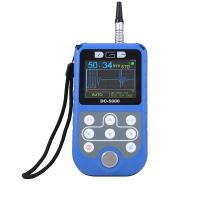
What factors affect the accuracy of Film thickness measuring instrument?
When using a thickness measuring instrument, in the normal operation process, sometimes it is found that the measured data deviates from the actual requirements, or the number of measurements is too many, and the comparison of the data will change slightly. What is the reason? What caused it? Aiming at the problems of users, NBCHAO Mall summarizes 9 factors that affect the accuracy of thickness measuring instruments for your reference in the actual experience and communication with customers.
1. Substrate thickness
When measuring the thickness of the coating, there are basic requirements for the thickness of the sample to be tested. A predetermined minimum thickness value of the substrate should be given to fully wrap the magnetic field of the probe in the metal of the sample to be tested. The specified minimum thickness value is related to the properties of the sample to be tested. If it is greater than this thickness, the measurement will not be affected by the thickness of the base metal, and there is no need to modify the measured results. If the thickness of the substrate is not up to the standard, the detected data will be biased and not accurate. In this case, it is necessary to use an object of the same material to stick to the sample to be measured before measurement. Every instrument has a critical thickness of the base metal.
2. Boundary distance
When the distance between the probe and the sample boundary, hole, cavity, and other section changes is less than the specified boundary distance, measurement errors will occur due to insufficient eddy current carrier section. Therefore, it is unreliable to measure close to the edge or inside corner of the sample under test. If it is necessary to measure the coating thickness at this point, it must be calibrated on the uncoated surface under the same conditions in advance.
3. Radius of curvature
The radius of curvature of the measured sample has an influence on the measurement results. As the radius of curvature of the measured sample decreases, the influence on the measurement results increases significantly, because
Therefore, measurements on the surface of curved samples are not reliable.
4. Surface roughness
Rough surface will cause systematic error and accidental error, and the number of measurements should be increased at different positions for each measurement to overcome this accidental error. On rough surfaces several measurements are required to obtain a representative average measurement. Obviously, the rougher the substrate or coating, the less reliable the measured value. The greater the roughness of the base metal and overlay, the greater the influence on the measurement results. In order to obtain reliable measurement data, the average roughness Ra of the substrate should be less than 5% of the coating thickness.
5. Surface cleanliness
Impurities, oil stains, etc. on the surface should be removed to ensure direct contact between the probe of the instrument and the surface of the tested piece.
6. Probe pressure
The probe is placed on the test piece, and the pressure applied will affect the reading of the measurement. Theoretically, the force used by the probe for detection should be constant, but in the actual measurement process, due to different operators or lack of experience of the operator, it is often impossible to strictly keep the force used for detection constant. Therefore, the changing force should be minimized as much as possible, so that there will be no deformation for the soft covering layer, resulting in inaccurate detection data. When necessary, an insulating hard film with a considerable thickness can be added between the probe and the object to be detected, and the desired result can be obtained by subtracting the thickness of the film from the detection result.
7. Probe direction
How the probe is placed has an effect on the measurement. During the measurement, the probe should be kept perpendicular to the surface of the sample to be measured.
8. Magnetic field
The strong magnetic field generated by various electrical equipment around will seriously interfere with the magnetic thickness measurement work. The measurement should be carried out near the disturbing external magnetic field. According to the performance of the testing instrument and the residual magnetism, it may lead to more or less measurement errors, but the above phenomena generally do not occur in structural steel and deep-drawn formed steel plates.
9. Ferromagnetic and conductive components in cladding materials
Magnetic thickness measurement is affected by changes in the magnetic properties of the base metal. In order to avoid being affected by heat treatment and cold working factors, the instrument should be calibrated with a standard plate having the same properties as the base metal of the test piece, or the test piece to be coated can also be used for calibration.
- 1Nondestructive measurement of dry coating thickness
- 2Coated steel coatings - Determination of dry-film thickness
- 3Application scheme of coating thickness test on wood board [with test video]
- 4Curved plastic coating thickness test application scheme [with test video]
- 5PosiTector200C ultrasonic coating Thickness Gauge on concrete coating thickness measurement application
- 6Coating Metering rodsFAQ
- 7Measuring method of nondestructive heat spray-on lining thickness
- 8Coulomb Thickness Gauge FAQ and Its Solutions
- 9What are the FAQs for paints Thickness Gauges? How to solve it?

