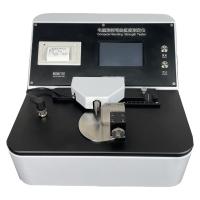
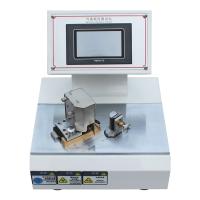
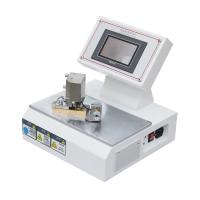
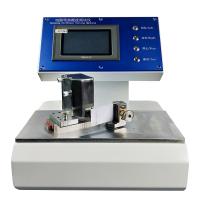
Paper and Cardboard stiffness measurement overview
This measurement method focuses on the evaluation of the stiffness of paper and cardboard, and aims to obtain the flexural strength of materials through scientific testing methods. Under standard conditions, a flexure test is performed on the specimen using a special instrument to measure the required force or moment. The entire experimental process includes the precise calibration of the instrument, the cutting and handling of the specimen, and the precautions during the test. The end result will provide data support for paper quality control and application performance optimization, helping manufacturers improve product competitiveness.
Definition and units of stiffness
Stiffness refers to the resistance of a specimen to bending forces under standard test conditions. Specifically, it is the force or moment required to bend the specimen to a 15° angle by clamping it and applying a force.
Force or Moment Representation – Stiffness is usually measured in millinewtons (mN) or millinewtons·meter (mN·m) and represents the force exerted on the specimen or the moment that produces bending.
Radial distance – this refers to the distance from the center of the specimen clamp to the point where the force is applied, usually the calculation of the moment of influence.
Bending length – the length of the stressed area when the specimen is bent, i.e. the distance between the point of force application and the point of support.
Definition of bending angle - bending angle refers to the angle between the initial position of the specimen and the position after the force is applied to the bending force. In standard testing, the specimen is often required to bend to 15°, and this angle is critical to the accuracy of the determination results as it represents the specific stiffness level of the material. Accurate control of the bending angle ensures repeatability and reliability of the measurements.
principle
Principles of instrument design
This instrument is designed based on the principle of torque balance and is designed to accurately determine the stiffness of the specimen. When a force is applied to bend the specimen, the torque inside the instrument is balanced and the relevant data is recorded.
Principle of torque balance- The instrument works by balancing two moments on the central axis of the pendulum. One moment is generated by the force F exerted by the paper roller on the specimen and the other by the component N of the heavy stone. When the values of these two moments are equal, the instrument reaches equilibrium, which ensures the accuracy of the reading.
Work process- When the instrument is not started, the specimen and pendulum are in a vertical position, and the centerline coincides. After starting, the pendulum and angle disc rotate clockwise, applying bending force until the center line of the pendulum forms an angle of 15° with the center line of the angle disk, at which point the instrument is stopped.
Oscillation and its effect on the specimen- The bending moment generated by the swing process causes the specimen to bend gradually, and the accuracy of the test depends on the swing amplitude and angle of the pendulum. By controlling the oscillation, the instrument can accurately measure the resistance of the specimen at a specific bending angle and calculate its stiffness value.
instrument
Instrument structure
This instrument is mainly composed of a transmission part and a test part, and each part works in coordination to achieve accurate stiffness determination.
Transmission part
The transmission part consists of a micro motor and a gear system. The miniature motor is responsible for providing the power to drive the entire instrument. The motor transmits power to the angle disc through a gear system, ensuring that it can rotate smoothly and precisely. This part is designed to ensure the stability and reliability of the instrument during operation.
Test section
The test section consists of several key components that work together to apply the force and record the data. The main structures are:
Load Disc – The disc surface responsible for applying the force, which is marked with a tick mark around it to facilitate the reading of the applied force or moment value. The design of the load disc ensures that the pressure applied to the specimen is evenly distributed.
Angle disc – used to indicate the angle at which the specimen is bent and works in conjunction with the load plate. The lower part is connected to the paper pusher to ensure that the angle is accurately displayed when the specimen is bent.
Load pendulum – supported on the main shaft and able to swing freely around the shaft. A counterweight is mounted on the top of the pendulum to ensure stability when the force is applied. In the lower part, there is a small shaft for placing the weight to adjust the load.
Paper pusher roller – in direct contact with the specimen and responsible for applying a bending force that causes the specimen to bend. The paper pusher roller is designed to take into account the contact effect with the specimen to avoid damage to the specimen and to ensure the accuracy of the applied force.
Instrument calibration
Instrument level adjustment
Before performing the test, you first need to make sure that the instrument is in a level state. This process is the basis for ensuring accurate measurement results. By adjusting the foot pad or adjustment device of the instrument base, the horizontal bubble of the instrument is in the center position to ensure that the instrument will not be affected by tilting during operation.
Sensitivity calibration of the pendulum
Sensitivity calibration of the pendulum is an important step in ensuring the accuracy of the instrument. Set the pendulum to a 15° angle position and release it to swing freely.
The number of swings is observed, and the number of swings is usually not less than 20 times to ensure the stability and repeatability of sensitivity.
By adjusting the position of the counterweight or weight, it is ensured that the sensitivity of the pendulum meets the standard requirements.
Experiment preparation
Sampling criteria
Sampling is carried out in accordance with relevant standards or specifications to ensure that the samples taken are representative and homogeneous. In general, sampling should be avoided in defective areas to ensure the accuracy and reliability of test results.
Temperature and humidity treatment
Before performing the test, the specimen needs to be handled under standard temperature and humidity conditions. This typically involves leaving the specimen in a specific temperature and humidity environment for a period of time to bring the specimen to equilibrium, thus eliminating the effects of environmental changes and ensuring consistent test results.
Preparation of specimen specifications
According to the test requirements, the specimen is cut to the specified size, which is usually a rectangle of 70 mm long and (38±0.2) mm wide. The choice of this size ensures that the specimen will meet the instrument's gripping requirements during testing and provide accurate measurement data.
Determination of the direction of the test
The choice of test direction is crucial. When determining longitudinal and transverse stiffness, it is important to ensure that the length of the specimen is consistent with the direction of the test. Five specimens should be prepared in each direction to ensure the reliability and representativeness of the data, and provide a sufficient basis for subsequent analysis of the results.
Test
Specimen clamping method
Before testing, clamp one end of the specimen into the specimen clamp, taking care not to clamp it too tightly so as not to damage the specimen or affect the measurement readings. Make sure that the specimen is in good contact with the grip to ensure that the force is transmitted accurately.
Precautions for the use of Taboryi
When using a taber, make sure that the specimen is aligned with the center notch of the pendulum. It is recommended to use the roller pitching device to adjust the distance between the specimen and the two rollers to (0.33±0.03) mm to ensure the accuracy of the test. In addition, the stability of the instrument should be maintained during operation to avoid external vibrations affecting the results.
Heavy stone selection and reading method
According to the stiffness of the specimen, the measurement range is selected by replacing the appropriate heavy weight, so that the reading of the specimen on the load plate is controlled between 20~70 scales. After the test is completed, record the value indicated on the load plate by the centerline of the pendulum to ensure that the reading is accurate to half a scale.
Specimen flexure test procedure
After the instrument is started, the specimen will begin to bend under the action of the paper roller. When the center line of the pendulum coincides with the 15° line of the angle disk, stop the instrument immediately. Record the readings of the pendulum and repeat to test the front and back sides of the specimen, calculating the average value in each direction. If the specimen is too large to fracture, stop with a 7.5 scale and multiply the reading by 2 to get an approximation of 15°, which should be noted in the report.
Result calculation
Test data processing
Collect all the data recorded during the test, including readings of different specimens and the type of heavy stone used. For the front and back readings of each specimen, an average calculation is performed to obtain the final stiffness value.
Accuracy of calculation results and precautions
When calculating the results, attention should be paid to the reasonableness and consistency of the data to ensure that all readings meet the preset standards. If there is an abnormal reading, the experimental process and the status of the instrument should be checked in time. Ensure the accuracy of the calculation results, and record all relevant data and calculation methods for subsequent review and verification.
summary
The stiffness determination of paper and cardboard is an important part of the material performance evaluation, which directly affects the quality and use effect of the product. The determination accurately measures the bending capacity of the specimen under stress conditions according to a standardized process by means of a special instrument. The experimental process includes the calibration of the instrument, the preparation of the specimen, and the execution of the test steps to ensure that each step meets the requirements of the standard. With the stiffness data obtained, companies are able to optimize their production processes and improve the bending resistance of paper and board to better meet market demands and application requirements.
-
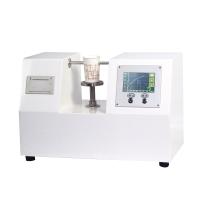
Yunda YD-TD-B cup stiffness Tester 0-10N$ 2264.00
-
-
-
-
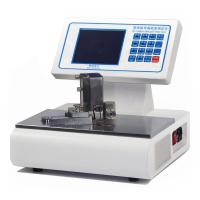
LD-TD-A-01 Bending Stiffness Tester$ 1691.00
-
-
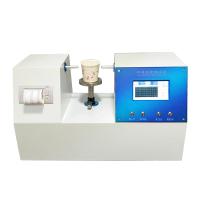
CHINA ZY-ZBT paper cup stiffness Tester$ 1731.00
-
-

