Hypertherm HG Digital Display Force Gauge Operating Instructions
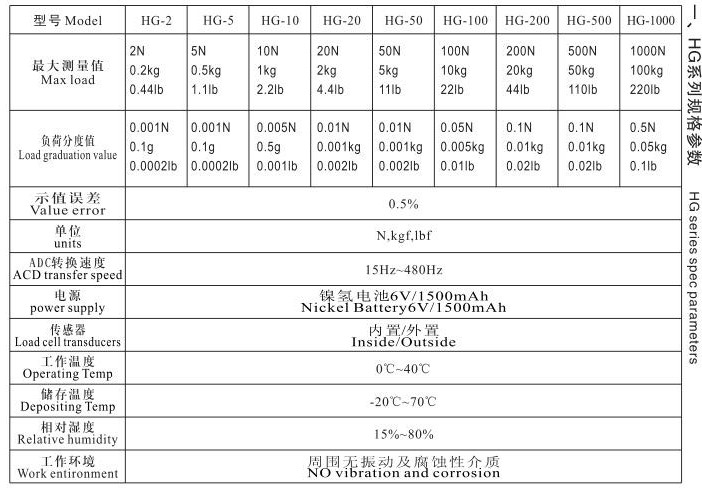
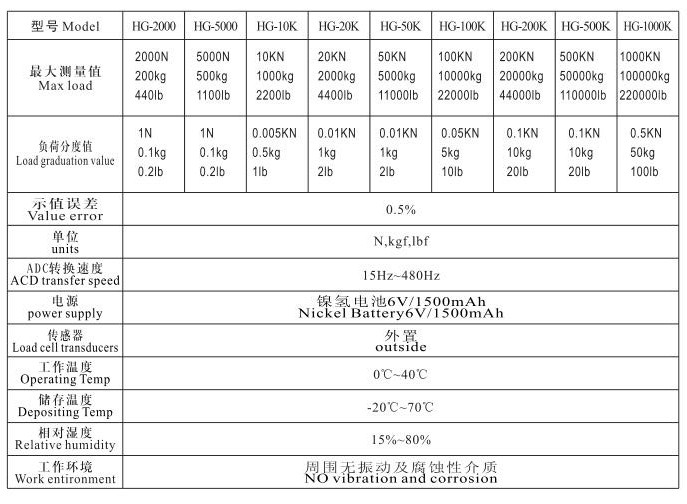
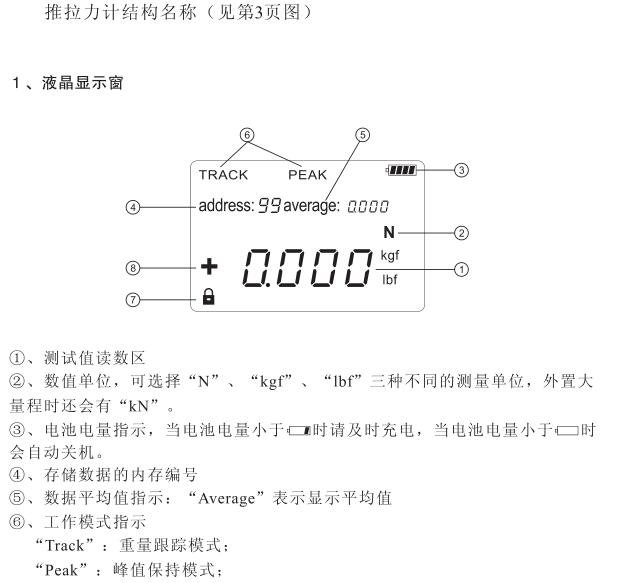
HG series specifications
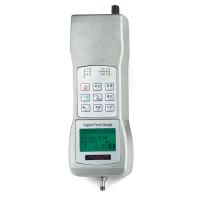
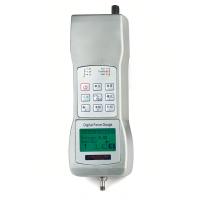
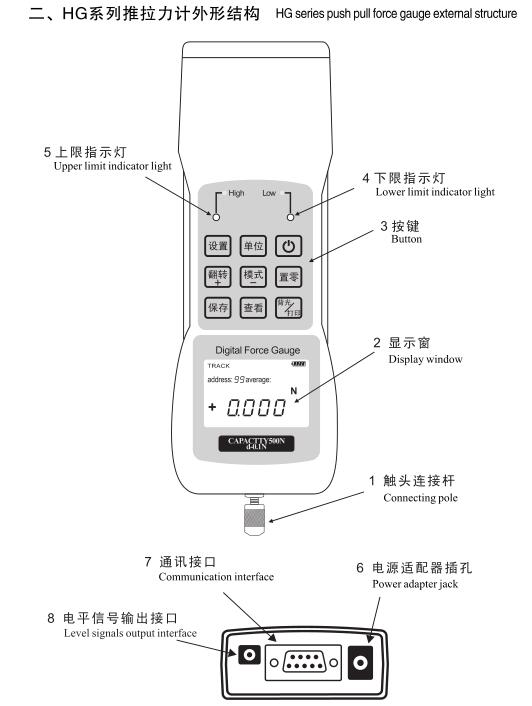
HG series push-pull gauge structure
4. Safety precautions
(1) Please read this manual in detail before use. Wrong operation may damage the machine or cause serious accidents.
(2) When doing destructive tests, protection work should be done well.
(3) Check the installation fixture in detail before the test, and do not use damaged or bent fixtures.
(4) When the sensor load exceeds 100% of the rated load, the display screen will prompt a warning message. At this time, the load should be reduced immediately to avoid damage to the sensor. Do not add 10% of the rated load when starting up.
5. Tips for use
(1) Do not use sharp tools instead of finger keys.
(2) This instrument can only be used to test the thrust or pull force, and do not let the test rod bear the force in the direction of bending or turning. (3) Reasonably select the range of the push-pull force meter. If it is to test the impact load, it is necessary to select a load at least
double the volume.
(4) Do not use the push-pull gauge in places where water, oil or other liquids are loose, and store the push-pull gauge in
A cool, dry, vibration-free place.
(5) Please use the matching charger to charge, the battery is fully charged when the green light is on, and can be charged at the same time during use
Normal charging takes about 4 hours.
(6) The instrument has a built-in 6v/1500mAh'3 rechargeable battery, do not use other types of batteries.
(7) Please do not insert or unplug the charger plug with wet hands to prevent electric shock.
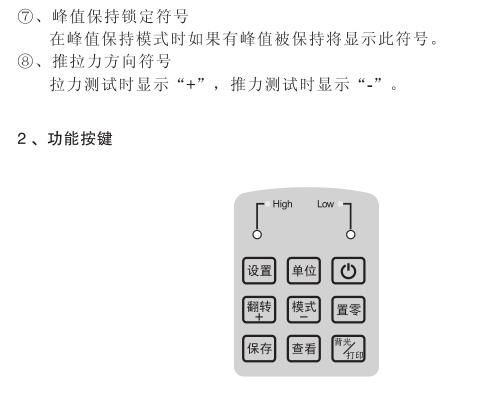
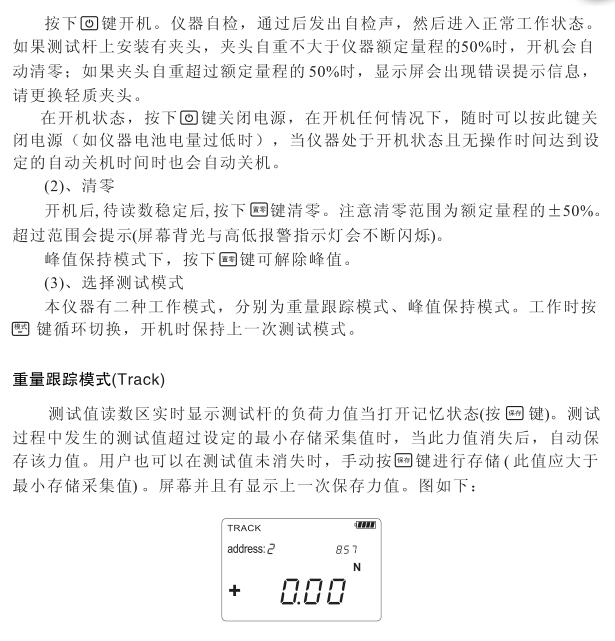
6. Function
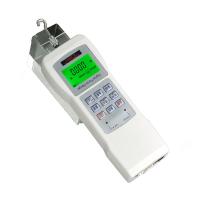
HG series digital display push-pull force gauge is a general-purpose portable push-pull load test instrument, which has the characteristics of small size, light weight, easy to carry, multi-function, high precision, etc. It is suitable for push-pull load test and insertion force test of various crystals , destructive test, etc., and can be combined with various machines and fixtures to form small experimental machines for different purposes.
7. Main features
◆High precision, high resolution, high stability.
◆Free setting of upper and lower limit comparison value, automatic sound alarm and level signal output.
◆Test direction display (pull ten, thrust one).
◆Segment LCD display with green backlight.
◆Store 99 sets of test data, and automatically calculate the average, maximum and minimum values of the stored data.
◆The three units N, kgf, 1bf are automatically interchangeable.
◆Gravity acceleration value can be set.
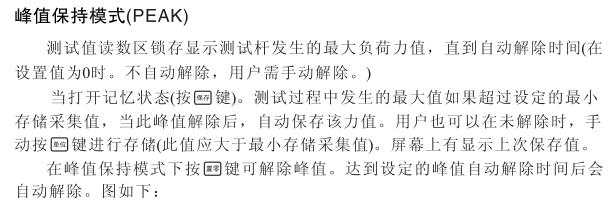
◆Peak hold, peak white dynamic release function (can be set to o-1o seconds).
◆Automatically shut down without operation (the time can be set freely o~99 minutes).
◆Using an external smart charger, it can be charged safely and prolong the battery life.
◆Serial port output (baud rate 9600), can print test data and maximum value, minimum value and average value.
◆Connect to the upper computer to read, print, delete, analyze and other operations on the stored data.
8. The name and function of each component
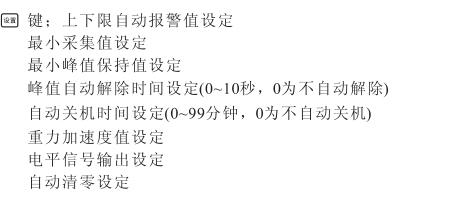
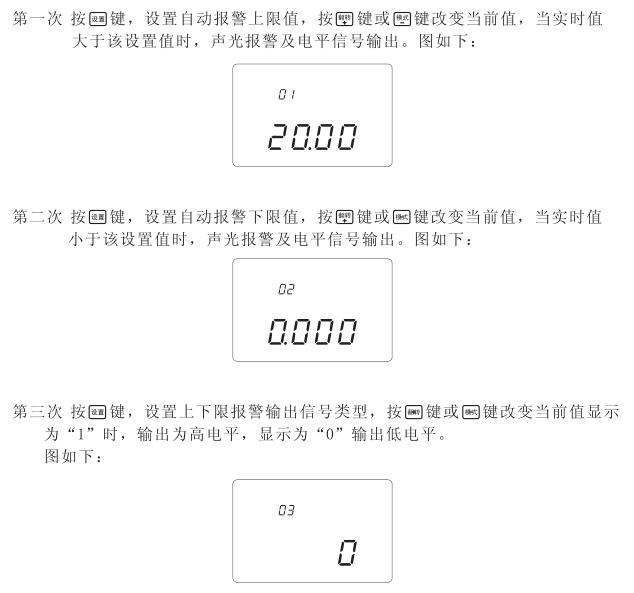
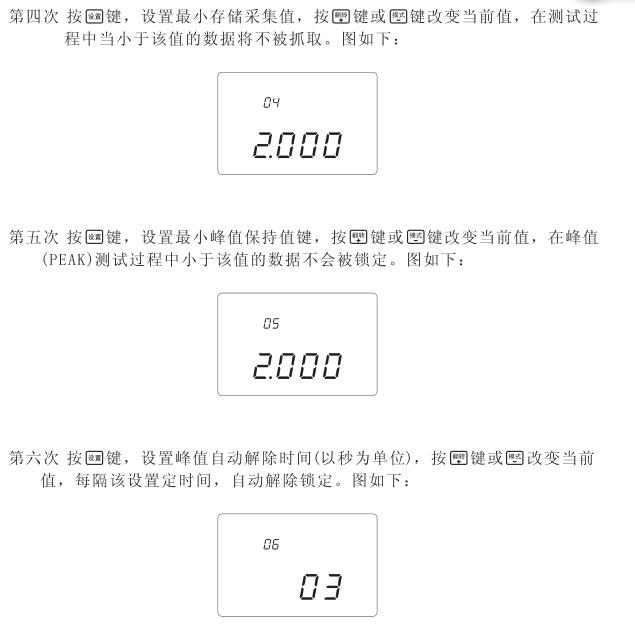
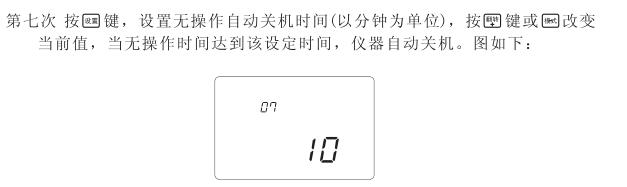
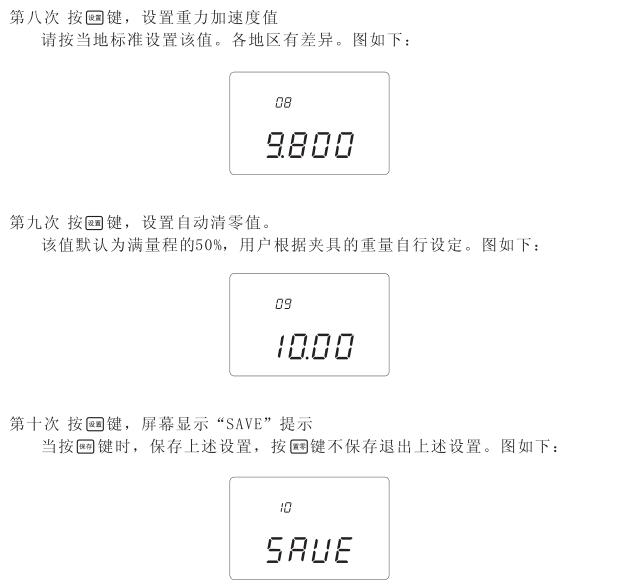
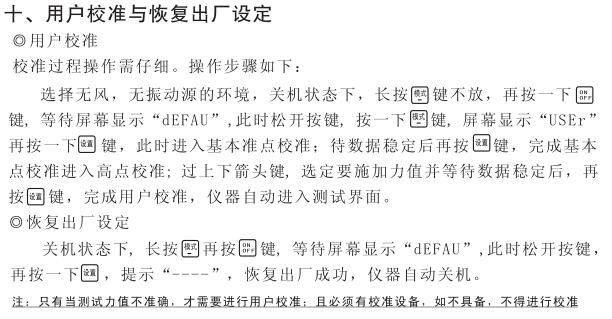
9. Parameter setting method
11. Upper and lower limit automatic reporting indicator light
The indicator light is a red light-emitting diode. When the upper limit is exceeded, it will glow red, and when the lower limit is lower, it will glow red. When it is normal, there will be no light display.
12. Charging Instructions
The instrument uses an external smart charger, the red light on the charger is on when charging, and the green light on the charger is on when the battery is fully charged.
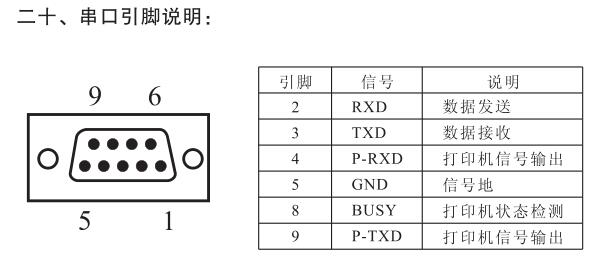
13. Communication interface
Rs-232c serial port output, use a sub to connect a micro-printer with a serial interface, and print all stored data. It can also be set to send peak data, continuously send real-time weight, etc.
14. Charger hole
Please use the matching charger for charging. The machine can be used continuously for about 24 hours (without the backlight) and about 10 hours with the backlight on.
Note: Only use the special charger that comes with it for charging, otherwise unpredictable accidents will occur!
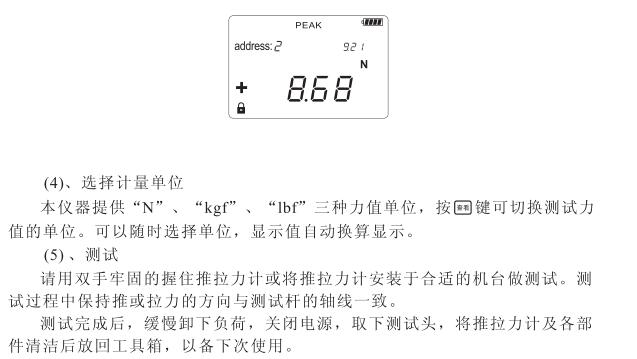
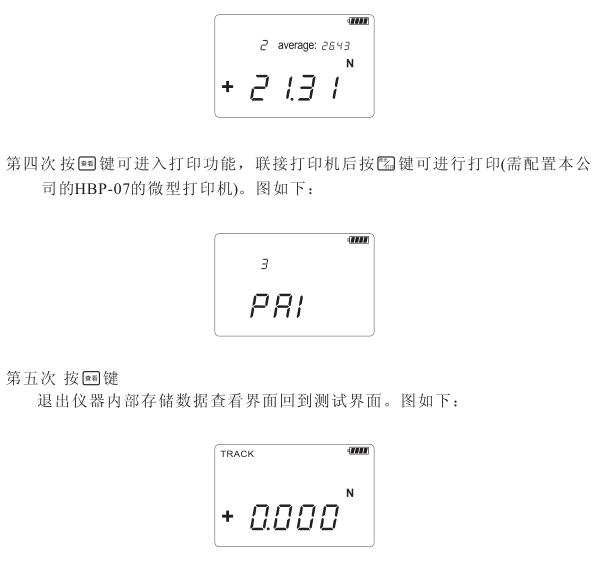
15. Print interface
The instrument has a RS-232C communication interface, which can be connected to a serial interface printer. See the printing sample below for the printing content, and see the instructions on page 15 for the specific operation.

16. Level signal output interface
The user can set the value to output high-low level signals, and cooperate with the company's electric test machine to realize various practical applications such as stopping immediately after pulling new, maintaining force value, and applying force limit.
17. Preparation before use
(1), check the power supply
Turn on the battery to check the status of the battery. If the power is less than 10%, please charge it in time. Charging method: Insert the charger that comes with the instrument into the charging interface of the instrument, connect the charger to 220v/50Hz AC, the charging indicator turns red, indicating that it is charging, and when the indicator turns green, it indicates that the charging is complete. The instrument can be charged when it is turned on or off, and the instrument can be tested at the same time during charging.
(2), install the test head
When testing, you can choose to install the appropriate test head accessories or fixtures, and be careful not to twist the test head with too much force, otherwise the sensor will be damaged.
18. Test
(1), on/off
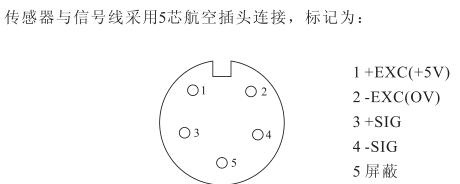
21. Description of the external interface of the sensor
23. Care and maintenance
1. Do not spray the surface of the instrument with corrosive solvents (such as gasoline, alcohol, etc.) when cleaning.
2. Avoid impact and collision during use and handling.
3. Do not disassemble the machine by yourself, otherwise it may cause malfunction.
Solemn reminder: Only use the special charger that comes with it for charging, otherwise unexpected accidents will occur! ! !
- 1Hypertherm HG digital push-pull force meter calibration method
- 2Hypertherm HG Force Gauge calibrating method
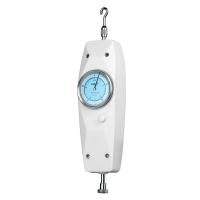
- 3Hypertherm NK Series Pointer Force Gauge Instructions
- 4Installation Instructions for HLX Series Spiral Force Gauge Benches
- 5Hypertherm HF Digital Display Force Gauge Operation Instructions Detailed Explanation
- 6Hypertherm Pointer Force Gauge Instructions
- 7Hypertherm HCL Side Swing Test Bench Operating Instructions
- 8Hypertherm HST-J Hand Pressed Tension and Compression Test Bench Description
- 9Hypertherm HM-1K Manual Horizontal Test Bench Manual