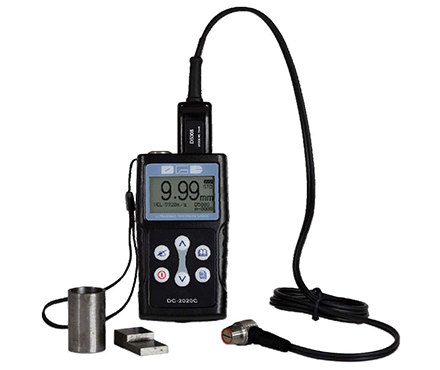
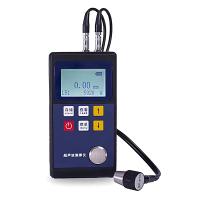
Deguang DC-2000B Intelligent Ultrasonic Thickness Gauge User Manual
I. Overview
DC- 2000B Intelligent Ultrasonic Thickness Gauge adopts microprocessor technology and ultrasonic measurement principle, which can measure the thickness and sound velocity of metal and other kinds of dental materials.
Before using the instrument, please read and read this user manual in detail, so as to understand the function of the instrument and understand how to use the instrument.
2. Technical parameters
Display method: 128X32 LCD Chinese dot matrix liquid crystal display (normal backlight)
Display digits: four digits
Measuring range: 0.7MM- 250.0MM (in steel)
Indication accuracy: low accuracy: 0.7MM~ 99.9MM ± 0.1MM
100.oMM- 250.0MM ≤3%oHMM
High precision: 0.7MM- 9.99MM ±0.04MM
0.00MM~ 99.99MM ± (1%o + 0.0411MM
100.MM- 250.0MM ≤3%oHMM
Note: H is the measured thickness value
Sound velocity range: 1000~9999 m/s
Measuring cycle: 2 times/second
Automatic shutdown time: 90 seconds
Power supply: Two AAA batteries. It can work continuously for not less than 72 hours.
Operating environment: Operating temperature: -20°c- +50°c
Test and storage temperature: -25℃ - +55℃
Dimensions: 108X6X25 MM
Weight: 2:30g (battery)
3. Measuring principle
C-2000B Series Intelligent Ultrasonic Thickness Gauge measures the thickness by the probe passing the ultrasonic pulse ll1 through the mixture to the object to be measured. Part of it is reflected by the surface of the object. The probe receives the echo reflected by the bottom surface of the object to be measured accurately. Accurately measure the round-trip time of the ultrasonic wave and calculate the thickness value, and then display it digitally.
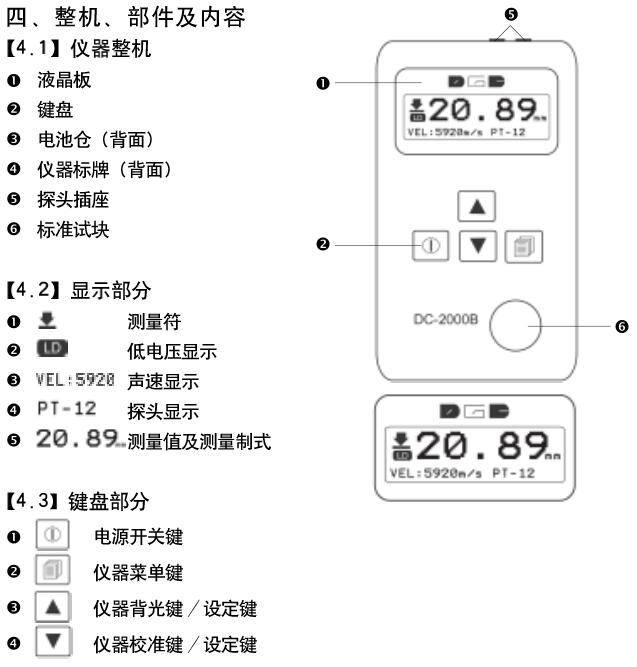
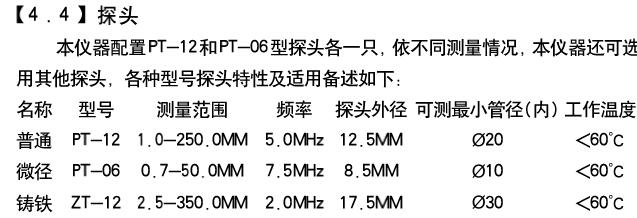
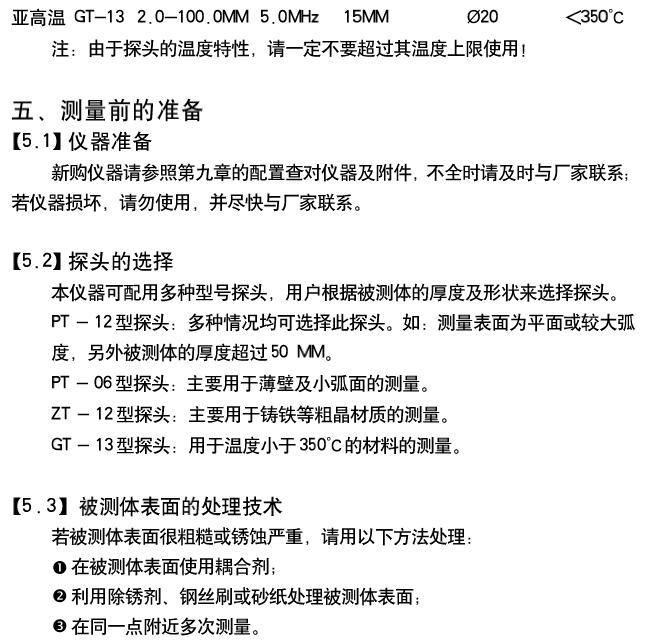

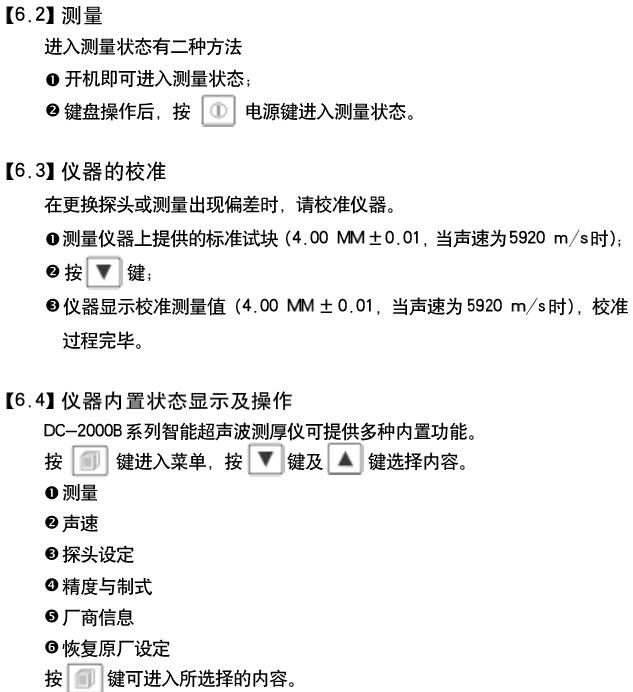
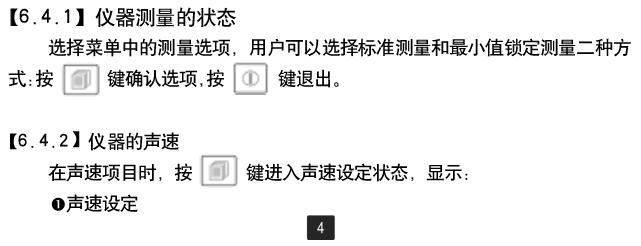
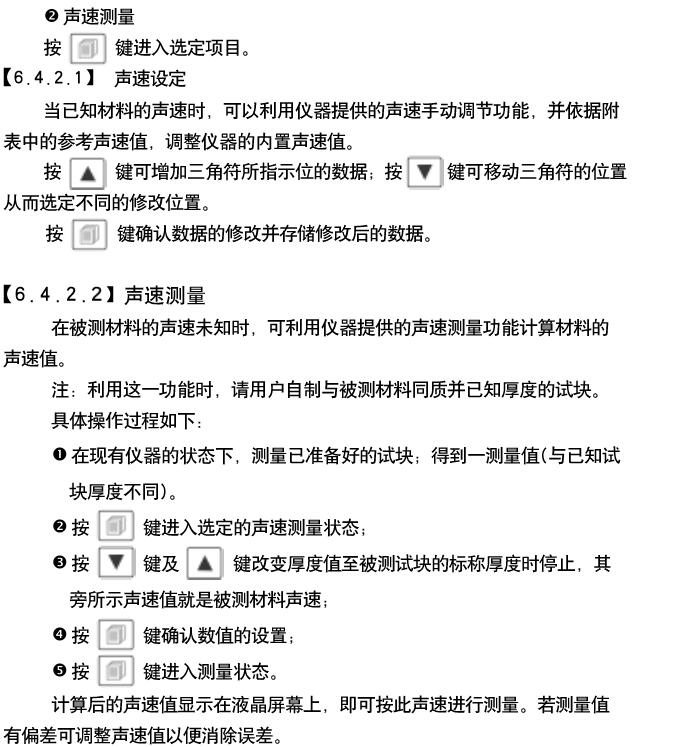

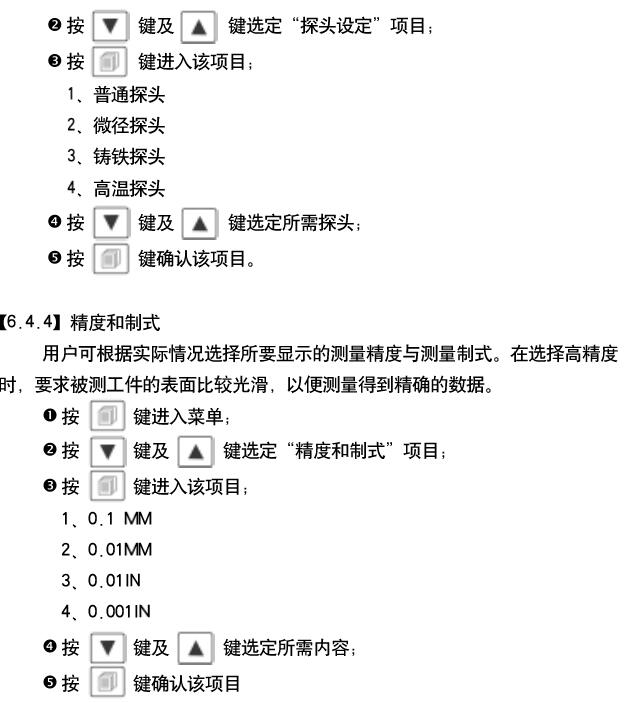


8. Maintenance and Precautions
【8.1】Power oil inspection
When the power supply voltage is low, the instrument displays a low voltage symbol. At this time, the battery should be replaced in time as required, so as not to affect the measurement accuracy. The backlight cannot be turned on for a long time, so as not to consume battery power too quickly.
【8.2】Notes
【8.2.1】General Notes
Avoid strong vibration of the instrument and the probe, and avoid placing the instrument in an overly humid environment. When inserting the probe, you should pinch the movable jacket along the axis and force the probe. Do not rotate the probe to avoid damage to the probe relay core wire.
The ambient temperature should not exceed 50°C
[8. 2. 2] Matters needing attention in measurement
1. When measuring, when there is a measurement display symbol ll: and it is stable, it is a good measurement.
2 If there is a large amount of additive on the surface of the measured body, when the probe is higher than the surface of the measured body, the phase agent will cause mismeasurement. When the measurement is over, the probe should be moved away from the surface of the measured body quickly.
3 If the probe should vibrate, the measured value will be unstable, and the probe should be replaced.
4 When the temperature of the measured body exceeds 80C, it is recommended to use a high temperature probe.
- 1Principle, Function, Application and Selection of Multifunctional Ultrasonic Thickness Gauge
- 2Principle, Application and Type Selection of Ultrasonic Thickness Gauge
- 3Principle, Application and Type Selection of Ultrasonic Thickness Gauge
- 4Principle, Application and Selection of Ceramic Ultrasonic Thickness Gauge
- 5The Principle, Application and Precautions of Copper Plate Ultrasonic Thickness Gauge
- 6Principle and Application of Ultrasonic Thickness Gauge
- 7Measurement principle and influencing factors of high temperature ultrasonic Thickness Gauge
- 8Principle of Portable Ultrasonic Thickness Gauge
- 9How does an ultrasonic Thickness Gauge work?
