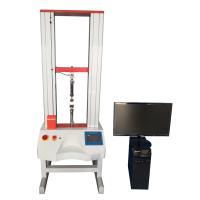
Universal Testing Machine Accuracy grade division: parsing the core difference between level 0.5 and level 1
As the core equipment of material mechanical property testing, the accuracy level directly determines the reliability and application value of the test data. The current GB/T 16491-2008 "Electronic Universal Testing Machine" and ISO 6892 series standards divide the accuracy of mainstream equipment into two major levels: 0.5 level and level 1.
The core difference comes from the force measurement accuracy index, which is the core basis for classification, including two key parameters: value error and repeatability error. The allowable range of the indicated error of the 0.5 level testing machine ≤± 0.5%, the repeatability error ≤ 0.25%, and the effective force measurement range is wide to 0.1%~100% of the full scale, which can accurately capture the mechanical response of small loads such as thin film and fiber. However, the indicated value error of the first-class testing machine is ≤± 1.0%, the repeatability error is ≤0.5%, the effective force measurement range is usually 1%~100%, and the accuracy attenuation is obvious during the small load test. Taking the copper strip test with a tensile strength of 500MPa as an example, the test deviation range of level 0.5 equipment is 497.5~502.5MPa, and the level 1 is expanded to 495~505MPa, which has a significant impact on high-precision demand scenarios.

The matching differences between displacement and velocity accuracy further distinguish the application boundaries between the two. The displacement display error of the 0.5 level model is ≤±0.5%, the resolution can reach 0.001mm, and the extensometer can achieve accurate measurement of small deformations, and the speed control error is ≤±0.5%, which can operate stably under extremely low or high speed working conditions. The displacement and velocity indication errors of the first-class model are ≤± 1.0%, which can only meet the basic measurement requirements of conventional tensile and compression, and cannot be adapted to the testing of deformation-sensitive indicators such as elastic modulus.
Scenario adaptability needs to be selected based on the balance between precision requirements and cost-effectiveness. As a high-precision model, the 0.5 level is used in scientific research institutes, third-party quality inspection institutions and new material research and development, which can accurately test rubber, microelectronic packaging materials and other specimens with strict requirements for force value and deformation accuracy, and support the quantitative analysis of key indicators such as yield strength and elastic modulus. The first-class model is cost-effective and suitable for factory production line quality inspection, such as the qualitative determination of tensile strength of metal bars and plastic plates, which can meet the needs of most industrial products for factory inspection.
It should be noted that the accuracy level must be calibrated and confirmed by a third-party institution recognized by CNAS, and the calibration report must specify the error parameters within the effective force measurement range. At the same time, the accuracy of the equipment is affected by the use environment, fixture accuracy and regular maintenance, even if the 0.5 class model is not calibrated or maintained properly for a long time, the accuracy may drop below level 1. In addition, the nominal high resolution ≠ high precision of some manufacturers must be subject to the statutory verification certificate to avoid misjudgment.
In summary, the essence of the difference between level 0.5 and level 1 is the positioning distinction between "accurate quantification" and "conventional judgment". When choosing, it is necessary to closely follow the test standards and scenario requirements, without blindly pursuing high-level accuracy, and achieve cost optimization under the premise of meeting data reliability to ensure the scientific and compliant test results.
