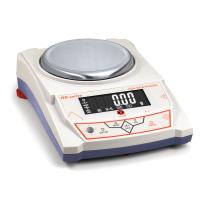
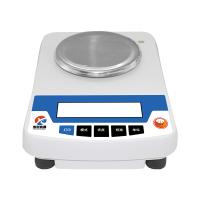
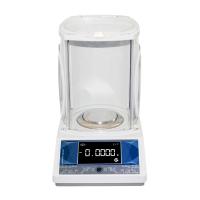
YP/JY Series Electronic Balance Operation Instructions
YP/JY electronic balance is an intelligent balance composed of a high-stability sensor and a monolithic microcomputer. It has functions such as counting, percentage, RS232, tare weight, self-calibration, memory, fault display, etc. Yueping electronic balance weighing is accurate, fast and stable, simple to operate, complete in function, suitable for industry, agriculture, commerce, schools, scientific research and other units to quickly determine the quality and quantity of objects.
1. Preparation for operation
1. Place the balance in a stable and flat place, and avoid vibration, sunlight, air flow and strong electromagnetic interference.
2. Stand on the side of the balance, you will see a screw in the direction pointed by the arrow at the bottom, the screw is the screw for positioning the sensor, rotate the screw in the counterclockwise direction, rotate to parallel to the shell, even if the sensor is in the working position.
3. Operating environment: temperature limit: 5C ~35C Temperature fluctuation: ≤5C/h
Relative humidity: 50~85
Second, boot on
1. Plug one end of the power adapter or power cord into the balance power input port, and the other end into the AC 220V voltage.
2. Turn on the power switch of the balance, and display "8.8.8.8.8.8.8.8.", "Maximum Weight", and "S-CAL" in order. Finally, the weighing mode of "0" or "0.0" or "0.00" or "0.000" is displayed.
3. Calibrate the balance
1. Turn on the balance power, preheat it for half an hour and calibrate it, which can make the calibration more accurate.
2. Calibration operation: without adding any object on the weighing pan, press and hold the "CAL (calibration)" button without letting go, about 3 seconds, enter the calibration state, display the "CAL weight value", then display the shining "weight value", put the corresponding weight, and later display the weight of the weight, that is, enter the weighing state. If the weighing is still inaccurate after calibration, repeat the calibration several times as described above.
3. Selection of calibration method: After entering the calibration state according to the above three and 2 items, press "CAL" again and againQuasi)" button, which displays 3 weight values and "CAL L", which can be selected to calibrate the balance with any weight value, or "CAL L" for three-point linear calibration.
4. After entering the calibration state, the weight is still not put for about 10 seconds, and "no CAL" is displayed, and it will automatically exitCalibration status
4. Weighing
1. After the preheating is stable or calibrated, put the object on the weighing pan, and wait for the black dot at the bottom left of the display screen to disappear, and then the mass of the object can be read.
2. The maximum weighing of the balance is the maximum value of the start-up display + 9d (d is the minimum reading displayed), after exceeding the maximum weight, the upper horizontal line "------" indicates that the cumulative weighing exceeds the specified range, and it should be weighed immediately, otherwise the balance will be damaged.
5. Peeling
Press the "TARE" button to remove the tare weight on the weighing pan, and the tare function is invalid when the black dot is displayed.
6. Backlight
When the balance is turned on, it will enter the backlight on state, press the "BL (backlight)" button to turn off the LCD backlight.
7. Other functions (simple balance does not have the following functions)
1. Unit conversion: press the "MODE" button to display "Unit" shine, press the "TARE" key to confirm, display "Unit*" to shine, press the "MODE" key to select the desired unit, press the "TARE" key to confirm, the unit conversion is over, and you can weigh it.
2. Counting function: press the "MODE" button twice, display "Count" shine, press the "TARE" button to confirm, display "*pcs" shine, press the "MODE" button, "*pcs" can be changed from "10pcs" to "500pcs", the larger the number, the higher the counting accuracy. Place the counting item with the corresponding shining number on the weighing pan, press the "TARE (tare)" button to confirm, and "------" will be displayed, and wait for the counting to be set. When the unit weight of the counted item is less than 2d, "no-cou" is displayed, and the counting cannot be set, and several counting items need to be counted as one reset.
3. Percentage function: Press the "MODE" button three times to display "PER" shine, press the "TARE" button to confirm, display "100%" shine, put the item to be set to 100%, press the "TARE" button to display "100%", remove the item and put on other items, that is, the percentage of the item and the previously set item will be displayed. When the set item is divided by 100 and is less than 2 days, "no-PER" is displayed, and the percentage cannot be set, so you need to increase the quality of the set item.
4. Printing function: Press the "MODE" button four times to display "Prt", press the "TARE" button to confirm, and "hAnd" will be displayed.
(1). Press "TARE" to confirm, enter the manual printing mode, and use the "PRT (Print)" key or the print symbol key together to complete the printing function.
(2). After the above display "hAnd", press the "MODE" button to display "Auto", press the "TARE" key to confirm, enter the automatic printing mode, and put about 3d items on the weighing pan, that is, print the displayed weight.
(3). After "hAnd" is displayed, press the "MODE" button twice to display "CLoSE", press "TARE" to confirm, and turn off the printing function.
▲ RS232 print port parameters:
Transmission data format: every 10 BIT is a data frame, and the frame format is as follows:
BIT1,BIT2,BIT3,…… ,BIT8,BIT9,BIT10。
BIT1: start bit, BIT2--- BIT9: data bit, BIT10: stop bit
Baud rate: 9600 bps
All characters are ASCII codes.
5. Low voltage indication: When the balance works with a battery or rechargeable battery, when the battery symbol is displayed on the upper left side of the LCD screen, it means that the battery needs to be replaced or recharged.
8. Precautions for use
1. Before use, it should be powered on and preheated according to the regulations.
2. The tare weight and weighing quality shall not exceed the weighing range.
3. If the weighing is inaccurate, the balance needs to be calibrated with standard weights.
4. If you need to remove the round weighing pan on the balance, turn the weighing pan in a clockwise direction before removing it.Do not pull the weighing pan upwards to avoid damaging the sensor.


- 1Proper Use of Electronic Balance
- 2What is the difference between 10,000-level and 100,000-level Electronic Balance?
- 3Selection scheme of solar cell slurry performance testing instrument
- 4Offset printing ink laboratory performance testing instrument scheme
- 5Method of using electronic balance and its structure
- 6How should the calibration weights of precision balances be handled and maintained?
- 7How to choose and use precision electronic balance test weights?
- 8How to choose a precision digital electronic balance?
- 9Edham Adam SAB & SPB Electronic Balance Structure