Huayang HCC-18 Magnetoresistive Thickness Gauge Operation Instructions
1 Overview
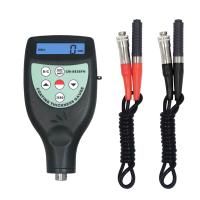
Huayang HCC- 1 8 Magnetic Resistance Thickness Gauge is a battery-powered portable measuring instrument. It has the characteristics of simple operation, convenient use, good stability and high measurement accuracy. This instrument can directly measure the thickness of the non-magnetic coating layer (such as: paint, plastic, enamel, copper, aluminum, zinc, chromium, etc.) on the surface of magnetically conductive materials (such as: iron, nickel).
The instrument adopts the magnetoresistance measurement technology. When the measuring probe is in contact , the probe and the magnetically permeable substrate form a closed magnetic circuit. Due to the existence of the non-magnetically permeable covering layer, the reluctance of the magnetic circuit increases. The magnitude of the magnetoresistance is proportional to the thickness of the covering layer, and the value of the thickness of the covering layer can be obtained by measuring the magnitude of the magnetoresistance, which can be read directly from the meter head of the instrument.
This instrument can be used to measure the thickness of electroplating layer, paint layer, enamel layer, plastic layer, aluminum tile, copper tile, babbitt alloy tile, phosphating layer, paper, etc., and can also be used for the thickness of attachments on hull paint and structural parts Measurement.
2 Technical parameters
1) Measuring range: 0μm~2000μm.
2) Indication error: ±5%.
3) Operating environment temperature: 0℃~40℃.
4) Power supply: 1 6F22 battery.
5) Dimensions: 172mm×85mm×49mm.
6) Mass: 370g.
7) Minimum measuring surface diameter: Φ10mm.
8) Undervoltage alarm: When the battery voltage is too low, the power indicator light will flash.
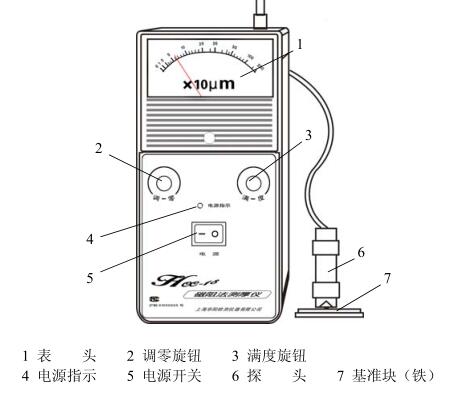
3 Appearance of the instrument
4 Basic operation method
1) Turn on the power switch, the power indicator light is on.
2) Take an uncoated (plated) or removed coated (plated) layer, and a smooth and smooth surface to be tested as a base block. Insert a 20μm standard test piece between the probe and the base block, and adjust the zero adjustment knob so that the gauge pointer is at 20μm.
3) Place a 2000μm standard thickness block between the probe and the base block, apply a certain pressure, and adjust the full scale knob so that the gauge pointer points to the full scale value.
4) Repeat the two adjustments 2 and 3 until the instructions are correct, and the calibration is completed. Actual measurements can be made.
5) When the power indicator flashes, a new battery needs to be replaced.
6) In order to improve the measurement accuracy, when the thickness of the coating to be measured is thin (less than 20μm), the probe can be directly pressed on the base block, and the zero adjustment knob can be adjusted so that the gauge pointer is at 0μm. Insert a 20μm standard test piece between the probe and the base block, and adjust the full scale knob so that the gauge pointer is at 20μm. Repeat the above two adjustments until the indication is correct, then the actual measurement can be carried out.
7) When measuring small parts, it is recommended to use appropriate fixtures to fix the tested part, as shown in the figure below.
5 Precautions for using the instrument
1) In order to improve the measurement accuracy, it is recommended to use the test piece without coating or the test block with the same material as the test piece as the reference block for calibration.
2) After the instrument is used, turn off the power, and apply a little grease on the contact of the measuring head and the reference block to prevent corrosion.
3) The battery should not be placed in the battery box for a long time to avoid battery leakage and corrosion of the battery box.
4) It is strictly forbidden to knock or collide with the probe, so as not to affect the performance of the probe.
5) The instrument should prevent severe vibration and impact. After use, wipe off the oil on the surface of the instrument and put it in the instrument storage box for proper storage.

- 1How to choose a good dry paint Film Thickness Gauge?
- 2Anmiao AC-112-200-NF-CN Coating Thickness Gauge operating instructions
- 3AT-140B-CN Ultrasonic Thickness Gauge Operating Instructions
- 4Anmiao AC-112B-CN Coating Thickness Gauge operating instructions
- 5Lantai CM-8825fn Coating Thickness Gauge operating instructions
- 6LANDTEK CM-8820 Thickness Gauge Operating Instructions
- 7Biaozhi GM200 Coating Thickness Gauge operating instructions
- 8HUAYANG HCC-24 Magnetoresistive Thickness Gauge Operation Instructions
- 9Huayang HCC-18A Coating Thickness Gauge operating instructions