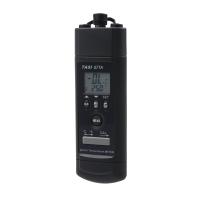
Teens MODEL TASI671/671A pH Meter Operating Instructions
1 Introduction
※Portable 3 1/2 digit (1999) pH/mV meter
※Dual display (pH or mV, temperature)
※Automatic shutdown function
※Automatic temperature compensation (ATC) and manual temperature compensation (MTC)
※Serial transmission (RS232) interface includes Windows operation interface.
7. Measurement steps
pH measurement
1. Calibrate the pH electrode before measuring.
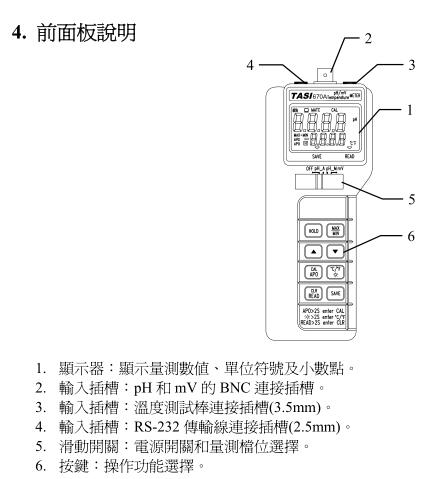
2. Connect the pH electrode to the BNC socket.
3. Select pH_A or pH_M with the slide switch.
4. If in ATC mode, please refer to 5.1.1 Temperature Compensation.
5. If in MTC mode, please refer to 5.1.2 Temperature Compensation.
6. Put the electrode into the solution to be tested, and the meter will display the pH value.
7. After measurement, please clean the electrode with distilled water.
mV measurement
The meter is applicable for ORP in mV measurement.
1. Slide the switch to select the mV range.
2. The mV value can be measured.
8. Care of the pH electrode
Proper use and preservation of the electrode can prolong the life of the glass membrane of the electrode. If the electrode reading is slow or unstable, please follow the steps below.
8.1 Cleaning the pH electrode stick
8.1.1 Protein pollution: Soak the tip of the electrode in 10% pepsin (pepsin) solution for 30 minutes, wash with deionized water, and immerse the electrode in pH7.00 standard solution for
8.1.2 Oil pollution: clean the electrode with 50% water-acetone (acetone) solution, do not immerse the electrode in acetone (acetone) solution, it will damage seal at the bottom of the plastic electrode, clean it with deionized water, and remove it before use The electrode is soaked in pH 7.00 standard solution for two hours.
8.2 Repair the pH electrode rod. Maintain and clean the electrode according to the previous steps to restore the electrode to an acceptable standard. Clean it with deionized water immediately. Before use, immerse electrode in the pH7.00 standard solution for two hours.
Notice:
To prevent continuous damage, it is necessary to select a suitable measuring electrode. If it is not used for a long time, the battery should be removed.
Always dip the electrode in 4M KCL. Rinse the electrode with deionized water before use.
To prolong electrode life, avoid touching or rubbing the electrode.
9. Frequently Asked Questions
※No display when starting up: Check if the battery is loose, or replace it with a new one.
※The reading value is unstable: clean the probe or make sure the sensor is completely in contact with the solution to be tested or check whether the probe is damaged, if damaged
Please replace the probe with a new one.
※Slow response: Rinse the probe with a tap for 10-15 minutes, then clean it with distilled water or general probe cleaner.
※In pH_A mode, LCD displays E1: the 3.5mm plug is not firmly inserted into the meter.
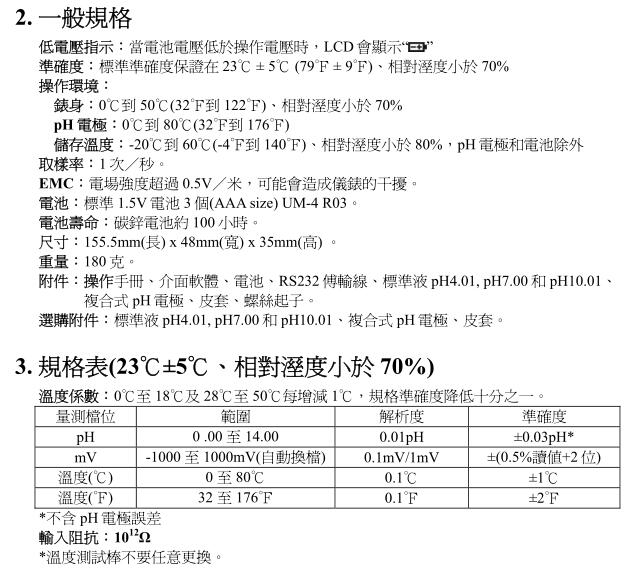
※In pH_A mode, LCD displays E2: the solution temperature exceeds 100°C (212°F).
※In pH_A mode, LCD displays E3: the solution temperature is lower than 0°C (32°F).
※Calibration mode cannot be entered: Check whether the low potential symbol " " is displayed.
※ Data cannot be stored: check if the pH value and temperature value are "OL" or "-OL", and check if the low potential symbol " " is  displayed .
10. Battery Replacement
Use standard 9V battery (NEDA1604, IEC6F22). When the LCD displays the " " symbol, the battery needs to be replaced. Loosen the two screws at the back of the meter, open the battery cover, and replace with a new battery.
11. Cleaning
Regularly wipe the casing with a damp cloth, do not use abrasive solutions to wipe the casing

- 1Teans MODEL TASI-670A pH Meter Operating Instructions
- 2The function of temperature compensator of pH meter and its influence on pH value
- 3How to use pH meter, maintenance measures and methods of Troubleshooting
- 4Glass electrode of pH acidity meter should be selected correctly
张莉 - 《中国氯碱》
- 5Uncertainty measurement experiment introduced by different levels of pHmeter
修宏宇; 贺新洋 - 《不同级别pH计在测量时所引入的不确定度分量》
-
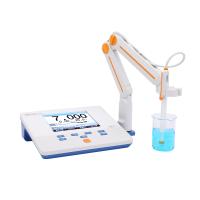
![Bante920-UK laboratory ph value Detector]()
-
![Bante920-CN Laboratory pH Meter]() Bante920-CN Laboratory pH Meter$ 413.00
Bante920-CN Laboratory pH Meter$ 413.00 -
![Bante210-UK Precision Laboratory pH Meter]()
-
![LEICI PHSJ-4F Laboratory pH Meter 0.001 PH/mV/Temperature]()
-
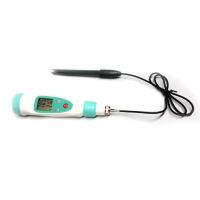
![Qiwei PH-220W pH meter (pen type) external electrode]()
-
![QIWEI PHB-4 pH Tester, Portable Microcomputer 0~14pH]()