Sunny NDJ-5S Digital Viscometer Instructions for Use
I. Overview
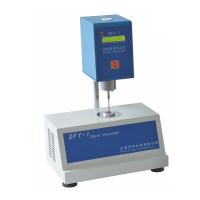
NDJ-5S Digital Rotational Viscometer is a new type of digital instrument developed on the basis of single-chip microprocessor technology for measuring the viscous resistance of liquids and the absolute viscosity of liquids. Compared with similar instruments, it has the advantages of high measurement accuracy, stable viscosity value display, easy to read, easy operation, and good anti-interference performance. It is widely used in the determination of the viscosity of various fluids such as oil, paint, food, medicine, adhesives, and cosmetics. .
2. Main technical performance
1. Measuring range: 10mPa·s~100000mPa·s
2. Rotor specifications: 1, 2, 3, 4 four rotors
3. Rotor speed: 6 rpm, 12 rpm, 30 rpm, 60 rpm
4. Measurement method: manual, automatic
5. Measurement error: ±5% (Newtonian liquid)
6. Dimensions: 105mm×120mm×160mm (excluding the base)
7. Net weight: 2.5kg (excluding the base)
8. Environmental conditions for use:
(1) The ambient temperature is 5°C~35°C;
(2) Relative humidity: not more than 80%;
(3) Power supply: voltage 220V±22V, frequency 50Hz±0.5Hz;
(4) There is no strong electromagnetic field interference, no violent vibration, and no corrosive gas near the product.
3. Working principle
1. The program-controlled motor drives the rotating shaft to rotate stably according to the speed given by the program, and then drives the standard rotor to rotate through the torque sensor. When the rotor rotates in a certain liquid, due to the viscosity of the liquid, the rotor receives a torque proportional to the viscosity, and the viscosity of the liquid can be obtained by measuring the torque through the torque sensor. In order to expand the measurement range, it is equipped with four standard rotors and given four speed gears.
2. To measure a wide viscosity range from 10mPa·s to 100000mPa·s, different combinations of rotors and speeds are required. The speed of the instrument is divided into four gears, and the rotor is also divided into four different specifications. By various combinations of them, any viscosity value within the determination range can be measured. There are 5 combination keys of up, down, left, right and enter in the middle of the panel. When starting up, the instrument displays the rotor and rotational speed value of the last operation, which can be checked and selected by pressing the up and down keys. Measuring a certain range of viscosity requires a certain specification of the rotor and a certain speed, which can be selected and set by the up and down keys and the left and right keys. You can first estimate the approximate viscosity of the liquid to be measured, and choose the appropriate rotor and speed. After installing and setting the rotor and speed, press the Enter key to start the measurement. There is a data memory inside the instrument, which stores the range of the instrument, the default rotor, speed, various coefficients and test data. The microcontroller controls the speed of the motor according to the user's selection. In addition, the instrument is also equipped with RS232 communication port, which can carry out two-way data communication with the computer.
3. The rotor protection frame of the instrument is used for stable measurement and protection of the rotor. Using the rotor protection frame for measurement can obtain more stable test results.
4. Installation
1. Take out the support and support from the storage box, screw the support into the screw hole at the back of the support, tighten the support with a wrench to prevent the support from rotating and face the toothed surface on the support to the front of the support.
2. Take out the viscometer from the storage box, install the lifting chuck of the viscometer on the pillar, adjust the chuck tightening screw, neither too loose nor too tight, turn the lifting knob to make it lift up and down, tight It is advisable to prevent the viscometer from falling automatically.
3. Loosen the protective cap screw at the lower end of the product, and remove the yellow protective cap.
4. Observe the level bubble, adjust the level adjustment screw at the lower part of the bracket, make the bubble in the middle of the level bubble, indicating that the product is close to the level.
5. Connect the power cord.
5. Operation and use
1. Prepare the liquid to be tested, put it into a beaker or a right-angle container with a diameter of not less than 70mm, and accurately control the temperature of the liquid to be tested.
2. Install the rotor protection frame on the instrument (turn right to install, turn left to remove).
3. Screw the selected rotor into the connecting screw (rotate to the left to install, and rotate to the right to remove). When loading and unloading the rotor, the connecting screw needs to be slightly lifted up by hand.
4. Rotate the lifting knob to lower the instrument slowly, and the rotor is gradually immersed in the liquid to be measured until the rotor liquid level mark is equal to the liquid level.
5. Adjust the instrument level again.
6. The sample is fully kept at the test temperature to keep the indication stable and accurate.
7. Panel operation:


6. Matters needing attention
1. This instrument is suitable for use at room temperature, and the temperature of the sample to be tested should be within ±0.1°C, otherwise it will seriously affect the accuracy of the measurement.
2. The instrument needs to be used within the specified voltage and frequency and the allowable error range, otherwise the measurement accuracy will be affected.
3. Care should be taken when loading and unloading the rotor. The connecting screw should be lifted slightly. Do not use too much force, and do not let the rotor be subjected to lateral force, so as not to bend the rotor.
4. Do not put the instrument on its side or put it down after installing the rotor.
5. The end face and thread of the connecting screw and rotor should be kept clean, otherwise it will affect the correct connection of the rotor and the stability of rotation.
6. When the instrument is raised or lowered, it should be supported by hand to prevent the instrument from falling under its own weight.
7. After each use, the rotor should be cleaned in time (do not clean the rotor on the instrument). After cleaning, it should be properly placed in the rotor frame.
8. After installing the rotor, it is not allowed to "rotate" without liquid, so as not to damage the shaft tip.
9. Do not disassemble or adjust the instrument parts at will, and do not add lubricating oil by yourself.
10. When moving and transporting the instrument, put on the yellow protective cap, hold up the connecting screw, and tighten the screws on the protective cap.
11. Many of the suspensions, emulsions, polymers and other high-viscosity liquids are "non-Newtonian liquids", and the apparent viscosity value changes with the change of shear speed and time. The inconsistency of the results of the measurement under the rotational speed and time is normal, not that the instrument is inaccurate (generally, the determination of non-Newtonian liquids should specify the rotor, rotational speed and time).
12. Do the following points to measure more accurate values:
(1) Accurately control the temperature of the measured liquid;
(2) Ensure the uniformity of the ambient temperature;
(3) Immerse the rotor in the liquid to be tested for enough time and keep the temperature constant at the same time, so that it can be consistent with the temperature of the liquid to be measured;
(4) Ensure the uniformity of the liquid;
(5) Place the rotor in the center of the container as much as possible during the measurement;
(6) Prevent air bubbles from adhering to ;
(7) Measure with a gear close to the full scale as much as possible;
(8) Use the rotor protection frame to measure;
(9) Ensure the cleanliness of the rotor.
(10) Operate strictly in accordance with the rules of use.