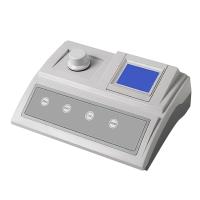
OLILONG AQ2070 Residual Chlorine Colorimeter Operating Instructions
1. Basic configuration
AQ2070 Chlorine/Total Chlorine Colorimeter One 9V battery One piece
One box of AC2070 colorimetric reagent (total chlorine/residual chlorine reagent 50 pieces each)
One white stirring rod for three sample cells
One plastic brush, one English instruction manual
Second, users choose accessories and consumables:
AC2070 Total Chlorine/Residual Chlorine Colorimetric Reagent
AC2CTB sample cell (4 pcs/box)
AC2073 residual chlorine standard solution
3. Instrument operation
1. Press the POWER key to turn on the Colorimeter.
2. The instrument displays the measurement mode "CL". If you are using a multi-function Colorimeter, press the "MODE" key to select the measurement mode.
3. Put 10mL sample into a cuvette and screw on the lid. Then put the cuvette into the sample chamber of the Colorimeter, and pay attention to the alignment of the mark on the cuvette with the mark on the Colorimeter.
4. Press the "ZERO/TEST" key.
5. The Colorimeter flashes "CL" for about 3 seconds.
6. The Colorimeter displays the measurement result, indicating that the zero point calibration has been carried out.
7. After completing the zero point calibration, take the cuvette out of the sample chamber of the Colorimeter.
8. Add the reagent to the sample, and a special color will be displayed after the color reaction is completed (see measurement method).
9. Screw on the cover of the cuvette, then put the cuvette into the sample chamber of the Colorimeter, and pay attention to the alignment of the triangle logo on the cuvette with the triangle logo on the Colorimeter.
10. Press "ZERO/TEST" to measure.
11. The Colorimeter flashes "CL" for about 3 seconds.
12. The measurement result displayed by the Colorimeter indicates that the measurement is completed, and the reading is the residual chlorine concentration.
13. Repeat the above steps to complete the measurement of other samples.
4. User information
EO1 light absorption value is too large Possible reasons: such as dirty lens, etc.
+Err is out of measurement range or the sample turbidity is too high.
-Err The measurement result is lower than the lower measurement limit.
LOBAT please replace the battery.
5. Technical specifications
Light source: LED: λ=528nm
Power source: 9V battery, (can be tested 600 times)
Automatic shutdown: 5 minutes
Operating environment: 5-40°C, 30-90%RH
Certification passed: DINEN55022, 61000-4-2, 61000-4-8
50082-2, 50081-1, DINVENV50140, 5020
FCCPart15ClassA
ICES-003 Issue 2
6. Method preparation for measuring chlorine 000-600mg/L
The method for measuring chlorine prescribed by the U.S. Environmental Protection Agency, the practical measurement range: 0.1—4.0mg/L
1. Measurement of free chlorine:
① Carry out zero calibration (see instrument operation).
②Pour out the sample in the cuvette, then add a DPD No.1 tablet, crush the tablet, and add the sample
To the mark of 10mL, stir evenly, and tighten the cap of the cuvette. Stand still for 2 minutes, put the cuvette into the sample chamber of the Colorimeter, and pay attention to the alignment of the triangle mark on the cuvette with the triangle mark on the Colorimeter.
③Press the "ZERO/TEST" key.
④The Colorimeter screen displays "CL" for about 3 seconds.
⑤The measurement result will be displayed on the screen, and the residual chlorine unit is mg/L.
2. Measurement of total chlorine:
①Take out the cuvette in step 1 from the sample chamber of the Colorimeter, and add a piece of DPD No.3 tablet to the color-developed sample. Stir with a clean stirring rod to dissolve it evenly. After 2 minutes of reaction, put the cuvette back into the sample chamber of the Colorimeter.
②Press "ZERO/TEST" to start measurement.
③After the screen flashes "CL" for about 3 seconds, the screen will display the measurement result of total chlorine in mg/L.
④After measuring each sample, the cuvette and bottle cap should be cleaned effectively.
3. Combined chlorine:
Combined chlorine = total chlorine - free chlorine
4. Total chlorine (using DPD No.4 tablet)
①If it is not necessary to read free chlorine, DPD No.4 reagent can be used to directly measure total chlorine.
②Clean the cuvette, add 1 piece of DPD No.4 drug, mash it with a clean stir bar, add the sample until
10mL mark, stir evenly, screw on the lid, let stand for 3 minutes until the reaction is complete, then put the cuvette into the sample chamber of the Colorimeter.
③Press the "ZERO/TEST" key to start measurement.
④The screen will flash "CL" for about 3 seconds.
⑤ The screen displays the measurement result of total chlorine in mg/L.
5. Measurement accuracy:
0—1mg/L: ±0.05mg/L1—2mg/L: ±0.10mg/L
2—3mg/L: ±0.20mg/L3—4mg/L: ±0.30mg/L
4—6mg/L: ±0.40mg/L
Seven, measurement precautions
Pay attention to the applicability of the measurement method, the interference of analytical standards and matrix to the method. Tablets are for chemical analysis only,
It should be kept properly. In order to avoid measurement errors during colorimetric measurement, the following points should be paid special attention to:
1. After each measurement and analysis, the cuvette, cuvette cap and stirring rod should be cleaned effectively. Even a small amount of reagent residue will cause measurement errors. Please use the provided brush to clean the cuvette.
2. Make sure that the outer wall of the cuvette is dry and clean before analysis. Fingerprints or water droplets will cause measurement errors. If there are fingerprints or smudges on the cuvette, use lens tissue or silk cloth to remove it.
3. When using the same cuvette, it is necessary to perform "zero point calibration" and then "measure", because there is a slight difference .
4. When performing zero point calibration and measurement, it is necessary to ensure that the white triangle mark on the cuvette is aligned with the white triangle mark on the sample chamber on the Colorimeter.
5. When performing zero point calibration and measurement, screw on the cap of the cuvette.
6. Bubbles on the inner wall of the cuvette will cause measurement errors. Screw on the lid and shake to remove the bubbles to avoid measurement errors.
7. It is necessary to ensure that no water seeps into the sample chamber of the Colorimeter. Water infiltrating into the sample chamber of the Colorimeter will damage the electrical system of the Colorimeter, such as causing corrosion.
8. Dirty lens (LED and photosensitive head) in the sample chamber will cause measurement errors. Check—clean if necessary—the distance from the surface of the incident light to the sample chamber should be constant. Please use damp cotton cloth or cotton for cleaning.
9. When adding tablets, add the tablets directly from the packaged tin foil to the cuvette, and avoid touching the tablets with your hands.
10. If the difference between the temperature of the sample chamber and the temperature of the measurement environment is too large, it will cause measurement errors—for example, the density of the lens or cuvette will increase.
11. In order to get a good measurement result, it is better to use a pipette to measure the sample when measuring.
12. The sampling volume should be accurate when sampling. See the English instructions for specific operations.
- 1Application of residual chlorine Detector in canned food factory
同奥科技
- 2Residual chlorine, total chlorine reagent simple operation process
同奥科技
- 3Basic principle and application of residual chlorine meter in waterworks
- 4Application of Water Quality Analyzer in Swimming Pool Water Quality Detection
- 5AQ3070 Portable Residual Chlorine and Total Chlorine Colorimeter Description