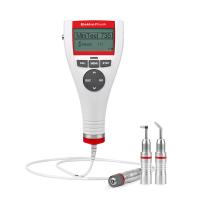
What problems affect the accuracy of magnetic Thickness Gauges?
The main factors affecting the measurement accuracy of magnetic Thickness Gauges are: matrix metal magnetism, matrix thickness, edge effect, curvature, surface roughness, external magnetic field, attached substances, probe pressure, probe position, deformation of the sample, etc.
1. Factors affecting measurement accuracy and related instructions
⒈ Base metal magnetism
The magnetic thickness measurement is affected by the magnetic change of the base metal (in practical applications, the magnetic change of low carbon steel can be considered slight), in order to avoid the influence of heat treatment and cold working factors, it should be used with the same properties as the base metal of the test piece. Calibrate the instrument with standard slices. Calibration can also be performed with a test piece to be coated.
2. Base metal thickness
Every instrument has a critical thickness of the base metal. Above this thickness, the measurement is not affected by the thickness of the base metal.
⒊ edge effect
The instrument is sensitive to abrupt changes in the surface shape of the test piece. It is therefore unreliable to measure near the edge or inside corners of the test piece.
⒋ Curvature
The curvature of the test piece has an effect on the measurement. This effect always increases significantly with decreasing radius of curvature.
⒌ surface roughness
The surface roughness of the base metal and the coating has an effect on the measurement. The greater the roughness, the greater the impact. Rough surface will cause systematic error and accidental error, and the number of measurements should be increased at different positions for each measurement to overcome this accidental error. If the base metal is rough, it is necessary to take several positions on the uncoated base metal test piece with similar roughness to calibrate the zero point of the instrument; or use a solvent that does not corrode the base metal to dissolve and remove the covering layer, and then calibrate the instrument. zero.
⒍ Magnetic field
The strong magnetic field generated by various electrical equipment around will seriously interfere with the magnetic thickness measurement work.
7. Adhesive substances
It is sensitive to the attachment substances that prevent the close contact between the probe and the surface of the covering layer. Therefore, it is necessary to remove the attachment substances to ensure that the instrument probe is in direct contact with the surface of the test piece.
⒏ Probe pressure
The pressure exerted by the probe on the test piece will affect the reading of the measurement, so the probe of the instrument maintains a substantially constant pressure with a spring.
⒐ Probe placement
The way the probe is placed has an effect on the measurement. During the measurement, the probe should be kept perpendicular to the surface of the sample.
⒑ Deformation of the specimen
The probe can distort soft-covered specimens, so less reliable data can be obtained on these specimens.
2. The regulations that should be followed when using the instrument
⒈ The properties of the base metal
The magnetic properties and surface roughness of the base metal of the standard sheet should be similar to those of the test piece base metal.
2. Base metal thickness
Check that the base metal thickness does not exceed the critical thickness.
⒊ edge effect
Measurements should not be made close to sudden changes in the test piece, such as edges, holes and inner corners.
⒋ Curvature
Measurements shall not be made on the curved surface of the test piece.
⒌ Number of readings
Often, several readings will be taken within each measurement area since each reading from the instrument will not be exactly the same. Local variations in cover thickness also require multiple measurements over a given area, especially if the surface is rough.
6. Surface cleanliness
Before measurement, any attached substances on the surface should be removed, such as dust, grease and corrosive substances, etc., but do not remove any covering substances.
- 1Magnetic method for thickness of dry film
- 2Film Film thickness determination
- 3Use of Magnetic Thickness Gauge
黎万树
- 4The role of Thickness Gauge in steel pipe coating mass inspection
- 5Film thickness determination by magnetic method
- 6Coating thickness measurement technology---magnetic method
- 7How is film thickness determined?
- 8Talking about the particularity of the measurement of the cladding Thickness Gauge and the choice of the substrate when calibrating
张国恒 - 《覆层测厚仪测量时的特殊性及校准时的基体选择》
- 9Introduction of Multifunctional Use of Magnetic Thickness Gauge
黎万树 - 《磁性测厚仪的巧用》


