Application of Ultrasonic Thickness Gauge in Oil Drilling Tools Production
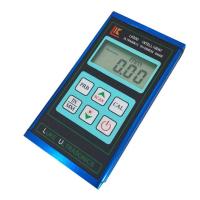
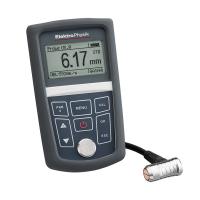
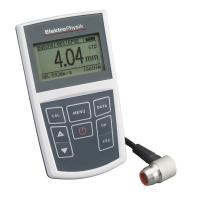
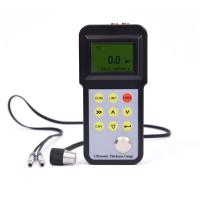
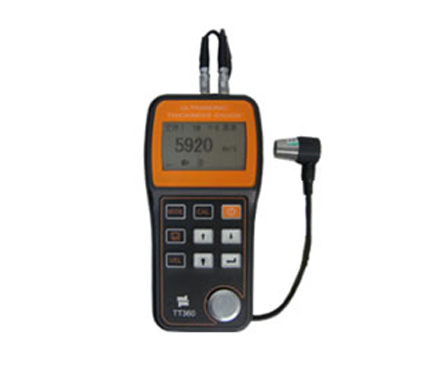
Drilling tool wall thickness difference is a main technical index of oil drilling tool production. Our company adopts the drilling tool wall thickness difference testing instrument: ultrasonic Thickness Gauge. Ultrasonic Thickness Gauge is a general purpose non-destructive testing instrument. In many years of practical operation,
We noticed that the field use of ultrasonic Thickness Gauge should pay attention to the following points:
1. Selection of probes for ultrasonic Thickness Gauges
Our company generally chooses a general-purpose probe with a nominal frequency of 5MHz and a contact area of Ф12mm with a double-chip structure. Because the material is mostly steel, the ultrasonic sound velocity is selected at 5900m/S. The basic structure of this type of probe includes three parts: wafer, damping block and protective film. The probe adopts the principle of piezoelectric effect for electro-acoustic conversion, and the two-chip structure has one for emitting ultrasonic waves and the other for receiving ultrasonic waves, separated by a sound-insulating layer in the middle. This type of probe has high sensitivity, and the surface protective film is made of soft polyurethane soft plastic. This soft protective film can improve the acoustic coupling, improve the transmission efficiency of sound energy, and the measurement repeatability is good. The loss reaches (6~7) dB. However, after the probe is used for a long time, the roughness of the protective film will increase, which will have a certain impact on the emission of sound waves, resulting in poor resolution and decreased sensitivity, so it needs to be replaced in time.
2. Selection of coupling agent
As a necessary way to realize the transmission of acoustic energy, the couplant is used for the transmission of high-frequency ultrasonic energy between the probe and the workpiece to ensure soft contact, and to remove air, fill gaps, prevent wear, and facilitate the movement of the probe on the interface between the two. function. Our company generally uses glycerin, butter, and engine oil as coupling agents. The coupling agent should be used in an appropriate amount and spread evenly on the surface of the workpiece. In the rough positioning process of the drilling tool, the surface of the workpiece is rough, and there are regular fine grooves on the surface, which will also cause measurement errors, so the couplant butter with high viscosity and large acoustic impedance is used. In the drilling tool finishing and inspection process, when the surface finish of the drilling tool is relatively high, low-viscosity coupling agent (oil, random coupling agent) is used.
3. Verification regulations and site
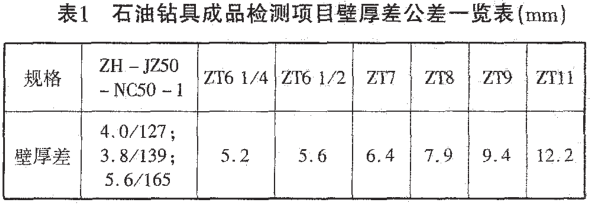
The use of the Ultrasonic Thickness Gauge does not meet the requirements. We carefully studied the national metrology verification regulations JJG403-1986 "Ultrasonic Thickness Gauge" verification regulations, referring to the specific situation of our company's oil drilling tool wall thickness detection. The content of the project does not conform to the specific use of our company's current ultrasonic Thickness Gauge: the lower limit and accuracy of curved surface wall thickness measurement. The provisions of this verification project are aimed at thin-walled pipes, and the lower limit of the measurement of the ultrasonic Thickness Gauge is assessed. The wall thickness difference of oil drilling tools is specified in Table 1. In the specific inspection, the wall thickness of the drilling tool is more than 25mm. Combined with the actual situation of our company’s drilling tool inspection, the company’s "Ultrasonic Thickness Gauge Calibration Specification" was drafted, and the ultrasonic Thickness Gauge was included in the measurement system management catalog for regular calibration. According to the wall thickness of the drilling tool, we choose a workpiece material close to the wall thickness of the workpiece to make a test block to calibrate the instrument. The thickness of the test block is evenly distributed in (0-200) mm.
Before measuring the thickness, the dust, dirt and rust on the surface of the workpiece should be removed first, and the coupling agent should be evenly applied on the surface of the workpiece. For our drilling tools, the radius of curvature is >50mm; There are obvious marks on the transmitting and receiving probe bases, and they should not be inserted incorrectly, otherwise the sensitivity will decrease. Before measurement, it is necessary to calibrate with random standard test blocks to ensure accurate measurement; some new ultrasonic Thickness Gauges have the function of probe self-calibration. During the measurement, we choose the crosstalk interlayer plate of the probe to be perpendicular to the axis of the workpiece, and use the probe seat to press the probe tightly to ensure good contact between the probe and the surface of the workpiece. When the displayed value jumps and fluctuates, do not easily confirm the measurement result, but carefully swing the probe so that it perpendicular to the wall of the drilling tool. In order to avoid false readings caused by multiple reflections of the couplant film or other clutter signals, it is necessary to read the data after the output is stable and can be presented repeatedly; the displayed value fluctuates slightly, and the smaller measured value generally prevails.
4. For some new material workpieces, it is difficult to measure the thickness when using an ultrasonic Thickness Gauge
According to chemical testing and analysis, this kind of surface material firstly has a coarse grain structure and insufficient compact structure, which causes a great attenuation of ultrasonic energy. When the ultrasonic wave wavelength is equal to or smaller than the metal grain size, the absorption attenuation and scattering of the material The attenuation is very significant, which reduces the penetration ability of ultrasonic waves and easily causes reflection at grain boundaries; secondly, due to the coarseness of grains and the existence of coarse out-of-phase structures, grass-like echoes will be generated, which will cause errors in thickness measurement; when the material inside When there are defects such as delamination, inclusions, cracks, etc., when the axis of the probe is perpendicular to the defect reflection surface, the instrument displays the thickness value of the internal defect of the drilling tool; when the inclination angle of the defect reflection surface is too large or parallel to the probe axis, the chip may not be able to receive To the reflected signal, there is no reading. For this reason, we have improved the processing technology of these material workpieces to weaken or avoid the attenuation of ultrasonic waves by these surface materials as much as possible to achieve accurate measurement.
Author unit [Henan Zhongyuan Special Steel Company]
- 1Principle, Function, Application and Selection of Multifunctional Ultrasonic Thickness Gauge
- 2Principle, Application and Type Selection of Ultrasonic Thickness Gauge
- 3Principle, Application and Type Selection of Ultrasonic Thickness Gauge
- 4Principle, Application and Selection of Ceramic Ultrasonic Thickness Gauge
- 5The Principle, Application and Precautions of Copper Plate Ultrasonic Thickness Gauge
- 6Application, Principle Introduction and Precautions for Selection of Pipeline Thickness Gauges
- 7Principle, Characteristics and Application of FISCHER Coating Thickness Gauge
- 8Principle and Application of Ultrasonic Thickness Gauge
- 9Application of Film Thickness Gauge in automobile paint thickness measurement

