A must read for beginners using digital Viscometers
1) Viscosity measurement skills
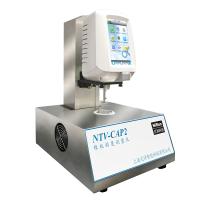
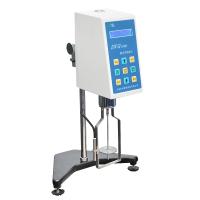
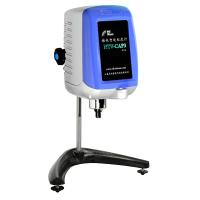
Like many precision instruments, proper operation helps to increase the efficiency of the digital viscometer. The introduction of each operation step can be found in the operation manual of each unit in the instruction manual, and this section does not repeat these parts. This section will provide some advice and guidance, read these complete basic instructions, you can go further to complete many accurate measurements.
2) Keep records
During the viscosity measurement procedure, we recommend that data recording is required. This includes the type of digital viscometer, type of spindle (including accessories), speed, percent torque, sample well size, whether to use a protective frame, etc. We recommend making yourself a record sheet that accompanies the viscosity measurement.
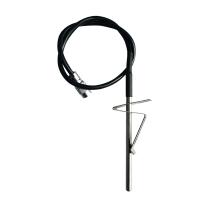
3) Rotor and protective frame
Each spindle needs to be inspected before use, if the spindle has corroded or changed shape, the measured viscosity will not be accurate. When you find that the new rotor is defective or damaged in shape, please contact us to get a new rotor. If you need to use it in a special environment, we have 316L stainless steel rotors to choose from. In addition, rotors of special materials can also be customized.
Before installing the spindle to the digital viscometer, the protective frame needs to be installed first. A protective frame protects the rotor and defines fluid boundary conditions. When installing the rotor, please pay attention to lock it correctly in the left helical direction. In order to avoid damage to the bearing,
Lift the rotor attachment screw slightly when installing the rotor. After installing the rotor, please do not hit the inner wall of the sample container, so as not to damage the alignment of the bearings. In addition, when using the No. 1 or No. 2 rotor, the protective frame is not installed, which has a great influence on the final result value, and the protective frame needs to be used at all times. If the situation does not allow the use of a protective frame, this needs to be noted in the results, and then another comparative experiment is done to correct the error of the data.
4) Select the speed of the rotor
Use an appropriate rotor and speed to get a correct viscosity value. At the beginning of viscosity testing, a better way to select the rotor and speed is trial and error, and adjust the viscometer percentage scale between 20% and 90% or between 10% and 90% (based on the instrument alarm limit prevail), when the percentage meter scale is within this range, the measurement accuracy can be guaranteed. If the percentage scale exceeds 90%, select a slower speed or smaller rotor. Conversely, if the percentage scale is less than 10% or 20%, select a higher RPM or larger rotor.
For example, the No. 1 rotor of LDV-2+PRO digital viscometer has a maximum measuring range of 100mPa·s at 60RPM. A good range to measure under this combination is 20mPa·s to 90mPa·s. If the viscosity of the sample is 150mPa.s, it is necessary to select the rotor speed combination to meet the measurable range. However, if the sample is about 50mPa·s, such a combination is very suitable. After the above preparations, the rotor and speed can be selected appropriately. When measuring multiple sets of viscosity data, you need to do the same to select the appropriate rotor and speed. Sometimes, the user needs to measure the rheological properties of the fluid, and needs to change the rotational speed to switch the shear rate. At this time, please choose a rotor that can meet the entire measurement range.
5) Sample tank size
We recommend that when measuring viscosity, the inner diameter of the sample tank is preferably 70mm or larger. Usually a 400ml beaker container is sufficient. Using a beaker with a smaller diameter will result in a larger measurement value, especially when using No. 1 and No. 2 spindles, the error is very obvious. When using a smaller sample cell, it is easy to note this in the results and ignore possible calibration errors. The correlation between these data is correct as long as the same sample well is used throughout.
6) Sample status
In order to obtain accurate measurement results, it is necessary to avoid air bubbles trapped in the fluid sample. If there are air bubbles, resolve the problem by tapping the sample well or using a vacuum. The sample needs to be kept at a constant and uniform temperature, check the different areas in the sample chamber to determine if the temperature is uniform. Note that the sample, rotor and protective frame need to reach the predetermined temperature before reading the data. We can use a dedicated viscosity measurement constant temperature Water Tank to make the system temperature meet the requirements. Please contact us for the selection of a special constant temperature Water Tank for viscosity measurement. Operation at high temperatures (over 100°C) requires the use of heater accessories. The homogeneity of the sample is also a very important factor, especially in some dispersed systems where sedimentation may occur. In some cases, simple agitation before measuring data can prevent the system from settling, but it needs to be confirmed that such agitation will not affect the viscosity of the sample.
7) The immersion condition of the rotor
The spindle needs to be immersed in the sample up to the mark, an incorrect position will result in incorrect viscosity data. In some fluids, the sample changes its rheological state due to the immersion of the rotor. To avoid this situation, we recommend inserting the spindle at different positions on the sample and moving it horizontally to the center of the sample well before connecting the spindle to the viscometer.
8) Read data
Before operating the viscometer, it is necessary to make sure that the viscometer is securely fixed on a table with a certain height. Select the combination of rotor and speed, start measurement, make it reach a stable state and take readings. However, the momentum gained during the acceleration of the rotor may cause the reading to jump around the stable reading. Under normal conditions, you just need to wait a reasonable amount of time for the reading to stabilize. A more reproducible method is to allow the rotor to rotate for a certain period before reading the data. You may find that even if you wait for a certain period of time, the reading will not be stable but will keep jumping. This is often caused by the non-Newtonian nature of the fluid. If the reading continues to increase or decrease, the properties of the fluid may have changed over time, in which case additional skill is required to obtain the correct viscosity value. The torque display of the digital viscometer may still have a 0.1% or 0.3% runout even after steady state is achieved. In this case, just read the averaged data. Larger jumps may be caused by other reasons.
9) Correction
We are often very concerned about the accuracy of viscometers. Here are some tests that can help us understand the condition of a viscometer:
(A) Bearing damage will result in incorrect and reproducible viscometer readings. Alternate testing of the following methods can help you assess the condition of these mechanisms:
The power switch of the digital viscometer is turned on, but the motor does not rotate.
Turn the rotor connecting screw 15 degrees, and release it to make it rotate automatically.
If it can rotate smoothly every time, it means that there is no problem with the bearing. Press the measurement key, the viscosity value should be 0mPa·s.
If the connecting screw turns slowly or jerky, it means that the viscometer is not working well and needs to be repaired.
(B) Finally the viscometer can be calibrated using standard viscosity samples. Carefully measure these standard viscosity samples according to the operating manual. The standard viscosity sample (error range within ±1%) provided by Nirun is a very satisfactory choice. Due to the possibility of unpredictable fluid behavior, we do not recommend using other fluids for calibration.
(C) If the viscometer can pass all the above tests, then the performance of the viscometer should be satisfactory. If you still feel that the measured data is unreasonable, please contact us.
10) Recalibrate the digital viscometer
In many environments, when measuring viscosity with a Nirun viscometer, sometimes the test conditions do not allow the use of a 400ml beaker container or larger container, but directly use the existing container containing the fluid; and sometimes, for Avoids extra cleaning and also does not use a protective frame.
All of these conditions will affect the accuracy of viscosity data. If you want to obtain accurate viscosity data, you need to re-calibrate the viscometer. When the viscometer is used for quality control, the following steps can establish a control method. At this time, the operator does not need to know the real viscosity of the sample, but only cares about a relative value.
(1.) Put the samples in the same sample well, and also use the protective frame or not use the protective frame. Note that you need to use the same spindle and speed, and keep the samples at the same temperature.
(2.) Note the new reading as a new reference point.
11) Maintenance of digital viscometer
The digital viscometer produced by Shanghai Nirun Intelligent Technology Co., Ltd. has high reliability and controllability. But in order to avoid some potential problems, some operating points are worth keeping in mind:
The adaptability of the viscometer to the external environment is extremely small. Good instrument performance requires eliminating all unnecessary friction that may affect instrument sensitivity; good cleaning habits are required; and care needs to be taken to avoid dust, fumes, liquids, and other forms of contamination from entering the viscometer. If it is necessary to operate the instrument in a contaminated environment, we recommend using an extended rotor or cleaning kit to reduce contamination from entering the system.
Do not install a rotor with fluid attached to it.
Do not expose the viscometer to an environment of 75°C. When it is necessary to measure the viscosity of samples at high temperature, it is recommended to use the extended spindle or the attached heating accessories.
Avoid inserting and squeezing the rotor joint from the side or below, because the connecting screw can protect the center and bearing of the rotor, and such rough actions will damage or make the connecting screw insensitive. When accessing or removing a rotor, always remember to slightly lift the rotor attachment screw, do not knock the rotor into the sample well and do not pull directly on the rotor or rotor connector.
Do not drop the instrument or shake the instrument violently. The base of the digital viscometer provides convenient and sturdy support. If you need to take the viscometer to other places for use, be sure to pack the viscometer for storage when not in use or during transportation.
If the viscometer is physically damaged, please send the instrument to the after-sales service department of Nirun Company for repair, or ask the agent who represents the instrument to assist in handling.
The maintenance cycle of the instrument varies according to different usage conditions; under normal usage conditions, once a year is enough to keep the instrument in good operating condition; more frequent maintenance is required in harsher operating environments . For this service, please call Nirun or the agent of the instrument.
12) Find the problem and repair the fault
A product manual is attached to the viscometer, which describes in detail how to use the instrument and precautions. The following lists some common problems encountered when using the viscometer, and attaches the possible causes and suggested repair methods.
The rotor cannot turn
Make sure the viscometer is plugged in to the power source.
Check the voltage used by the viscometer (115V, 220V): it needs to match the voltage on the wall outlet.
Make sure the power switch is in the ON position.
Make sure the RPM is set correctly and at your desired RPM, press the Measure key.
When the rotor turns, the rotor shakes or the trajectory of the rotor appears to bend
Make sure the rotor is turned tight on the connecting screw joint.
Check that the rotor is straight; if it is bent, replace it.
Check the connecting screw of the viscometer and the joint area of the rotor joint and the thread for dirt; if so, remove it.
Check threads for abrasive wear; if threads are worn, have unit repaired.
Check if the rotors are spinning or shaking in the same circle. When measuring the horizontal movement distance of the rotor in the air from the bottom of the rotor, we allow a deviation of 0.5mm.
Check for bends in the viscometer fitting; if so, send the unit for repair. If the error of the equipment is out of range, the instrument needs to be sent for repair.
Adjust the horizontal position of the instrument in the middle of the level at any time.


- 1Professional technology teaches you how to choose a digital viscometer?
- 2Determination of viscosity of redispersible latex powder by digital viscometer
裴勇兵 - 《《丙烯酸酯可再分散乳胶粉的制备及再分散稳定机理与应用研究》》
- 3Fangrui DV-1T/2T digital viscometer installation and operation video tutorial
- 4Fangrui NDJ-5S digital viscometer installation video tutorial
- 5Digital viscometer maintenance learn these ten tips!
- 6How does Nirun DV-79 digital viscometer time measurement work?
- 7Nirun DV-79 Digital Viscometer How to measure unknown viscosity samples correctly?
- 8How to install Shanghai Nirun DV-79 digital viscometer correctly?
- 9Digital Viscometer Tips [Must Read Dry Goods]