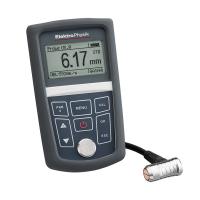
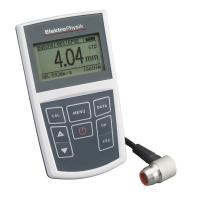
How to Use Ultrasonic Thickness Gauge Correctly
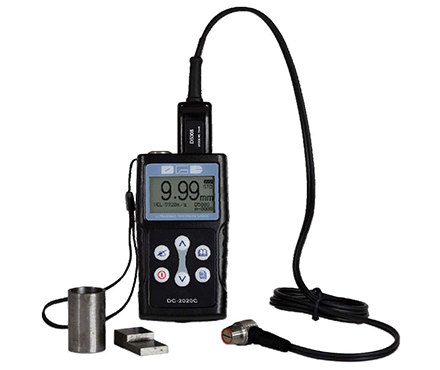
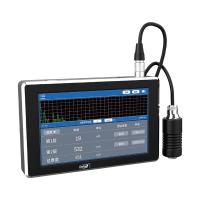
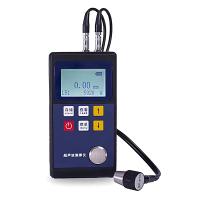
The ultrasonic Thickness Gauge measures the thickness according to the principle of ultrasonic pulse reflection . When the ultrasonic pulse emitted by the probe passes through the object to be measured and reaches the interface of the material, the pulse is reflected to the probe. Determine the thickness . All kinds of materials that can make ultrasonic waves propagate inside them at a constant speed can be measured by this principle. The Thickness Gauge designed according to this principle can accurately measure various plates and various processed parts, and can also monitor various pipelines and pressure vessels in production equipment, and monitor their thinning after being corroded during use It can be widely used in petroleum , chemical industry, metallurgy, shipbuilding, aviation, aerospace and other fields.
1 General measurement method
(1) Use the probe to measure the thickness twice at one point. In the two measurements, the dividing planes of the probe should be 90° to each other, and take the smaller value as the thickness .
(2) 30mm multi-point measurement method: When the measured value is unstable, take one measurement point as the center, perform multiple and take the minimum value as the thickness value of the measured workpiece.
2 Accurate measurement method
Increase the number of measurements around the specified measurement points, and the thickness change is represented by isopach lines.
3 Continuous measurement method
Continuously measure along the specified route with the single-point measurement method, and the interval is not greater than 5mm.
4 Grid measurement method
Draw a grid on the designated area, and record the thickness by point. This method is widely used in high pressure equipment and stainless steel lining corrosion monitoring.
5 Factors Affecting the Indication of Ultrasonic Thickness Gauge
(1) The surface roughness of the workpiece is too large, resulting in poor coupling , low reflection echo, and even failure to receive the echo signal. For surface corrosion, in-service equipment and pipelines with extremely poor coupling effects, the surface can be treated by sanding, grinding, filing, etc. to reduce the roughness At the same time, the oxide and paint layer can be removed to reveal the metallic luster, so that The probe and the object to be tested can achieve a good coupling effect through the couplant.
(2) The radius of curvature of the workpiece is too small, especially when measuring the thickness of small-diameter pipes. Because the surface of the commonly used probe is flat, the contact with the curved surface is point contact or line contact , and the sound intensity transmittance is low (poor coupling). A small-diameter special probe (6mm) can be selected, which can accurately measure curved surface materials such as pipes.
(3) The detection surface is not parallel to the bottom surface, the sound wave will be scattered , and the probe cannot receive the bottom wave signal.
(4) Castings and austenitic steel have serious scattering and attenuation when ultrasonic waves pass through them due to uneven structure or coarse grains. The scattered ultrasonic waves propagate along complex paths, which may annihilate echoes and cause unsightly show. Coarse grain special probe (2.5MHz) with lower frequency can be selected.
(5) The contact surface of the probe is somewhat worn. The surface of commonly used thickness measuring probes is made of acrylic resin. Long-term use will increase the surface roughness, resulting in a decrease in sensitivity, resulting in incorrect display. 500# sandpaper can be used for grinding to make it smooth and ensure parallelism. If still unstable, consider replacing the probe.
(6) There are a large number of corrosion pits on the back of the measured object. Because there are rust spots and corrosion pits on the other side of the measured object , the sound wave is attenuated, resulting in irregular , or even no readings in extreme cases.
(7) There is sediment in the measured object (such as a pipe). When the acoustic impedance of the sediment and the workpiece is not much different, the value displayed by the Thickness Gauge is the wall thickness plus the thickness of the sediment.
(8) When there are defects (such as inclusions, interlayers, etc.) inside the material , the displayed value is about 70% of the nominal thickness. At this time, an ultrasonic flaw Detector for further defect detection.
(9) Effect of temperature. In general, the sound velocity in solid materials decreases with the increase of its temperature . According to experimental data, the sound velocity decreases by 1% for every 100°C increase in hot materials. This is often the case for high-temperature in-service equipment . Special probes for high temperatures (300°C to 600°C) should be used instead of ordinary probes.
(10) Laminated materials, composite (heterogeneous) materials. It is not possible to measure uncoupled laminated materials because ultrasonic waves cannot penetrate uncoupled spaces and do not propagate at a uniform velocity through composite (heterogeneous) materials. For equipment made of multi-layer materials (such as urea high-pressure equipment), special attention should be paid when measuring the thickness. The indicated value of the Thickness Gauge only indicates the thickness of the layer of material that is in contact with the probe.
(11) The influence of couplant. The couplant is used to exclude the air between the probe and the measured object, so that the ultrasonic wave can effectively penetrate the workpiece to achieve the purpose of detection. If the type is selected or used improperly, it will cause errors or the coupling mark will flicker, making it impossible to measure. Due to the selection , when using on a smooth material surface, you can use a low-viscosity coupling agent; when using on a rough surface, vertical surface and top surface, you should use a high-viscosity coupling agent. High temperature workpieces should use high temperature couplant. Secondly, the couplant should be used in an appropriate amount and applied evenly. Generally the couplant should be applied to the surface of the material to be tested, but when the measurement temperature is high, the couplant should be applied to the probe.
(12) Wrong choice of sound velocity. Before measuring the workpiece, preset its sound velocity according to the type of or reversely measure the sound velocity according to the standard block. When the instrument is calibrated with one material (the common test block is steel) and then measured with another material , it will produce wrong results. It is required to correctly identify .
(13) The effect of stress. Most of the equipment and pipelines in service have stress , and the stress state of solid materials has a certain influence on the sound velocity. When the stress direction is consistent with the propagation direction, if the stress is compressive stress, the stress will increase the elasticity of the workpiece and accelerate the sound velocity; Conversely, if the stress is tensile stress, the speed of sound will slow down. When the stress and the propagation direction of the wave are different , the particle vibration trajectory is disturbed by the stress during the wave process, and the wave propagation direction deviates. According to the data, the general stress increases and the speed of sound increases slowly.
(14) Effect of metal surface oxide or paint coating. Although the dense oxide or paint anti-corrosion layer produced on materialthe metal and has no obvious interface, the propagation speed of the sound velocity in the two substances is different, resulting in errors, and it varies with the thickness of the covering. The same, the size of the error is also different.
- 1Principle, Function, Application and Selection of Multifunctional Ultrasonic Thickness Gauge
- 2Principle, Application and Type Selection of Ultrasonic Thickness Gauge
- 3Principle, Application and Type Selection of Ultrasonic Thickness Gauge
- 4Principle, Application and Selection of Ceramic Ultrasonic Thickness Gauge
- 5The Principle, Application and Precautions of Copper Plate Ultrasonic Thickness Gauge
- 6Principle and Application of Ultrasonic Thickness Gauge
- 7Measurement principle and influencing factors of high temperature ultrasonic Thickness Gauge
- 8Principle of Portable Ultrasonic Thickness Gauge
- 9How does an ultrasonic Thickness Gauge work?


