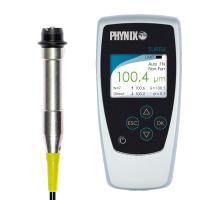
What affects the measurement accuracy of the cladding Thickness Gauge?
The cladding Thickness Gauge is a non-destructive testing Thickness Gauge. There are three Thickness Gauges based on the principle of magnetic force, magnetic induction, and eddy current, which are also widely used. The cladding includes pasting, plating, coating, chemical film formation, etc., which are used to protect the material from damage. Although the thickness measurement principles of thickness measurement are different, the measurement accuracy of Thickness Gauges is similar, mainly including substrate thickness, boundary distance, radius of curvature, surface roughness, surface cleanliness, probe pressure, probe direction, cladding material Ferromagnetic and conductive components and magnetic fields. Analyze several influencing factors:
1) Probe direction: The placement of the probe will affect the measurement results, so the probe should be kept perpendicular to the surface of the sample to be tested during measurement.
2) Probe pressure: The pressure exerted by the probe on the test piece will affect the measurement reading. Therefore, the applied force should be kept constant or minimized during the measurement. When necessary, an insulating hard film with a certain thickness can be added between the probe and the measured object, and then the thickness of the film can be subtracted from the measurement result to obtain the coating thickness.
3) Surface cleanliness: The surface of the tested piece should be kept clean, as impurities and oil stains on the surface will affect the test results.
4) Substrate thickness: In general, Colorimeters will have a critical thickness of the substrate metal. That is to say, when the coating Thickness Gauge is measuring, there will be basic requirements for the thickness of the sample to be tested. Given a predetermined minimum thickness value of the substrate (related to the nature of the sample to be tested), it can completely wrap the magnetic field of the probe in the measured sample. in the metal of the test sample. If the thickness of the substrate is greater than the minimum thickness value, it will not be affected by the thickness of the substrate metal, and the result does not need to be modified; if the minimum thickness value is not reached, the measurement result will have a certain deviation, and it is necessary to use an object of the same material to stick to the measured sample. Measure again.
5) Boundary distance: When the distance between the probe and the boundary, hole, cavity, and other sections of the sample to be measured is less than the specified boundary distance, measurement errors will occur due to insufficient eddy current carrier section. Therefore, it is unreliable to measure close to the edge or inner corner of the tested sample. If it is necessary to measure the coating thickness at this point, it must be calibrated on the uncoated surface under the same conditions in advance.
6) Surface roughness: Rough surface will lead to systematic error. For rough surface, multi-point and multiple measurements should be taken, and then averaged to obtain more objective data. The greater the roughness of the base metal and the coating, the greater the impact on the measurement results, so the average roughness Ra of the base should be less than 5% of the coating thickness.
7) Radius of curvature: The radius of curvature of the measured sample will affect the measurement results. The smaller the radius of curvature, the greater the error, so measuring thickness on curved surfaces is inaccurate.
8) Magnetic field: For the Thickness Gauge of the magnetic thickness measurement method, the strong magnetic field generated by the surrounding environmental equipment will interfere with the measurement of the Thickness Gauge. Therefore, it should be avoided to use the magnetic Thickness Gauge in an environment with an external magnetic field. This is generally not the case except for structural steel and deep-drawn formed steel.
9) Ferromagnetic and conductive components in cladding materials: Magnetic Thickness Gauges will be affected by changes in the magnetic properties of the base metal. In order to avoid being affected by heat treatment and cold working factors, the Thickness Gauge should be calibrated with a standard sheet having the same properties as the base metal of the test piece, or it can be calibrated with the test piece to be coated.
The above are the nine influencing factors of the measurement accuracy of the cladding Thickness Gauge. Of course, there are other small influencing factors, which will not be listed here. These nine factors are relatively common problems.
This article refers to Zhang Qizhong's "Factors Affecting Measurement Accuracy of Cladding Thickness Gauge and Key Points of Using It"
- 1Nondestructive measurement Coating thickness
- 2Principle, application and selection of traffic coatings Coating Thickness Gauge
- 3Principle, Application and Selection of Eddy current Coating Thickness Gauge
- 4Principle, Application and Type Selection of Electronic Coating Thickness Gauge
- 5Explore the principle, application and selection of phosphating layer Coating Thickness Gauge
- 6Principle, Application and Type Selection Analysis of Chrome Coating Thickness Gauge
- 7Principle, Application and Selection of Coating Thickness Gauge for inner wall of small pipe
- 8Basic principle and application scenario of steel Coating Thickness Gauge
- 9Principle and Application Analysis of Coating Thickness Gauge


