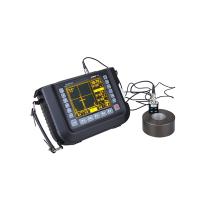
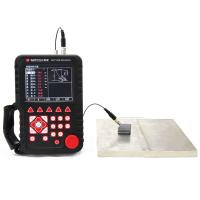
Ultrasonic flaw detection FAQ answer summary
1. What is non-destructive testing?
Answer: Non-destructive testing is a test method to check the surface and internal quality of the inspected part without damaging the working state of the workpiece or raw materials.
2. What are the commonly used flaw detection methods?
Answer: Commonly used nondestructive testing methods include: X-ray testing, ultrasonic testing, magnetic particle testing, penetrant testing, eddy current testing, gamma ray testing, fluorescent testing, coloring testing and other methods.
3. Explain the principle of magnetic particle flaw detection?
Answer: Its basic principle is: when the workpiece is magnetized, if there is a defect on the surface of the workpiece, magnetic flux leakage will occur due to the increase of the magnetic resistance at the defect, forming a local magnetic field, and the magnetic powder will display the shape and position of the defect here, thus Determine the existence of defects.
4. Describe the types of magnetic particle inspection?
1. According to the different magnetization directions of the workpiece, it can be divided into circumferential magnetization method, longitudinal magnetization method, composite magnetization method and rotary magnetization method.
2. According to the difference of magnetization current, it can be divided into: DC magnetization method, half-wave DC magnetization method, and AC magnetization method.
3. According to the preparation of magnetic powder used in flaw detection, it can be divided into dry powder method and wet powder method.
5. What are the defects of magnetic particle testing?
Answer: The magnetic particle inspection equipment is simple, easy to operate, quick to inspect, and has high flaw detection sensitivity. It can be used to find defects on the surface or near the surface of ferromagnetic materials nickel, cobalt and their alloys, carbon steel and some alloy steels; it It is suitable for the inspection of cracks on the surface of thin-walled parts or welds, and can also reveal incomplete penetration defects of a certain depth and size; but it is difficult to find pores, inclusions and defects hidden deep in the weld.
Six, defect magnetic marks can be divided into several categories?
Answer: 1. Magnetic traces of various technological defects;
2. Hairline magnetic marks caused by material slag inclusion;
3. Point-like magnetic marks caused by slag inclusions and pores.
7. Explain the reasons for magnetic flux leakage?
Answer: Since the magnetic rate of ferromagnetic materials is much greater than that of non-ferromagnetic materials, according to the analysis of the magnetic flux density B=μH after the workpiece is magnetized, B magnetic lines pass through the unit area of the workpiece, and in the defect area B magnetic lines of force cannot be allowed to pass through per unit area, so part of the lines of force are forced to squeeze into the material below the defect, and other lines of force have to be forced to escape from the surface of the workpiece to form magnetic flux leakage, and the magnetic powder will be attracted by the magnetic flux leakage caused by this. .
8. Discuss the influencing factors of magnetic flux leakage?
Answer: 1. The magnetic permeability of the defect: the smaller the magnetic permeability of the defect, the stronger the magnetic flux leakage.
2. Magnetizing magnetic field strength (magnetizing force): the greater the magnetizing force, the stronger the magnetic flux leakage.
3. The shape and size of the inspected workpiece, the shape and size of the defect, and the burial depth, etc.: When other conditions are the same, the magnetic flux leakage generated by pores buried at the same depth under the surface is smaller than that generated by transverse cracks.
9. Why should some parts be demagnetized after magnetic particle testing?
Answer: The residual magnetism of some rotating parts will attract iron filings and cause frictional damage to the parts during rotation, such as shaft bearings. The residual magnetism of some parts will make the indication of nearby instruments abnormal. Therefore, why some parts should be demagnetized after magnetic particle inspection.
10. What is the basic principle of ultrasonic flaw detection?
Answer: Ultrasonic flaw detection is a method that uses ultrasonic energy to penetrate deep into metal materials, and when one section enters another section, reflection occurs at the edge of the interface to inspect parts defects. When the ultrasonic beam is passed from the surface of the part by the probe When it passes to the inside of the metal, when a defect and the bottom surface of the part are encountered, reflected waves will be generated respectively, and pulse waveforms will be formed on the fluorescent screen. Based on these pulse waveforms, the position and size of the defect can be judged.
11. What are the advantages and disadvantages of ultrasonic flaw detection compared with X-ray flaw detection?
Answer: Compared with X-ray flaw detection, ultrasonic flaw detection has the advantages of higher flaw detection sensitivity, short cycle, low cost, flexibility and convenience, high efficiency, and harmless to human body; the disadvantage is that the working surface needs to be smooth and experienced inspectors can distinguish The types of defects are not intuitive to defects; ultrasonic flaw detection is suitable for inspection of parts with larger thickness.
12. What are the main characteristics of ultrasonic flaw detection?
Answer: 1. When the ultrasonic wave propagates in the medium, it has the characteristic of reflection on the heterogeneous interface. If a defect is encountered and the size of the defect is equal to or greater than the wavelength of the ultrasonic wave, the ultrasonic wave will be reflected back on the defect, and the flaw Detector can reflect the reflected wave. Shown; if the size of the defect is even smaller than the wavelength, the sound wave will bypass the ray and cannot be reflected;
2. The directivity of the wave sound is good. The higher the frequency, the better the directivity. It radiates into the medium with a very narrow beam, and it is easy to determine the position of the defect.
3. The propagation energy of ultrasonic waves is large. For example, the energy transmitted by ultrasonic waves with a frequency of 1MHZ (Hertz) is equivalent to 1 million times that of sound waves with the same amplitude and frequency of 1000HZ (Hertz).
13. When the thickness of the ultrasonic flaw detection plate is 14 mm, what is the relationship between the three main curves on the distance amplitude curve?
Answer: Measuring line Ф1х6-12dB
Quantitative line Ф1х6-6dB
Judgment line Ф1х6-2dB
14. What is the "softness" and "hardness" of rays?
Answer: The ability of X-rays to penetrate matter is related to the wavelength of the ray itself. The shorter the wavelength (the higher the tube voltage), the greater the penetration ability, which is called "hard"; otherwise, it is called "soft".
15. When using ultrasonic flaw detection, what may be the reason for the disappearance of the bottom wave?
Answer: 1. Large defects near the surface; 2. Absorptive defects; 3. Large oblique defects; 4. The combination of scale and steel plate is not good.
16. What are the main factors affecting the development?
答:1、显影时间;2、显影液温度;3、显影液的摇动;4、配方类型;5、老化程度。
十七、什么是电流?
答:电流是指电子在一定方向的外力作用下有规则的运动;电流方向,习惯上规定是由电源的正极经用电设备流向负极为正方向,即与电子的方向相反。
十八、什么是电流强度?
答:电流强度是单位时间内通过导体横截面的电量,电流有时也作为电流强度的简称,可写成I=Q\T式中I表示为电流强度Q为电量,T为时间。
十九、什么是电阻?
答:指电流在导体内流动所受到的阻力,在相同的温度下,长度和截面积都相同的不同物质的电阻,差别往往很大;电阻用“R”表示,单位为欧姆,简称欧,以Ω表示
二十、什么是电压?
答:指在电源力的作用下,将导体内部的正负电荷推移到导体的两端,使其具有电位差,电压的单位是伏特,简称伏,用符号“V”表示。
二十一、什么是交流电,有何特点?
答:交流电指电路中电流、电压、电势的大小和方向不是恒定的,而是交变的,其特点是电流、电压、电势的大小和方向都是随时间作作周期性的变化;工矿企业设备所用的交流电动机、民用照明、日常生活的电器设备都是以交流电作为电源;交流电有三相和单相之分,其电压380伏和220伏。
二十二、什么是直流电,有何特点?
答:指在任何不同时刻,单位时间内通过导体横截面的电荷均相等,方向始终不变的电流;其特点是电路中的电流、电压、电势的大小和方向都是不随时间变化而变化,而是恒定的;直流电机、电镀、电机励磁、蓄电池充电、半导体电路等。
二十三、什么是欧姆定律?
答:欧姆定律反映了有稳恒电流通过的电路中电阻、电压和电流相互关系;欧姆定律指出,通过电路中的电流与电路两端电压成正比,与电路中的电阻成反比;即I=V\R。
二十四、什么是电磁感应?
答:通过闭合回路的磁通量发生变化,而在回路中产生电动势的现象称为电磁感应;这样产生电动势称为感应电动势,如果导体是个闭合回路,将有电流流过,其电流称为感生电流;变压器,发电机、各种电感线圈都是According to电磁感应原理工作。
二十五、简述超生波探伤中,超生波在介质中传播时引起衰减的原因是什么?
答:1、超声波的扩散传播距离增加,波束截面愈来愈大,单位面积上的能量减少。
2、材质衰减一是介质粘滞性引起的吸收;二是介质界面杂乱反射引起的散射。
二十六、CSK-ⅡA试块的主要作用是什么?
答:1、校验灵敏度;2、校准扫描线性。
二十七、影响照相灵敏度的主要因素有哪些?
答:1、X光机的焦点大小;2、透照参数选择的合理性,主要参数有管电压、管电流、曝光时间和焦距大小;3、增感方式;4、选用胶片的合理性;5、暗室处理条件;6、散射的遮挡等。
二十八、用超生波对饼形大锻件探伤,如果用底波调节探伤起始灵敏度对工作底面有何要求?
答:1、底面需要平行于探伤面;
2、底面需要平整并且有一定的光洁度。
二十九、超声波探伤选择探头K值有哪三条原则?
答:1、声束扫查到整个焊缝截面;
2、声束尽量垂直于主要缺陷;
3、有足够的灵敏度。
三十、超声波探伤仪主要有哪几部分组成?
答:主要有电路同步电路、发电路、接收电路、水平扫描电路、显示器和电源等部份组成。
三十一、发射电路的主要作用是什么?
答:由同步电路输入的同步脉冲信号,触发发射电路工作,产生高频电脉冲信号激励晶片,产生高频振动,并在介质内产生超声波。
三十二、超声波探伤中,晶片表面和被探工件表面之间使用耦合剂的原因是什么?
答:晶片表面和被检工件表面之间的空气间隙,会使超声波完全反射,造成探伤结果不准确和无法探伤。
三十三、JB1150-73标准中规定的判别缺陷的三种情况是什么?
答:1、无底波只有缺陷的多次反射波。
2、无底波只有多个紊乱的缺陷波。
3、缺陷波和底波同时存在。
三十四、JB1150-73标准中规定的距离――波幅曲线的用途是什么?
答:距离――波幅曲线主要用于判定缺陷大小,给验收标准提供According to它是由判废线、定量线、测长线三条曲线组成;
判废线――判定缺陷的最大允许当量;
定量线――判定缺陷的大小、长度的控制线;
测长线――探伤起始灵敏度控制线。
三十五、什么是超声场?
答:充满超声场能量的空间叫超声场。
三十六、反映超声场特征的主要参数是什么?
答:反映超声场特征的重要物理量有声强、声压声阻抗、声束扩散角、近场和远场区。
三十七、探伤仪重要的性能指标是什么?
答:分辨力、动态范围、水平线性、垂直线性、灵敏度、信噪比。
三十八、超声波探伤仪近显示方式可分几种?
答:1、A型显示示波屏横座标代表超声波传递播时间(或距离)纵座标代表反射回波的高度;2、B型显示示波屏横座标代表超声波传递播时间(或距离),这类显示得到的是探头扫查深度方向的断面图;3、C型显示仪器示波屏代表被检工件的投影面,这种显示能绘出缺陷的水平投影位置,但不能给出缺陷的埋藏深度。
三十九、超声波探头的主要作用是什么?
答:1、探头是一个电声换能器,并能将返回来的声波转换成电脉冲;
2、控制超声波的传播方向和能量集中的程度,当改变探头入射角或改变超声波的扩散角时,可使声波的主要能量按不同的角度射入介质内部或改变声波的指向性,提高分辨率;
3、实现波型转换;
4、控制工作频率;适用于不同的工作条件。
四十、磁粉探头的安全操作要求?
答:1、当工件直接通过电磁化时,要注意夹头间的接触不良、或用了太大的磁化电流引起打弧闪光,应戴防护眼镜,同时不应在有可能燃气体的场合使用;2、在连续使用湿法磁悬液时,皮肤上可涂防护膏;3、如用于水磁悬液,设备须接地良好,以防触电;4、在用茧火磁粉时,所用紫外线需要经滤光器,以保护眼睛和皮肤。
四十一、什么是分辨率?
答:指在射线底片或荧光屏上能够识别的图像之间最小距离,通常用每1毫米内可辨认线条的数目表示。
四十二、什么是几何不清晰度?
答:由半影造成的不清晰度、半影取决于焦点尺寸,焦距和工件厚度。
四十三、为什么要加强超波探伤合录和报告工作?
答:任何工件经过超声波探伤后,都需要出据检验报告以作为该工作质量好坏的凭证,一份正确的探伤报告,除建立可靠的探测方法和结果外,很大程度上取决于原始记录和最后出据的探伤报告是非常重要的,如果我们检查了工件不作记录也不出报告,那么探伤检查就毫无意义。
四十四、磁粉探伤中为什么要使用灵敏试片?
答:使用灵敏试片目的在于检验磁粉和磁悬液的性能和连续法中确定试件表面有效磁场强度和方向以及操作方法是否正确等综合因素。
四十五、什么叫定影作用?
答:显影后的胶片在影液中,分影剂将它上面未经显影的溴化银溶解掉,同时保护住黑色金属银粒的过程叫定影作用。
四十六、着色(渗透)探伤的基本原理是什么?
答:着色(渗透)探伤的基本原理是利用毛细现象使渗透液渗入缺陷,经清洗使表面渗透液支除,而缺陷中的渗透残瘤,再利用显像剂的毛细管作用吸附出缺陷中残瘤渗透液而达到检验缺陷的目的。
四十七、着色(渗透)探伤灵敏度的主要因素有哪些?
答:1、渗透剂的性能的影响;2、乳化剂的乳化效果的影响;3、显像剂性能的影响;4、操作方法的影响;5、缺陷本身性质的影响。
四十八、在超声波探伤中把焊缝中的缺陷分几类?怎样进行分类?
答:在焊缝超声波探伤中一般把焊缝中的缺陷分成三类:点状缺陷、线状缺陷、面状缺陷。
在分类中把长度小于10mm的缺陷叫做点状缺陷;一般不测长,小于10mm的缺陷按5mm计。把长度大于10mm的缺陷叫线状缺陷。把长度大于10mm高度大于3mm的缺陷叫面状缺陷。
四十九、胶片洗冲程序如何?
答:显影、停影、定影、水洗、干燥。
五十、什么叫导电性?
答:指金属能够传导电流的性质。
五十一、什么叫磁性?
答:指金属具有导磁的性能;从实用意义讲如:可用磁性材料(金属)制造长久磁铁、电工材料,也可用磁性来检查磁性金属是否有裂纹等
五十二、什么叫高压?
答:设备对地电压在250伏以上者称为高压。
五十三、什么叫低压?
答:设备对地电压在250伏以下者称为低压。
五十四、什么叫安全电压?
答:人身触及带电导体时,无生命危险的电压,一般都采用36伏以下的电压称为安全电压。
凡工作场所潮湿或在金属容器内,隧道、矿井内用电器照明等,均采用12伏安全电压。
五十五、超声波试块的作用是什么?
答:超声波试块的作用是校验仪器和探头的性能,确定探伤起始灵敏度,校准扫描线性。
五十六、什么是斜探头折射角β的正确值?
Answer: The correct value of the angle of refraction of the angled probe is called the K value, which is equal to the ratio of the horizontal distance from the angled probe's λ shooting point to the reflection point and the corresponding depth.
57. What should I do if there are unacceptable defects found in the weld seam of local non-destructive testing inspection?
Answer: Supplementary radiographic inspection should be carried out in the extension direction of the defect or suspicious parts. After the supplementary inspection, if there is still doubt about the quality of the weld, the weld should be fully inspected.
58. How many kinds of magnetic marks are there caused by non-defects?
Answer: 1. Local cold work hardening, the accumulation of magnetic marks caused by the change of magnetic permeability of materials; 2. Magnetic powder accumulation at the interface of two different materials; 3. Segregation of carbide layer structure; 5. The magnetization current is too high, the magnetic marks caused by the metal streamline; 6. The spot-shaped magnetic marks caused by the unclean or oily surface of the workpiece.
59. What are the contents of the magnetic particle inspection regulations?
Answer: 1. The scope of application of the regulations; 2. Magnetization method (including magnetization specification, preparation of workpiece surface); 3. Magnetic powder (including particle size, color, preparation of magnetic suspension and fluorescent magnetic suspension). 4. Test piece; 5. Technical operation; 6. Quality assessment and inspection records.
60. What is the scope of application of magnetic particle testing?
Answer: Magnetic particle inspection is a detection method used to detect surface and near-surface defects of ferromagnetic materials.
61. What is the main function of the synchronous signal generator in the ultrasonic flaw Detector? Which two parts of the circuit does it mainly control?
Answer: The synchronous circuit generates a synchronous pulse signal to trigger the coordinated work of all parts of the instrument at the same time. It mainly controls the synchronous emission and synchronous scanning of the two parts of the circuit.
62. What is the purpose of non-destructive testing?
Answer: 1. Improve the manufacturing process; 2. Reduce the manufacturing cost; 3. Improve the possibility of the product; 4. Ensure the safe operation of the equipment.
63. What are the methods for adjusting the time scanning line of the defect positioning instrument during ultrasonic weld flaw detection?
Answer: There are three methods: horizontal locator, vertical locator, and sound path locator.
64. Try to compare the main advantages and disadvantages of dry powder method and wet powder method?
Answer: The dry powder method has a high ability to detect near-surface defects, and is especially suitable for large-area or field flaw detection; the wet powder method has a high ability to detect small surface defects, and is especially suitable for batch flaw detection of small parts with irregular shapes.
- 1Application of Ultrasonic Flaw Detector
- 2Basic Principle Characteristics and Application Analysis of Flaw Detector for Casting
- 3The working principle and application of eddy current Flaw Detector
- 4Ultrasonic Flaw Detectors: the right-hand man for nondestructive detection
- 5The role and application of ultrasonic flaw Detector
- 6What is an ultrasonic flaw Detector?
- 7What is an ultrasonic pulse echo system?
- 8Application of Ultrasonic Flaw Detector in Weld Flaw Detection
- 9Ultrasonic flaw detection defect judgment
珀泰@sisi


