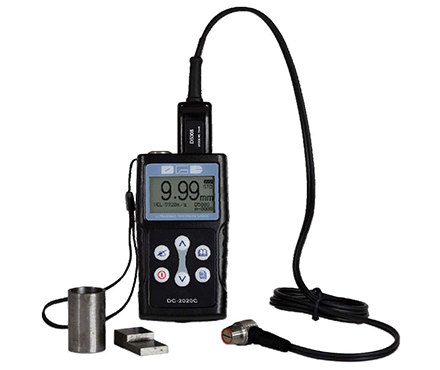
Ultrasonic Thickness Gauge FAQ and solution
Due to the convenience of ultrasonic treatment and good directivity, ultrasonic technology can measure the thickness of metal and non-metal materials, which is fast, accurate and pollution-free, especially in the occasions where only one side is allowed to be touched, it can show its superiority , Widely used in various plate, pipe wall thickness, boiler container wall thickness and local corrosion, rust, so for product inspection of various industrial sectors such as metallurgy, shipbuilding, machinery, chemical industry, electric power, atomic energy, etc., for safe operation of equipment And modern management plays a major role. There are some common problems encountered in use.
1. Clean the surface
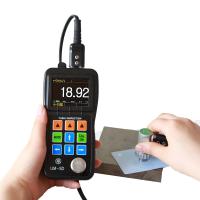
Before measuring, all dust, dirt and rust on the surface of the object to be measured should be removed. When using an ultrasonic Thickness Gauge without the function of penetrating the coating, paint and other coverings should be removed. (The surface paint layer of the UM-2D ultrasonic Thickness Gauge produced by Shenyang Yushi Pioneer does not need to be polished, and can penetrate the coating to directly measure the thickness of the substrate)
2. Improve the roughness requirement
Rough surface will cause measurement errors, and even the instrument has no reading . Before measurement, the surface of the material to be tested should be made as smooth as possible, and it can be smoothed by grinding, polishing, filing, etc. High viscosity couplants may also be used.
3. Measuring cylindrical surface
To measure cylindrical materials, such as pipes, shafts, etc., it is the most satisfactory situation to select the dividing line of the probe to be perpendicular to the axis of the measured material. Simply put, couple the probe with the material to be measured, then rotate the probe around the axis of the measured object or move the probe in parallel perpendicular to the axis of the measured object, so that the center line of the probe is in contact with the measured object, and select a stable reading as the accurate reading of the material. thickness. It is helpful to select different chip size probes for different diameters of measured objects.
4. Non-parallel surfaces
In order to obtain a satisfactory ultrasonic response, the other surface of the material to be tested must be parallel or coaxial with the surface to be tested, otherwise it will cause measurement errors or no reading display at all.
5. The temperature of the material affects
the thickness of the material and the ultrasonic propagation speed. When using a conventional probe, the surface of the measured object should not exceed 60°C, otherwise the probe cannot be used. When the temperature is high, use a high temperature probe and a high temperature couplant.
6. Large attenuation materials
For some materials such as fibers, porous, and coarse particles, they will cause a large amount of scattering and energy attenuation of ultrasonic waves, resulting in abnormal readings or even no readings (usually abnormal readings are smaller than the actual thickness), in this case , it means that the material is not suitable for testing with this Thickness Gauge.
7. The reference test block
can accurately measure different materials under different conditions. The closer the material of the calibration test block is to the material to be tested, the more accurate the measurement will be. A satisfactory reference test block will be a group of test blocks of different thicknesses of the material to be tested. The test block can provide instrument compensation correction factors (such as the microstructure of the material, heat treatment conditions, particle orientation, surface roughness, etc.). In order to meet the requirements of maximum accuracy measurement, a set of reference test blocks will be important.
In most cases, satisfactory measurement accuracy can be obtained by using only a reference test block, which should be of the same material and similar thickness as the material to be tested. A uniform test material can be taken as a test block after being measured with a micrometer. For thin materials, when its thickness is close to the lower limit of probe measurement, a test block can be used to determine the accurate lower limit. Do not measure material below the lower limit thickness. If a thickness range can be estimated, then the thickness of the test block should be selected as the upper limit. When the material to be tested is thick, especially alloys with complex internal structures, one of the test blocks should be selected from a group of test blocks close to the material to be tested, so as to master the calibration. The internal structure of most forgings and castings has directionality. In different directions, the sound velocity will have a small change. In order to solve this problem, the test block should have the internal structure in the same direction as the material to be tested. The sound wave in the test block The direction of propagation must also be the same as in the material being tested.
Under certain circumstances, the reference test block can be replaced by looking up the sound velocity table of known materials, but this is only an approximate replacement for some reference test blocks. In some cases, the values in the sound speed table are different from the actual measurement. The physical and chemical conditions are different. This method is often used to measure low carbon steel, but only as a rough measurement.
8. Ultra-thin material
Using any ultrasonic Thickness Gauge, when the thickness of the measured material falls below the lower limit of the probe, it will cause measurement errors. If necessary, the minimum limit thickness can be measured by the test block comparison method. When measuring ultra-thin materials, a false result called "double refraction" sometimes occurs, which results in the displayed reading being twice the actual thickness, and another false result which results in a measured value greater than the actual thickness , in order to prevent this kind of error, when measuring the critical thin material, the measurement should be repeated and checked. (The UM-5 series Thickness Gauge with A-scan from Shenyang Yushi Pioneer can easily solve such problems)
9. Rust spots, corrosion pits, etc.
Rust spots and pits on the other surface of the measured material will cause irregular readings In extreme cases, even no readings, small rust spots are sometimes difficult to find. When a pit is found or suspected, the measurement of this area must be very careful, and the positioning of the probe at different angles can be selected for multiple tests.
10. Material identification error
When the instrument is calibrated with one material and then tested for another material, wrong results will occur, so attention should be paid to choosing the correct sound velocity.
11. Probe wear
The surface of the probe is made of acrylic resin. Long-term use will increase the roughness and reduce the sensitivity. If the user can determine that the error is caused by this reason, the probe needs to be replaced.
12. The influence of the oxide layer on the metal surface
Some metals can produce a denser oxide layer on their surface, such as aluminum, etc. This layer of oxide layer is closely combined with the substrate without obvious interface, but the propagation speed of ultrasonic waves in these two substances It is different, so it will cause errors, and the size of the error is different with the thickness of the oxide layer. Please pay attention to the user when using it. You can choose a piece of the same batch of materials to be tested and measure it with a micrometer or caliper to make a sample block. to calibrate.
13. Use and selection of couplant
The couplant is used for the transmission of high-frequency ultrasonic energy between the probe and the material to be tested. If you choose the type or use it improperly, it may cause errors or the coupling mark will flicker, making it impossible to measure the value. The couplant should be used in an appropriate amount and spread evenly. It is important to choose a suitable type of couplant. When used on a smooth material surface, a low-viscosity couplant (such as a random configuration of couplant, light machine oil, etc.) is very suitable. When used on rough material surfaces, or vertical surfaces and top surfaces, a coupling agent with a higher viscosity (such as glycerin paste, butter, grease, etc.) can be used. Couplants are available in various formulations.
- 1Principle, Function, Application and Selection of Multifunctional Ultrasonic Thickness Gauge
- 2Principle, Application and Type Selection of Ultrasonic Thickness Gauge
- 3Principle, Application and Type Selection of Ultrasonic Thickness Gauge
- 4Principle, Application and Selection of Ceramic Ultrasonic Thickness Gauge
- 5The Principle, Application and Precautions of Copper Plate Ultrasonic Thickness Gauge
- 6Principle and Application of Ultrasonic Thickness Gauge
- 7Measurement principle and influencing factors of high temperature ultrasonic Thickness Gauge
- 8Principle of Portable Ultrasonic Thickness Gauge
- 9How does an ultrasonic Thickness Gauge work?

