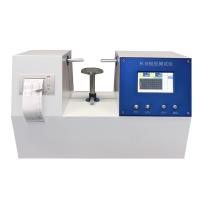
YT-ZBY cup body stiffness Tester instruction manual
Installation and Precautions
Unboxing and Installation
1 Open the upper cover of the outer packing box , take out the accompanying technical documents , and read the instruction manual carefully.
2. Place the main machine on a flat and stable horizontal workbench , and pad the four feet under the flat bottom plate.
3 Turn on the power , turn on the power switch , and wait for the self-test of the instrument to complete.
Operation Guide

1 Set the speed to 50mm/min.
Press the [Setting] key, tap the [①Test Speed] cell, input 50, and press the [Enter] key to complete the input.
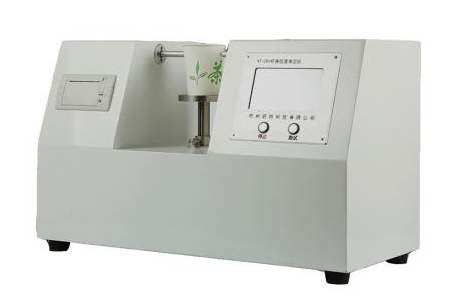
1.2 Adjust the height of the sample holder, place the paper cup to be tested on the sample holder, measure the height of the paper cup with a ruler and make a mark at the 2/3 height position of the paper cup, loosen the locking screw counterclockwise, and adjust the height of the sample holder Make the position of the mark and the center position of the "probe" basically on the same horizontal line, and tighten the locking screw clockwise .
1.3 Adjust the position of the "probe", press the [forward] or [backward] key, so that the distance between the probe and the paper cup is about 3~10mm.
1.4 Press the test key, the instrument will automatically complete a test.
1.5 Replace the sample and proceed to the next test.
2 View, delete and print out test data
2.1 View the measured data (for a group of sample tests, the data can be saved up to 20 times, if there are more than 20 times, the last 20 times will be kept). Press 【<】key to view the previous data. Press 【>】key to view the last data. (Note: Double-click the key to quickly flip through)
2.2 delete
Press the "Delete" button to delete the current test value; double-click the "Delete" button to delete all data.
2.3 Statistics and printing
After a group of samples has been tested (the number of samples is greater than 3), press the [Statistics] key to display the statistical results. Press【Print】to print the statistics report.
When the printing paper roll is used up, the printing paper should be replaced. The printing paper is thermal printing paper (size: Φ 30mm×57mm).
Instrument Calibration
The instrument has been strictly inspected and calibrated before leaving the factory. Under normal circumstances, the user does not need to make further . If the instrument needs to be calibrated after a period of use, standard force arms and weights can be used for force value inspection. Be careful not to touch the measuring head with force during inspection! (For specific calibration precautions, please contact the manufacturer.)
Turn on the power, press the [Setting] key, tap the [③Pressure Calibration] cell to enter the calibration interface ; then press the [Zero Adjustment] key to adjust to zero;
Faults and Fixes
1 The display on the touch screen is abnormal, please restart the machine. If it is not normal, please contact the after-sales service
2 If the measurement does not stop during the measurement process, please press the stop key and check whether the distance parameters in the instrument are correct.
maintenance
1 The operator should familiarize himself with the instruction manual and strictly abide by the operating procedures and precautions for use. Non-specialized personnel should not operate or repair the instrument casually.
2 Always keep the inside of the instrument clean to prevent dust and water vapor from entering the machine.
3 Do not touch the measuring head with force.