How to use YT-RRY1000 Softness Tester
YT-RRY-1000 computerized softness Tester is a test instrument for simulating the softness of hand, mainly used for softness measurement of high and middle grade toilet paper, tobacco flakes, fiber fabrics and other materials.
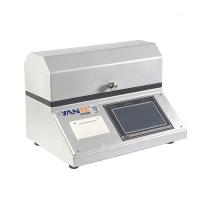
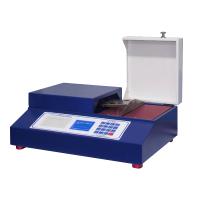
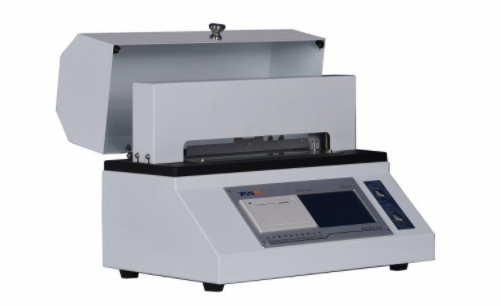
product structure
1. Power switch
Located at the right rear of the instrument, it is used to control the power on and off.
2. Operation buttons
The operation keys of the instrument are concentrated on the operation panel, as shown in the figure, and the functions of each operation key are as follows:
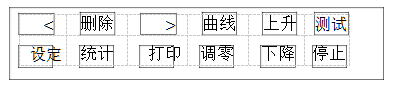
[Zero adjustment] key, when the probe is suspended in the air and there is no external force, the pressure display is not 0, press the [Zero adjustment] key to perform zero adjustment.
【Curve】key to display the curve graph of the current test result.
【Test】key: After placing the sample, press 【Test】to test.
[Up], [Down], [Stop] keys: used to manually control the movement of the probe.
【Delete】key: used to delete the current or all test data; double-click the delete key to clear all test data.
【Statistics】key: used to display test statistical results.
【Print】key: used to print data.
【<】key: View the previous data, double-click to view the previous 5 data.
【>】key: View the last data, double-click to view the last 5 data.
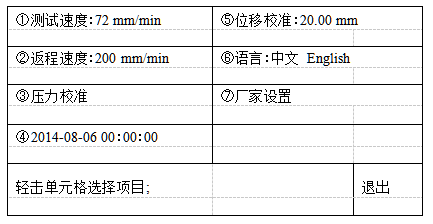
[Setting] key to enter the test setting parameter setting, including test speed, return speed, displacement calibration, language, calibration, factory settings. Press【Exit】key to exit the settings as shown in the figure below:
operation method
1. Steps to use
a) Set the speed to 72mm/min (equivalent to 1.2mm/s).
Press the [Setting] key, tap the [①Test Speed] cell, input 72, and press the [Enter] key to complete the input.
b) Adjust the height of the "probe" (the user generally does not need to adjust, it has been adjusted before leaving the factory).
After the self-inspection of the instrument is turned on, the height from the lower edge of the probe to the platen is 4mm±0.5, if it exceeds the range, press the [Setting] key, and tap the cell of [⑤Displacement Calibration] to adjust the data. (If the measured height is 4.6mm, the original "⑤ displacement calibration: 20.00 mm", then input 20-(4.6-4)=19.4mm)
c) Adjust the test slit width: (adjusted to 5mm at the factory)
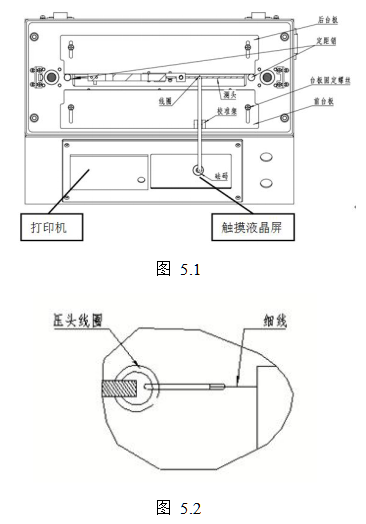
Press the up button to raise the measuring head to the highest position, see "Figure 5.1", loosen the four fixing screws of the pressure plate, move the front and rear panels to the outermost position, and select the appropriate distance pin (5mm, 6.35mm, 10mm , 20mm) into the spacer pin holes (see the position in the picture above), then close the front and back panels to the spacer pins, and then tighten the platen screws.
d) Prepare the sample according to the size required by the standard: the size is (100×100) mm
e)将试样按规定的方向对称于狭缝置放在左右试样台板中间,盖上 上罩壳(如室内没有风,可不盖上罩壳)。
f)按测试键,仪器自动完成一次测试。
g)更换试样,进行下一次测试。
2.测试数据的查看、删除和打印输出
a)查看已测数据(一组试样测试,数据最多保存 20 次,多余 20 次,保留最后20次)
按【<】键,查看前一次数据。按【>】键,查看后一次数据。(注:双击键可快速翻阅)
b)删除
按“删除”键,删除当次测试值;双击【删除】键删除所有数据。
3.统计、打印 一组试样测试完毕后(试样数大于 3 个),按【统计】键,显示统计结果。按【打印】打印统计报告。
当打印纸卷用完应更换打印纸,打印纸为热敏打印纸(尺寸为:Φ30mm×57mm)。
4.仪器校准
仪器出厂前已经过严格的检验和校准,一般情况下用户不须作进一步核查,若仪器使用一段时间确需校准时,可用标准的力臂和砝码进行力值检验。检验时应小心,不可用力触碰测量头!(具体校准注意事项,请联系厂家。)
a)接通电源,按【设定】键,轻击【③压力校准】单元格进入校准界面;再按【调零】键调零;
b)用标准的力臂(平衡杠)放在试样前台板上,平衡杠一端挂钩挂住测头上的线圈(见图 5.1),并且使挂钩近似位于测头厚度的中心(见图 5.2),另一端挂砝码(1g=9.81mN 如挂上一个 50g 砝码,标准值为 490.5 mN),误差为 1%
c)如数值相差大(超过 1%),轻击输入【输入压力】,输入砝码值(如砝码 100g,则输入 50×9.81=491),按【确认】键,再按【校准】键,输入密码“3215”,确认即可。
注意:校准时不可用力触碰测量头(传感器最大量程为 1000mN).
5.拆箱与安装
a)打开外包装箱上盖板,取出随机技术文件,认真阅读使用说明书。
b)将主机置于平整稳固的水平工作台上,垫平底板下面四个支足。
接通电源,打开电源开关,等待仪器自检完成后,取下测试台上的 泡沫纸(放置运输过程中,测头抖动)。
维护与保养
1. The operator should familiarize himself with the instruction manual and strictly abide by the operating procedures and precautions for use. Non-specialized personnel should not operate or repair the instrument casually.
2. Always keep the inside of the instrument clean to prevent dust and water vapor from entering the machine.
3. Do not touch the measuring head with force.
4. After the instrument is used, cover the cover