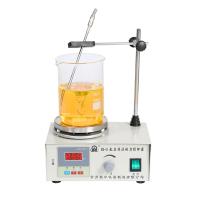
B13-3, B15-3 intelligent constant temperature digital display timing magneticstirrer instruction manual
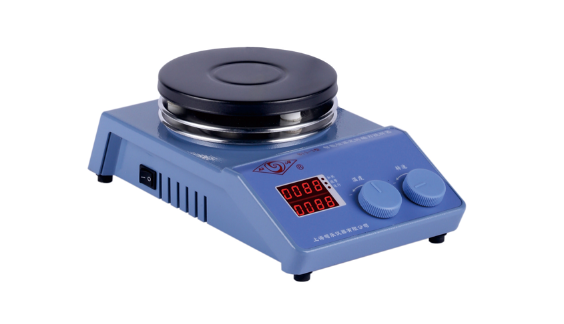
Indicator light and button description: Display: display temperature and speed or display various prompts according to the status of the instrument; the upper line of the display shows the temperature, and the lower line shows the speed, which is the standard state at this time;
Heating light: After pressing the temperature button to turn on the temperature operation, the running light is on, and the heating light is on when there is heating output;
Alarm light: When the temperature of the Heating Plate exceeds the AP value, it is always on, the heating is turned off, the heating circuit is cut off, and the buzzer alarms;
Running light: flashes when performing self-tuning, and is always on when heating is turned on;
operation method
1. Screw the watch rod in the random accessories into the threaded hole in the upper right corner of the instrument, and fix the sensor bracket.
2. After placing the instrument stably, insert the plug of the temperature sensor and tighten the locking nut on it, and then connect the power cord.
3. Put the container containing the solution in the center of the workbench (black electric hob), and put a suitable stirrer in the container (cylindrical stirrer for flat-bottomed container, spindle-shaped stirrer for spherical container. The container should not be iron and It is made of magnetic-related materials, and the bottom thickness should not be greater than 10mm.), adjust the height of the temperature sensor so that it is about 10mm away from the bottom of the container. When the solution is small, insert it at least 10mm into the solution to ensure the correctness of temperature measurement.
4. Turn on the power switch on the left side of the instrument, the display digital tube and all display lights will be on, and enter the standard display state after a few seconds.
5. Speed key: Rotate once to enter and modify the speed setting value. Turn left to decrease, and right to increase. After setting, click to turn on the speed, and then click to turn off the speed.
6. Temperature key: Turn it once to enter and modify the temperature setting value, turn left to subtract, turn right to add. After setting, press the temperature button to start heating. At this time, the running light and heating light are on, and the set temperature is locked. Press the temperature button again to stop heating, and both the running light and heating light are off.
7. Timing time setting: long press the temperature button, LK prompt and the number "0", release and click. Press the temperature button for the first time, rT displays the time running value, OFF means no time setting, and it keeps running; press the temperature button for the second time, T2 displays the current temperature on the electric hob; press the temperature button for the third time, ST For timing time setting, you need to rotate the temperature key to set the time, and change the number from 0 to 9999. If the timing time is "0", it keeps running, and the running time is 1-9999 minutes; press the temperature key for the fourth time to exit the setting , into the standard state. The timing time starts when the set temperature is reached; when the set time is reached, the speed and heating are turned off at the same time. The set timing time is automatically zeroed every time the power is turned off or cut off.
8. Table temperature setting: Due to the particularity of the user's use, when the liquid temperature cannot be detected, the table temperature control can be used. The operation method is to unplug the sensor plug and automatically switch to the temperature sensor in the built-in countertop. The countertop temperature setting is the same as the liquid temperature setting.
9. Check the set speed: turn the speed key slightly, the number will display the original set speed, and rotate the speed key to change the original set speed.
10. Check the set temperature: Turn the temperature key slightly, the number will display the original set temperature, and rotate the temperature key to change the original set temperature.
11. Check how long the timing has elapsed: the operation is the same as 7.
Precautions
1. If the upper half of the digital tube displays "□□□□", it means that the sensor is open circuited, and if the lower half of the digital tube displays "□□□□", it means that the sensor is short-circuited, the buzzer sounds, and press any key to silence; if the above situation occurs Please check the sensor carefully, or replace the sensor.
2. When pressing the temperature key or speed key, it should be pressed at the center of the knob, and there should be no turning phenomenon, otherwise it will cause operation errors. during operation.
3. The power socket needs to be reliably grounded;
4. When the machine is in use, the liquid in the container should not be too full, so as not to overflow when stirring;
5. The temperature of the Heating Plate is very high when it is working, and the power cord and temperature sensor lead wire should be kept away from it, let alone touched;
6. It can be cleaned only after the power is cut off, and the stains on the display can be wiped with a soft cloth or tissue paper.
7. When using an Oil Bath, the temperature sensor must be inserted into the bottom of the Oil Bath container.
-
![SILE B13-3 intelligent constant temperature digital display timing magneticstirrer 5L/1400rpm]()
-
![CHIJIU SH05-3G Laboratory Magnetic Stirrer 10L/250 ℃]()
-
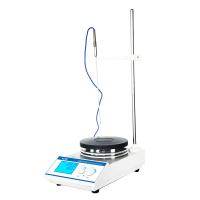
![SILE B15-3 intelligent constant temperature digital display timing magneticstirrer 10L/1500rpm]()
-
![CHIJIU SH21-2 thermostatic Magnetic Stirrer Aluminum Alloy, stirring capacity 10L]()
-
![CHIJIU 85-1C heating thermostatic Magnetic Stirrer Capacity 2000ml]()
-
![CHIJIU H01-3 thermostatic Magnetic Stirrer with a stirring capacity of 10000ml]()
-
![LEICI JB-12 Magnetic Stirrer]() LEICI JB-12 Magnetic Stirrer$ 148.00
LEICI JB-12 Magnetic Stirrer$ 148.00 -
![CHIJIU SH05-3T Electric Mantle Magnetic Stirrer 1000ml Stir]()


- 1Comparison and Application of Magnetic Stirring and Mechanical Stirring
- 2Application and Selection Guide of Electromagnetic Stirrer in Laboratory
- 3Describe 4 Common Stirrers in detail
- 4Principle and Application of Water Bath Magnetic Stirrer
- 5What is a mixer? Applications, advantages and disadvantages of mixers
- 6How to prepare polymer blended solid film materials?
- 7Agitators and their classification
裴梦琛 - 《西北大学》
- 8Testing Factors Affecting the Drying Properties of Plastic Water-based Gravure Ink with Agitator
- 9What are the characteristics of an overhead mixer?
-
![RONGHUA 85-2 Digital thermostatic magnetic heating Stirrer 300W/digital temperature control]()
-
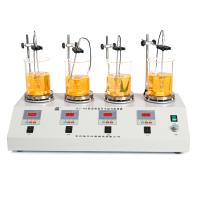
![RONGHUA HJ-4A digital thermostatic four head Magnetic Stirrer]()
-
![DaDi 85-2 digital temperature control magneticstirrer]()
-
![HUXI HMS-203D magneticstirrer]() HUXI HMS-203D magneticstirrer$ 251.00
HUXI HMS-203D magneticstirrer$ 251.00 -
![RONGHUA 78HW-1 thermostatic Magnetic Stirrer 200W/Electronic temperature control]()
-
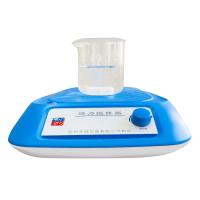
![Qiwei CL-R magneticstirrer 1000ml]() Qiwei CL-R magneticstirrer 1000ml$ 103.00
Qiwei CL-R magneticstirrer 1000ml$ 103.00