NGP5 Series Stationary Gas Detector
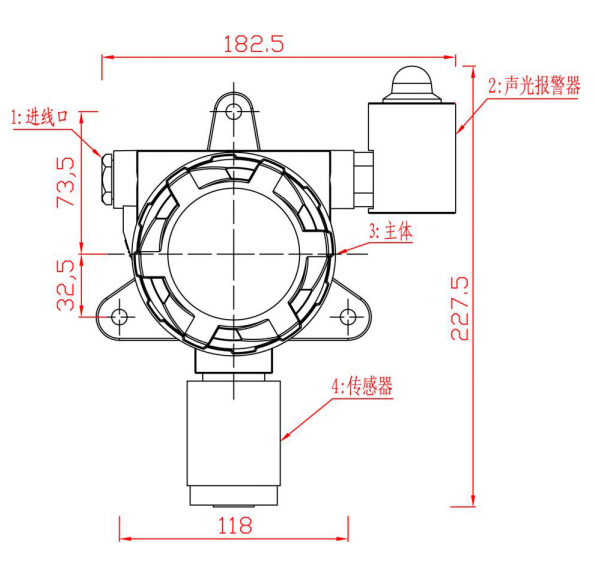
Dimensions and installation method
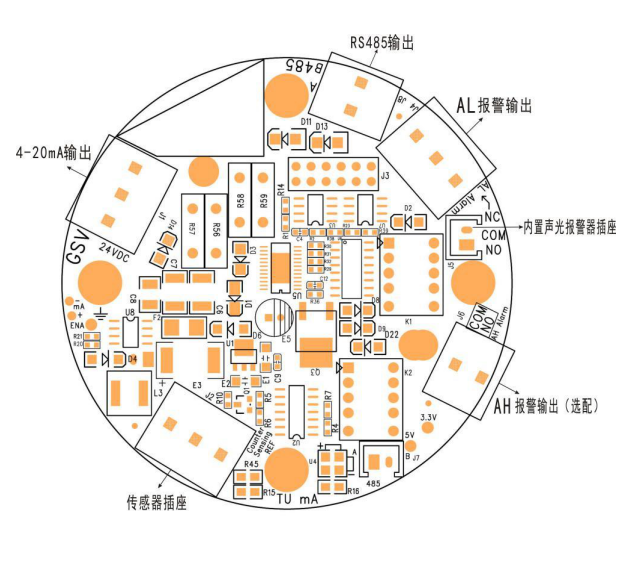
Product Alignment Map
Key definition and operation instructions
MENU/ESC key: menu key, return key. Enter and exit the menu, press once to mute the sound when alarming, after the sound is muted, press the ("MENU/ESC") key to cancel the mute state
OK key: confirmation key ← key: direction key, move the cursor to the left, and play the role of shifting when modifying the number → key: direction key, move the cursor to the right, function to adjust the size of the value and turn the page when modifying the value
Enter the menu setting: press the "MENU/ESC" key to enter the menu
Exit menu settings: press the "MENU/ESC" key to exit the menu
Quick zero point calibration: Press and hold the ← key for 5 seconds on the test interface, and the lower left corner of the calibration success screen will display "YES"
Quick target point calibration: Press and hold the → key for 5 seconds on the test interface, and "YES" will be displayed in the lower left corner of the screen if the calibration is successful
(The calibration is a primary concentration value, which requires gas to be calibrated successfully)
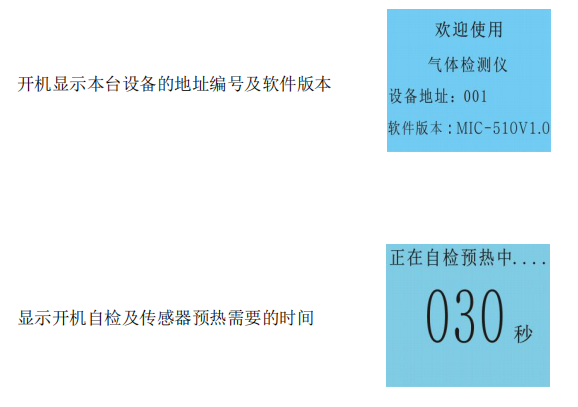
Boot Instructions

Menu Operation Instructions
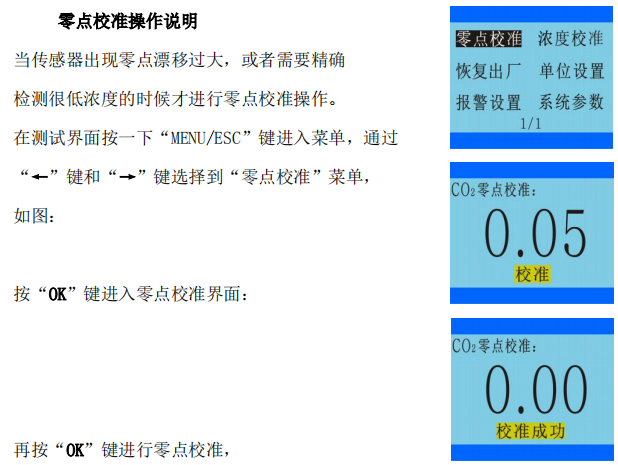

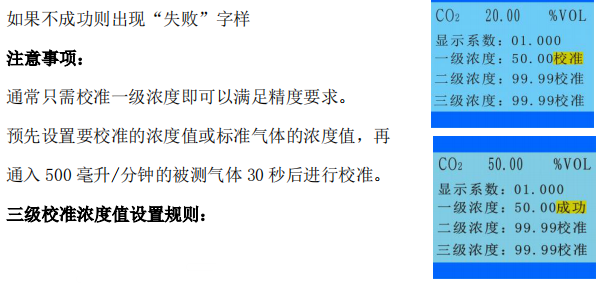
If the calibration is not successful, it will display: "Calibration failed"
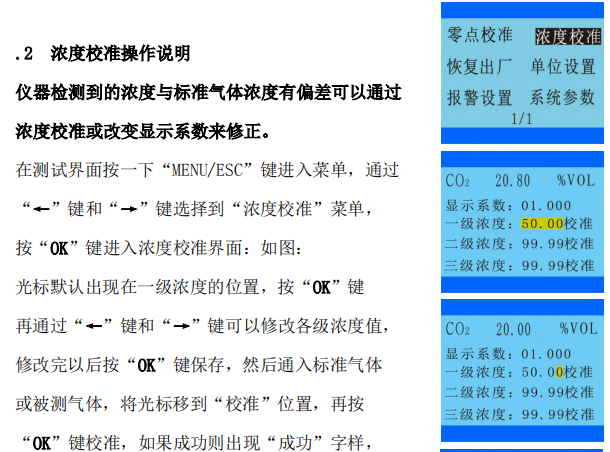
Level 1 concentration value < Level 2 concentration value < Level 3 concentration value
Three-level concentration calibration sequence:
Primary concentration calibration → secondary concentration calibration → tertiary concentration calibration
Factory reset instructions
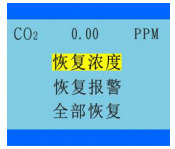
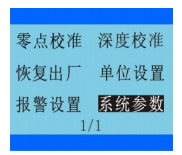
Press the "MENU/ESC" key on the test interface to enter the menu, select the "Restore Factory" menu through the "←" and "→" keys, and press the "OK" key to enter the factory reset interface: as shown in the figure: Optionally select "Restore Concentration", "Resume Alarm", "All Resume", and then press the "OK" button to restore, if the restoration is successful, the word "Success" will appear, and if it is not successful, the word "Failure" will appear.


When the setting is wrong or the test concentration is inaccurate, it is necessary to restore the factory
operation, if it is caused by human factors, it can be recovered,
The parameters that can be restored to the factory:
Zero calibration value, concentration calibration value, alarm value, alarm mode,
Alarm mode, maximum range
Operating Instructions for Unit Setting
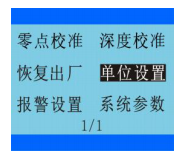
Press the "MENU/ESC" key on the test interface to enter the menu, and use the "←" and "→" keys to select the "Unit Setting" menu.
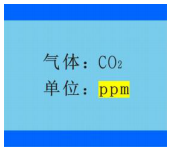
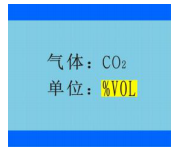
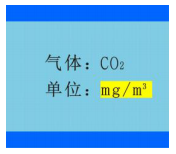
Press the "OK" key to enter the unit setting interface: as shown in the figure:
Press the "OK" button to switch the automatic conversion between each unit, the units that can be switched:
ppm, Vol%, LEL%, ppb, pphm,
mg/m3, mg/L
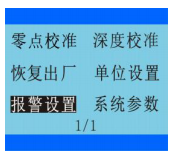
Alarm Setting Operation Instructions
在测试界面按一下“MENU/ESC”键进入菜单,通过“←”键和“→”键选择到“报警设置”菜单,
按“OK”键进入单位设置界面:如图:
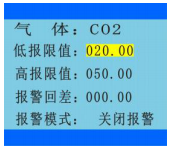
可以通过“OK”键和“←”键和“→”键进行修改。
气 体:显示的是当前通道的气体名称
低报限值:即一级报警值,可修改
高报限值:即二级报警值,可修改
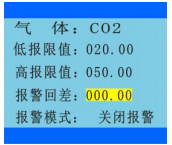
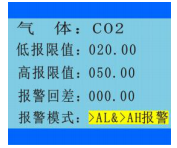
报警回差:即报警回程差,如果设置为 0,只要数值达到报警设定值就马上报警,若不想数值在报警设定值的临界点发生频繁报警,可以把报警回差设置一定的数值报警模式:O2 和 N2 默认设置为 <AL&>AH 报警
其它气体默认设置为 >AL&>AH 报警
可以修改或设置为“关闭报警”
报警方式:常规联动,数值大于 AH 报警值时,AL 也报警并联动继电器输出(默认设置) 常规独立,数值大于 AH 报警时 AL 不报警无联动继电器输出,只有 AH 有联动输出 O2 和 N2 默认设置为区间联动,可设区间独立

系统参数操作说明
在测试界面按一下“MENU/ESC”键进入菜单,通过“←”键和“→”键选择到“系统参数”菜单, 按“OK”键进入单位设置界面:如图:
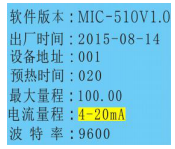
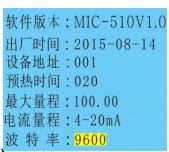
通过“OK”键和“←”键和“→”键进行修改。
软件版本:显示的是当前的软件版本
出厂时间:显示的是本台设备出厂的时间
设备地址:显示的是本台设备的地址编号,可According to需要进行修改为 1~255,进行 RS485 通讯 或连接电脑通讯时,要保证每台设备的 地址编号都不一致,支持跳号通讯预热时间:开机以后传感器需要的预热时间
最大量程:本台设备能检测的气体浓度最大量程, 不同的传感器有不同的最大量程,仪器出厂的时候已设置好,不需设置,如需修改请与厂家联系
电流量程:默认为 4-20mA 输出,可以According to需要设置为 0~20mA、0~24mA、4~24mA 。波特率: 默认为 9600,可以According to需要设置为 4800、19200、38400
常见故障及解决对策
故障 1:低浓度的时候检测不出来
解决对策:
1、如果是泵吸式测量,先检查泵是否工作,泵正常工作的时候有轻微的振动,并且用手指堵住进气口 5 秒钟可以感觉到有明显的吸力。然后再检查进气口是否被堵塞或连接处没有密封好导致漏气而无吸
2、通入氮气校准零点或在洁净空气中校准零点,校准完以后马上进行检测
3、校准零点以后还检测不出被测气体,需要进行恢复出厂设置操作
4、恢复出厂设置以后还检测不出来,需要再次通入氮气或在洁净空气中进行零
点校准操作,校准完以后马上进行检测
5、检查传感器的连接线有没有被人为损坏或接触不良
6、以上四个步骤都做了还是检测不出来,需要确认一下现场是否存在被测气体, 或者被测气体的浓度确实很低,如果低于仪器的最小检出限值就无法检测
故障 2:在空气中,没有被测气体,但是数值波动很大或乱跳
解决对策:
1、一般短时间零点波动范围小于最大量程的 1%属于正常范围,在没有被测气体的情况下长时间漂移小于最大量程的 2%属于正常范围,若超出此范围,需要确认现场是否存在被测气体,或空气中的温度和湿度波动较大,导致数值不稳,一般情况下温度和湿度波动大会造成仪器检测数值短时间波动较大,待空气中的温度和湿度恒定以后,数值也会相对比较稳定。
2、确认是否对仪器进行了零点校准或目标点校准操作,若在有被测气体的场合进行了零点校准操作就可能检测不出低浓度的气体,若在有被测气体的场合进行了目标点校准,但是校准的浓度值和实际浓度值不符,可能造成仪器数值波动很大或检测到的数值偏小,这 2 种情况都都进行恢复出厂操作就可以解决.
3、如果恢复出厂设置以后还无法解决问题,要确认检测仪的供电电源的功率是否足够,不要用变压器给仪器供电,更好采用直流稳压电源或开关电源供电,并且功率要大于 24V,1A(给单台设备供电),多台设备需要的功率更大,要注意电源线的线径不能太小,短距离给单台设备供电的线径更好大于 0.75 平方毫米。
4、检查信号传输线的走线,是否经过了大功率的风机、马达、变频器等会产生电磁场变化的地方,要尽量避开强电和电磁场区域,并且采用屏蔽线作为信号传输线,屏蔽层的一端接仪器的外壳,另一端要接大地,要保证接地良好。
5、如果还无法解决问题,需要确认是否通入了高浓度的气体或有高浓度的气体冲击了传感器,如果有冲击过传感器,将仪器上电老化 24 小时以后,数值还不稳就可能是传感器被冲击坏了。
故障三:检测不准确
解决对策:
1、确认现场的气体浓度是否准确,有时候理论值和实际值之间的差值很大, 更好通过通入标准气体来验证仪器的准确性,或送第三方计量机构检测。
2、若传感器使用的时间较长,测量值可能会有一些误差,需要先和厂家确认传感器是否还可以再继续使用,若传感器本身已经快接近使用寿命了,即使标定完当时可以正常使用,但是过不了多久又不能正常使用了,建议更换传。
故障四:数值为 0 的时候或在空气中没有达到报警值也报警
解决对策:
1、检查报警值是否被修改了
2、检查报警方式、报警模式是否被修改了
3、检查报警状态是浓度报警还是故障报警,浓度报警会出现 AL 或 AH 字样,并 且红色指示灯会闪烁,故障报警会亮
4、如果是人为修改导致的报警可以通过恢复出厂设置来解决,故障报警需要进 一步检查是否短路、断路,接触不良,传感器故障等,或寄回厂家
故障五:无法和电脑通讯
解决对策:
1、检查设备地址,通讯软件里设置的地址需要和仪器的设备地址一致
2、检查 RS485/RS232 转换器的接线,一般 TR+ 连 RS485 的 A 端子,TR- 连 RS485的 B 端子,同时在电脑的 硬件-设备管理器-端口 检查 RS485/RS232 转换器对应的串口是否连接上。对于 USB 接口的设备,也是要检测串口是否连上。
3、检查上位机软件或仪器的设备地址是否有重复的地址编号,不能有重号。
设备维护
检测仪在正常的使用中,大部分传感器的有效使用寿命为 24-36 个月。在有效使用寿命期内,每 6 个月或 1 年要定期对传感器进行一次标定检查,进而保证气体检测功能的准确有效。超过有效使用期的和有故障的传感器需要进行更换。
传感器更换
在传感器出现故障后,请将仪器寄回厂家更换并重新校准。
传感器标定
See Chapter 9, 9.1 and 9.2 for details. Do not operate without standard gas ready. when
In case of misuse, you need to restore the factory settings through the operations in Chapter 9.3
Precautions
It is strictly forbidden to open the cover with power on
Do not replace the sensor with power on
Operations such as installation, commissioning, and settings must be performed by professionals
The calibration check of the Detector should be carried out regularly
Sensors that have expired or are faulty should be replaced in time
Avoid impinging the sensor with a gas higher than the measurement range
- 1Principle and Application Analysis of Composite Four-in-One Gas Detector
- 2Introduction to Working Principle and Application of Carbon Monoxide Gas Detector
- 3Basic Principle and Application of Portable Gas Detector
- 4Basic Principle and Application Analysis of Gas Detector
- 5What is the alarm value of Gas Detector?
- 6What is phosphating Gas Detector?
- 7What is a combustion analyzer?
- 8Application Scheme of Gas Detector in Coking Coal Metallurgy Industry
保时安 - 《保时安》
- 9Application of Gas Detector in Medical Manufacturing
保时安 - 《保时安》