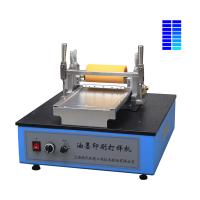
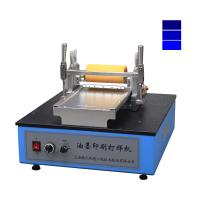
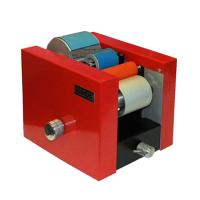
RYDJ Printing Proofing Machine (Flexo Printing) Instruction Manual
I. Overview:
Printing proofing machine is also called ink printing verification machine. RYDJ type printing and proofing machine (flexo printing) can quickly produce flexo printing ink or water-based liquid ink printing proofs under laboratory conditions, and is often used in the production of laboratory printing proofs, the inspection of ink printing suitability and the research and development of ink products. This machine adopts planar engraving gravure transfer printing method, which is suitable for rapid proofing on various flexible substrates (such as cardboard, film, etc.), and is easy to operate. This machine provides a special gravure proofing plate at random.
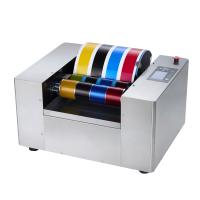
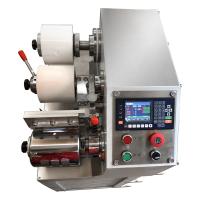
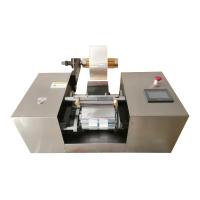
The company also has an AYDJ type printing proofing machine (gravure printing), which adopts the direct printing method of plane engraving gravure, which is available for users to choose.
2. Main technical parameters:
1. Power supply: 220V 50Hz
2. Proofing speed: 20/30/40/45 m/min (four gears are optional)
3. Concave sample range: 95×149 mm
4. Random gravure: 150 lines/inch (A, B, C, D four types are optional)
5. Proof specification: 120×240 mm (recommended)
6. Dimensions: 500×400×350mm
7. Machine weight: 27 kg
3. Operation summary:
1. Put the proofing machine on a stable and flat test bench, with the switch panel in front.
2. Install the gravure proofing plate: place the side with standard printing on the far end, and align the non-printing side with the front of the proofing plate installation table, and properly tighten the compression screws.
3. Loosen the clamping handle and lift up the proofing mobile frame. Install the squeegee on the squeegee holder, and fasten the screw after leaning against the positioning pin (the squeegee is attached in the instruction manual packaging bag). Tilt the scraper frame back about 45 degrees, and properly tighten the compression screw of the scraper frame.
4. Push the proofing mobile frame back to the end. Adjust the metal roller adjuster backward properly (loosen the locking ring at the bottom before adjustment), so that the metal roller does not contact the rubber roller. Also adjust the scraper adjuster and rubber roller adjuster upward properly, and confirm that the scraper and rubber roller will not contact the proofing plate when the proofing mobile frame is lowered and the clamping handle is locked.
5. Put down the proofing mobile frame and lock the clamping handle. Adjust the rubber roller adjuster downward (loosen the locking ring at the bottom before adjustment, and then lock it after adjustment), so that there is an appropriate pressure between the rubber roller and the proofing plate (the pressing film will not be easily pulled out). Usually at the beginning, touch the rubber roller parallel to the proofing plate and then increase the scale of the spiral micrometer clockwise by about 1~2 circles. After the trial printing, make appropriate adjustments according to the leveling situation.
6. Adjust the scraper adjuster downward (loosen the locking ring at the bottom before adjustment, and then lock it after adjustment), so that there is a suitable pressure between the scraper and the proofing plate (can scrape off the remaining ink in the non-concave part can be). Usually, at the beginning, touch the ink scraper in parallel with the proofing plate, and then increase the scale of the spiral micrometer clockwise by about 1 to 2 circles. After the trial printing, make appropriate adjustments depending on the ink scraping situation.
7. Loosen the clamping handle and tighten the paper pressing handle. Adjust the metal roller adjuster forward (loosen the locking ring at the bottom before adjustment, and then lock it after adjustment), so that there is an appropriate pressure between the metal roller and the rubber roller (it will not be easily pulled out after pressing the sample) . Usually, at the beginning, touch the metal roller and the rubber roller in parallel, and then increase the scale of the spiral micrometer clockwise by about 1~2 circles. After the trial printing, make appropriate adjustments depending on the transfer situation.
8. Loosen the clamping handle and paper pressing handle, and confirm that the proofing mobile frame has moved back enough, and the "proofing/manual/reset" knob is in the "manual" position (middle position). Connect the power and turn on the power switch. First select the "1" gear speed (20 m/min), turn the "proofing/manual/reset" knob to the "proofing" gear, and confirm that the proofing mobile frame slides smoothly. After reset, select the appropriate proofing speed (usually you can choose "3" gear at the beginning, 40m/min), if the leveling is not satisfactory after trial printing, you can properly reduce the proofing speed.
9. Proofing operation: Paste a flexible substrate sample of appropriate width and length (cardboard, film, etc., 120×240 mm size is recommended) on the metal roller with transparent tape (just paste the end that enters in the direction). Turn the paste end to the appropriate starting position (approximately near the connecting rod on the rear side of the proofing mobile frame), tighten the paper pressing handle, lock the clamping handle, and put an appropriate amount of ink on the proofing plate near the scraper (concave sample At the beginning, it is advisable to be close to the width of the concave sample and not exceed it). Turn the "proofing/manual/reset" knob to the "proofing" position, and the proofing mobile frame will quickly complete the proofing movement from back to front at the selected speed.
10. Loosen the clamping handle and paper pressing handle, and take off the sample sheet. Lift the proofing mobile rack and select the "reset" file to make it back to the end (the reset speed has been adjusted before leaving the factory). Use a soft cloth with a solvent or cleaning agent to quickly wipe off the residual ink on the scraper, proofing plate, rubber roller and metal roller for the next proofing operation. During the scrubbing process, the "proofing/manual/reset" knob can be placed in the "manual" position (middle position), so that the proofing mobile frame can be moved back and forth at will, which is convenient for scrubbing operations. After scrubbing, reset the proofing mobile frame.
11. Observe the printing effect of the proof sheet, and make appropriate adjustments to the ink or instrument depending on the proofing situation.
4. Matters needing attention:
1. This machine is used for the test process of chemical raw materials. Users should establish appropriate safety and health protection measures and determine rules and regulations according to relevant safety regulations before use. Safety issues related to contact with chemical raw materials should be established by the user and are not within the scope of this manual.
2. If there is a protective paper on the proofing plate when using it for the first time, please remove it.
3. When moving the proofing mobile frame forward with no load, please do not select the "4" gear (45 m/s) for the proofing speed.
4. Lubricate the sliding guide rail at the lower part of the proofing plate mounting table in due course.
5. Every time a proofing operation is completed, it is necessary to promptly and effectively clean the residual ink on the proofing plate to avoid "paste board". Before proofing, confirm that there is no residue in the concave part.
6. Every time a proofing operation is completed, it is also necessary to clean the rubber rollers in time, and confirm that there is no residue on the rubber rollers before proofing.
7. The proofing plate, ink scraper, rubber roller and metal roller play an important role in the proofing effect. During use, bumps and scratches should be avoided, and cleaning and maintenance should be done in a timely manner.
8. If you want to manually move the proofing mobile rack during use, please set the "proofing/manual/reset" knob to the center. If the "proofing" file is selected, the proofing mobile frame will move forward rapidly at the selected speed. If the "reset" file is selected, the proofing mobile frame will fall backward at a preset speed. The retraction speed has been preset before leaving the factory and usually does not need to be adjusted (it can be adjusted through the small opening at the bottom of the machine).
- 1Lithography, letterpress plate, flexographic, gravure printing
- 2What is pulsed jet printing and what are the advantages and disadvantages?
- 3What is inkjet printing?
- 4What are the printing substrates and printing inks?
- 5How are printing plates made?
- 6Historical Development of Aniline and Flexographic Printing Processes
- 7What is screen printing?
- 8Influence and Advantages of Scraper Cavity System on Flexographic Printing
- 9The Importance of Correct Installation of Scraper Blades for Flexographic Printing