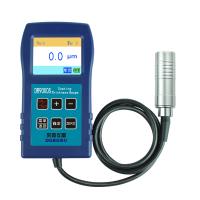
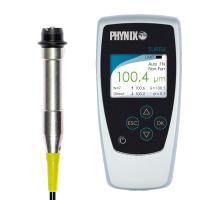
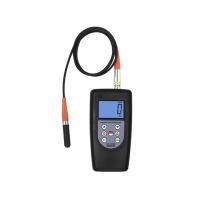
Germany PHYNIX Coating Thickness Gauge FAQ set

1) Which substrate should be measured?
Steel and iron using a coating Thickness Gauge marked "F" (iron), such as Surfix® F. All non-magnetic coatings can also be measured, such as paint, enamel, plastic, zinc, brass, chrome, etc.
For non-ferrous metals, such as aluminum, brass, zinc die-casting, etc., use a coating Thickness Gauge marked "N" (non-ferrous), e.g., Surfix® N. All electrically insulating coatings can also be measured, such as paint enamel, plastics, anodized coatings, etc.
PHYNIX Combination Thickness Gauge instruments are marked "FN", eg Surfix® FN are available for both applications. They automatically identify the substrate and measure the correct coating thickness
2) Do you want to measure the coating on small parts such as wires, washers, nuts, screw heads etc.?
Measurements on small parts are required to observe precise probe positioning on the test object in order to obtain the accuracy achieved through calibration. However, in many cases this cannot be produced manually. Using our probe guides, the probe can be adequately positioned on small components, thereby maintaining the measurement accuracy of the instrument.
3) When is the Thickness Gauge used with the built-in probe or the probe alone?
Coating Thickness Gauge with integrated probe is suitable for fast measurement of large area objects, such as car bodies, boat hulls, panels, washing machines, pipes, etc., thanks to one-handed operation.
Meters with separate probes are available for large surface objects as well as small components. Separate probes are also better suited for measurements in inaccessible locations. Our probe guides are the perfect tool for our individual probes to measure very small parts such as screw heads, washers, nuts, etc. using individual probes.
4) What is the measurement range of the instrument?
An instrument with a corresponding measurement range should be selected according to the coating thickness to be measured.
Note: If you want to measure a very thin thickness, such as 50μm, then you should choose a probe and meter with a small measuring range. Instruments with a measuring range greater than 1,500 μm will produce inaccurate readings when used to measure thin coatings.
5) Is there a need for a statistical evaluation of the measurements?
The importance of a statistical evaluation of the measured values for a good quality assessment cannot be overstated:
Number of measured values
average value
standard deviation
Maximum and minimum measuring range
Surfix® Sbasic and Surfix®basic do not have statistical evaluation functions.
6) Is there an interface to transfer the measured values to a printer or computer where the required measured values can be stored?
Instruments need to be able to store measured values and have an interface to record them on a printer or computer.
All Surfix® ProS, Surfix® S, Surfix® and Pocket-Surfix® have data memory and an infrared interface for wireless data transfer (see "Overview Sheet" and "Technical Specifications" for each instrument).
Surfix® Sbasic and Surfix® Basic do not provide data memory and computer interface.
7) Is software required for data transfer, but also for statistical evaluation of measured values and graphical representation of trends and frequencies to a computer?
There are two different broad software versions:
● Data transfer programs for FixSoft, SurfixPro®S, Surfix®S, Surfix® and PocketSurfix®.
Measured values are transferred together with histogram and trend representation in precompiled templates in Microsoft Excel. Specific customer data can also be added later. Such as date, batch details, company name and personnel testing etc. Templates can be changed by users with knowledge of Excel
● ProSoft, an English-language user-friendly data transfer program for SurfixPro®S.
ProSoft is a database program for data management and administration. It is able to manage all measurement sets or individual sets stored in SurfixPro®. Any number of measurement sets can be transferred depending on the size of the computer. The individual measurement sets are displayed as selection lists. The selected files are displayed in a separate window. Displays the measured values of a single measurement set along with their statistics, limit values and offset values. Histograms are presented with measured values within a range of +/- 3 standard deviations. Trend graphs show all measured values relative to the mean. Measurements can be displayed in μm or mils. The original data remains unchanged.
A free demo version of ProSoft is available for download.
8) Is it ok to take measurements inside the pipe or in places that are difficult to access, such as grooves or grooves?
For measurements in pipes or grooves you can use the Surfix® ProS or Surfix® S gauge with the probe probe FN 1,5 / 90°. This special probe enables measurements on tubes with an inner diameter greater than 13 mm. Can measure the gap width from the bottom of the groove to 8mm.
After removing the black accessory feet of the standard probe, you can measure a gap width of 5 mm within the recessed base.
9) Is it possible to perform measurements on high temperature surfaces up to 300°C?
Surface coating thickness measurements can be performed at temperatures up to 300°C, depending on the accessory feet of the Surfix® ProS, Surfix® S and Surfix® standard probes. Probe contact on hot surfaces should not exceed 5 seconds. The probe needs to be cooled down before the next measurement, eg by placing the probe on a cool surface.
The standard probes (measuring range: 0~1500μm) of the above instruments can withstand temperatures up to 100°C.
The standard probe can withstand temperatures up to 150°C, temperature resistant beige accessory feet (optional) a' replace the black accessory feet by screw connection.
Standard probes can withstand temperatures up to 300°C and are equipped with special high temperature resistant connection feet. This reduces the measuring range to 0 ... 1,100 μm and can be easily used by replacing the black accessory feet.
10) Is it possible to measure the coating thickness continuously without lifting the probe?
When measuring over large areas, it is often necessary to detect thickness differences quickly. In doing so, the probe scans the surface without having to be lifted after each measurement . The Surfix® ProS has a "continuous mode" and acquires measurements with a maximum measurement rate of 180 measurements per minute. It stores these values, evaluates them statistically and transmits them (wirelessly) to the PC when required.
- 1Nondestructive measurement Coating thickness
- 2Principle, application and selection of traffic coatings Coating Thickness Gauge
- 3Principle, Application and Selection of Eddy current Coating Thickness Gauge
- 4Principle, Application and Type Selection of Electronic Coating Thickness Gauge
- 5Explore the principle, application and selection of phosphating layer Coating Thickness Gauge
- 6Principle, Application and Type Selection Analysis of Chrome Coating Thickness Gauge
- 7Principle, Application and Selection of Coating Thickness Gauge for inner wall of small pipe
- 8Basic principle and application scenario of steel Coating Thickness Gauge
- 9Principle and Application Analysis of Coating Thickness Gauge


