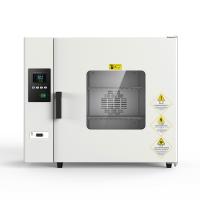
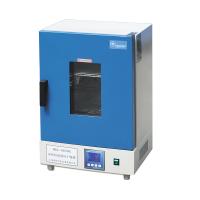
Use steps of Pushen horizontal 90 series Drying Oven
1.Put the items to be dried into the drying box, keep a certain space around the upper and lower sides, keep the air flow in the working room unobstructed, and close the box door.
2.According to the degree of humidity of different items, choose different drying times. If the items to be dried are relatively wet, you can open the damper to let the humid air in the box out.

3.Instrument operation method:
A: Turn on the power and wait for about 18 seconds until the upper and lower digital display positions of the list panel all display values.
1. How to change the set value: Press the SET button, the upper row displays SP, press the AT or TIME button, adjust the lower row value to the temperature value you need, and then press the SET button, the upper row displays ST, press AT or TIME button TIME button, adjust the value in the lower row to the timing time you need, and then press the SET button. At this time, the upper row shows the actual temperature in the cabinet, and the lower row shows the temperature you set. The oven automatically heats and keeps the temperature.
2. Timing function: When ST is set to O, the meter cancels the timing function. When ST is not set to O, the meter has a timing function (unit: minute). After the measured temperature reaches the set temperature, the timing function starts timing. When the timer is running, press the TIME button for two seconds to observe the remaining time. When the timer ends, the buzzer will sound 4 times to remind and stop heating.
3. Correction temperature: Since the product has been strictly tested before leaving the factory, it is generally not necessary to make corrections. However, when the product is used for the first time or the product is used in a bad environment or the temperature range of the temperature control is changed before and after, it will cause an error between the temperature display value and the actual value in the box. If it exceeds the technical index range, the specific correction steps are as follows: press the function key SET key 4 Seconds later, the silver screen displays AL, then click the SET button, find LK in the B menu, press the AT or TIME button to make the lower row display 18, then click the SET button, find PK in the B menu, and use the plus TIME button to subtract AT key to modify parameters. By analogy, until the actual temperature in the oven is consistent with the displayed temperature, press the SET key for more than 4 seconds to return to the standard mode.
B: Wiring


- 1Principle, application and selection of vertical Electric Forced Air Drying Oven
- 2Principle, application and selection of pigment Drying Oven
- 3Principle, application and selection of electric heating air Drying Oven
- 4Principle, application and selection of vacuum electric Drying Oven
- 5Principle, application and selection of nitro paint Drying Oven
- 6Principle, application and selection of industrial hot air circulation Drying Oven
- 7Principle, application and selection of Drying Oven with timed blast
- 8Principle, application and selection of small Drying Oven
- 9Working principle and application analysis of pointer Electric Forced Air Drying Oven