How to operate the vacuum Drying Oven to have a longer service life after debugging?
What to do after debugging:
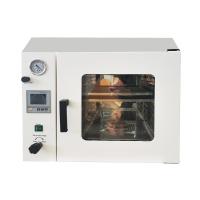
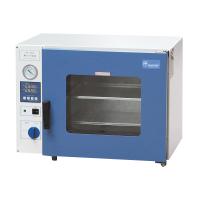
Turn on the power of the vacuum box, and the power indicator light should be on at this time (the 6090 and 6210 models should turn on the switch of the temperature controller respectively). . The lights such as AT and HEAT on the temperature controller should be on, indicating that the meter has entered the working state of heating.
Modify the set temperature
Press the function key (SET) of the temperature controller; after the PV screen displays the SP character, you can use the key button to modify the set temperature (for 6090 and 6210, the 2 and 3 instruments should be set and modified separately, the following are similar) .
After the modification, press the SET button again, the PV screen will display the ST character, and set the timing time. If the timing function is not used, set ST=0. Press the SET button again to make the PV screen display the temperature of the studio, SV The screen will display the new set temperature. The AT and HEAT lights of the meter are on, and the meter re-enters the heating working state. When the temperature in the working room is close to the set temperature, the HEAT light flickers on and off, indicating that the heating enters the PID adjustment stage. Sometimes the measured temperature of the meter exceeds the set temperature. Sometimes lower than the set temperature is normal. When the measured temperature is close to or equal to the set temperature, wait for 1~2 hours and then the working room enters the constant temperature state, and the items enter the drying stage. When the required temperature is low, the secondary setting method can be used, such as the required working temperature is 70°C , set 60°C for the first time, and then set 70°C for the second time after the temperature overshoot begins to fall, so as to reduce or even eliminate the temperature overshoot phenomenon, and enter the constant temperature state as soon as possible.
There is no explosion-proof and anti-corrosion treatment in the working room of the vacuum drying box, and items that are flammable, explosive, and corrosive gases are not allowed to be dried. The Vacuum Pump cannot work for a long time, so when the vacuum degree meets the requirements for drying items, it should be closed first Turn off the vacuum valve, and then turn off the power of the Vacuum Pump. When the vacuum degree is lower than the requirements of the dry goods, turn on the vacuum valve and the power of the Vacuum Pump to continue vacuuming, which can prolong the service life of the Vacuum Pump.
If the dry item is wet, it is better to add a filter between the vacuum drying box and the Vacuum Pump to prevent the wet gas from entering the Vacuum Pump and causing the Vacuum Pump to malfunction. A barrier net should be added to the vacuum port in the working room to prevent the Vacuum Pump (or solenoid valve) from being damaged by the inhalation of dry matter. Adjust the protruding distance of the door buckle on the box to solve it. When the drying temperature of the vacuum Drying Oven is higher than 200°C, slow air leakage will occur. At this time, remove the back cover of the box and use the hexagonal wrench to loosen the heater base, replace the sealing ring or tighten the heater base to solve the problem.


- 1How to calibrate Vacuum oven?
- 2Principle, application and selection of vertical Electric Forced Air Drying Oven
- 3Principle, application and selection of pigment Drying Oven
- 4Principle, application and selection of electric heating air Drying Oven
- 5Principle, application and selection of vacuum electric Drying Oven
- 6Principle, application and selection of nitro paint Drying Oven
- 7Principle, application and selection of industrial hot air circulation Drying Oven
- 8Principle, application and selection of small Drying Oven
- 9Principle and Application of Electrothermal Vacuum oven