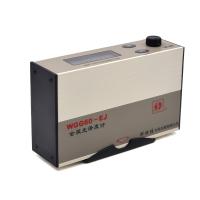
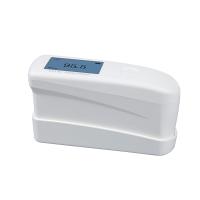
Junnengda WGG60-E4 single angle gloss meter specific operation method
Junengda WGG60-E4 gloss meter is a gloss measuring instrument designed and manufactured with reference to the international standard ISO 2813 and the Chinese national standard GB/T9754. The technical parameters also comply with ASTM D2457, ASTM D523 and GB/T13891 , GB/T7706, GB /T8807 standard.
Steps
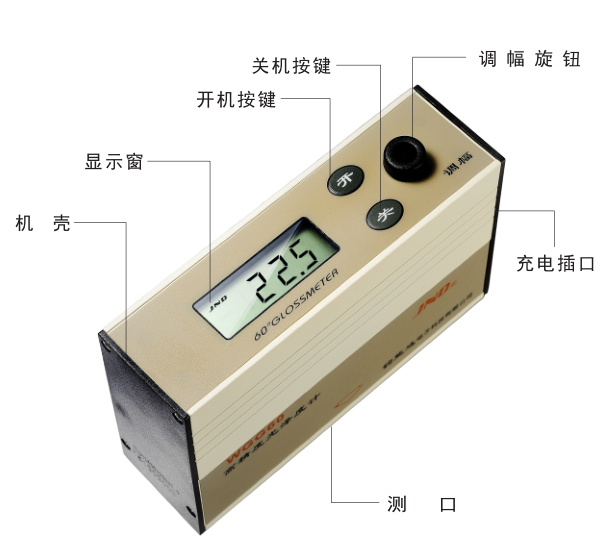
1) Turn on and off
Press and hold (about 2 seconds) the "on" button to turn it on; press the "off" button to turn it off.
2) Tuning
Turn on the power, take off the dust cover, and place the measuring port on the calibration working board (black glass). After about half a minute, adjust the "adjustment" button so that the displayed value is equal to the test value of the black working board.
☆The measuring port of the instrument needs to be buckled into the positioning frame of the working board, so that the adjusted indication value is valid.
☆The instrument needs to be adjusted every time it is turned on.
3) Measure
Put the measuring port of the instrument at the measured position, the value displayed by the instrument is the gloss , and the unit is "gloss unit" (English abbreviation: GU)
☆If the power-on time is long, the instrument should be re-calibrated to avoid affecting the measurement accuracy.
4) Verify
After the instrument has been used for a period of time, or when there is doubt about the measured value, the instrument can be calibrated.
Methods as below:
Adjust the instrument according to the adjustment steps, and place the measuring port on the calibration work plate attached to the machine. The instrument shows that the difference between the actual gloss value of the calibration work plate and its marked value should not be greater than 1 gloss unit. If it is out of tolerance, it is recommended to send the entire set of instruments to the relevant unit or our factory for verification , and to re-assign the value.
☆ The measuring port of the instrument needs to be buckled into the positioning frame of the working plate box, and then the calibration will be valid.
Operation precautions
● During the operation, the measuring port of the instrument, the surface of the working plate and the surface of the object to be tested should be kept clean. Otherwise it will cause measurement error and inaccurate calibration. If there is dust or smudges on the surface, please wipe it off with a lens cloth dipped in absolute ethanol.
● The plane of the measuring port is the measurement basis, and no foreign matter should be attached, otherwise it will affect the measurement accuracy of the instrument.
● Calibration and measurement or calibration operations should be performed at the same ambient temperature. Otherwise, too large ambient temperature difference will lead to numerical deviation.
● During use, avoid strong light directly illuminating the instrument to prevent external light interference from affecting the accuracy of the measured value.
● After the battery power exhaustion warning sign appears, if you continue to use the instrument, the measurement will be inaccurate. At this time, the battery should be charged in time.
charging method
1) Internal battery power supply method
Just turn on the instrument switch directly. (Refer to "Switching on and off" in "Operating Steps")
■ Emergency power supply method
Once the internal battery is exhausted and the instrument is urgently needed, the instrument can be used while charging the internal battery. After use, you should continue to charge the battery.
■ Undervoltage warning sign
The internal battery is about to run out, and the instrument will automatically display a warning sign.
▲ Undervoltage warning sign:
The warning symbol is displayed on the left side of the instrument display window as shown in the right figure.
2) How to charge the internal battery
▲ Turn off the switch of the instrument, and plug in the connection between the instrument and the charger. Plug the charger into the mains AC socket, the indicator light of the charger is on, and the charging starts.
▲ This charger is a constant current type, and it should be charged for 14 to 16 hours for a battery that has been exhausted.
Notice:
☆ It is recommended to adopt the battery charging and discharging system of "full charge and full discharge"; that is, to charge the battery only when the instrument has an undervoltage warning sign to prolong the battery life!
☆ Please pay attention to the timing when charging, in case the battery is overcharged and causes premature damage to the battery! When charging is complete, the charger should be removed from the AC power outlet.
☆ It is strictly forbidden to use non-supporting chargers for charging, so as not to damage the instrument or cause danger!
-
![KSJ WGG60-E4 Gloss meter built-in lithium battery]()
-
![Junengda WGG60-E4 Glossiness Meter]() Junengda WGG60-E4 Glossiness Meter$ 243.00
Junengda WGG60-E4 Glossiness Meter$ 243.00

- 1Principle and Application of Glossiness Tester
- 2Working Principle and Application of Metal Gloss Meter
- 3Basic principle and application analysis of insulating paint gloss Detector
- 4Working principle and application analysis of film Glossmeter
- 5Principle and application analysis of microporous gloss meter
- 6 FZ/T 01097 Analysis of fabric gloss test method
- 7Evaluation and Application of Optical Properties of Powder coatings
- 8Coating coatings - Determination of surface gloss and Gloss meter
- 9The Importance and Method of Gloss Measurement of Paint Film