Frequently Asked Questions in Microhardness Testing
The problems inherent in microhardness testing are accuracy, repeatability and correlation. However, testing error and variability can be better reduced by using properly maintained and calibrated equipment, trained personnel, and an appropriate testing environment.
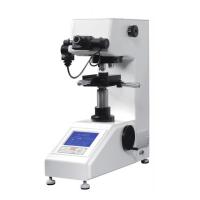
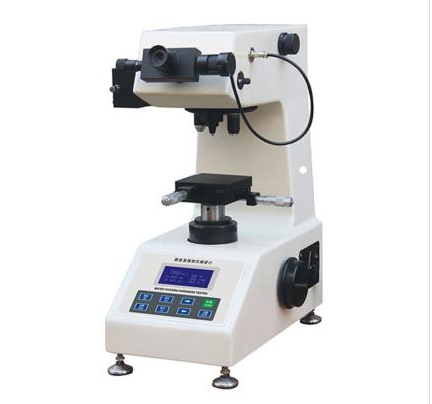
Wide range of Vickers and Knoop Testers. They are found everywhere from research labs to quality control labs. Locating them in sheltered environments (ie laboratories and workshops) usually ensures a long service life.
These hardness testing methods are valuable tools for determining "shallow hardness" such as surface hardness, coating hardness and surface depth. Additionally, selective testing of specific grains or components cannot be performed without these tests.
Most Vickers and Knoop Testers are very accurate in applying test force as well as measuring distance. However, when most people think of microhardness testing, three terms often come to mind: finicky, subjective, and time-consuming.
That being said, in most cases all three of these negative connotations are warranted for several reasons. But advances in computer technology have reduced, if not eliminated, these unflattering adjectives. MicroHardness Testers are delicate instruments. Very light forces (typically 10 –1,000 grams) need to be applied accurately, and the resulting indentations (some as small as 10 microns) need to be measured precisely at high magnification. There are many problems inherent in these stringent requirements.
three basic questions
Generally, microhardness testing problems can be grouped into three categories - accuracy, repeatability and correlation - and can be traced back to five main causes - machine, operator, environment, sample preparation and calibration. Before discussing why, it's important to define the problem:
Accuracy—The ability of the instrument to read in a linear fashion on a recognized hardness standard (certified test block), and the ability to transfer this accuracy to the test sample.
Repeatability - A measure of how well an instrument can replicate its results on a recognized hardness standard.
Correlation - the ability of an instrument to produce results similar to those produced by another "properly calibrated" instrument; or the ability of two operators using the same machine to measure the same impression and obtain similar results.
With an understanding of these problems, we can better understand their causes. Although there are really only five main reasons, each question contains many problems, and the common ones are discussed here.
machine
MicroHardness Testers use their own weight to generate force. Unlike Rockwell Hardness Testers, these light-duty devices (10-2,000 gf) stack their own weight directly on the indenter. This eliminates errors in magnification as well as many other negative factors such as knife edges and hanging weights. Other units utilize screw drives to apply force and load cells to control the applied force. These types have their own set of repeatability and durability issues.
Typically, these force application systems are robust. However, problems with ram travel can create false loads. On most machines, there are two speeds for applying the load: "fast" to bring the indenter close to the test piece, and "slow" to contact the workpiece and apply the load. The "stroke" of the indenter is usually set with a measuring device. Once the "indenter to test surface distance" distance is set, the high power objective lens is focused on the test surface.
Now, once properly focused, the operator can be assured that he is reaching the workpiece at the proper speed and that load shocks do not occur. Considering the ASTM E384 standard dwell time of 15 seconds, the instrument takes approximately 30 seconds to generate an impression. This is part of the "slowness" problem mentioned earlier.
When measuring case depth or simply trying to accurately place a stamper in a specific location, the importance of indenter to target alignment cannot be overemphasized. Although the accuracy of the hardness value is not affected by this error, if the operator is measuring the effective case depth, the distance from the edge of the sample may be incorrect and ultimately lead to erroneous measurements. Likewise, if the operator is trying to imprint on a specific grain or on the center of a thin coating, misalignment can make finishing difficult, if not impossible. Often, hitting the indenter or objective with the sample will cause this misalignment, so care needs to be taken when loading the sample or rotating the turret.
operator
No other aspect of hardness testing is as influenced by the operator as microhardness. While this is true for both the Vickers and Knoop tests, Knoop, with its nice, seemingly endless tricks, is the most vulnerable.
Often, the operator's ability to accurately and repeatably address the purpose of these impressions is often the cause of the error. It is indeed rare to have two operators fully agree when measuring the same impression. This problem is often masked by users authenticating their machines on a daily basis. Here, the operator can take the time to measure these indentations on test blocks of known hardness, where the test surface is usually in good condition. There are two operative terms here: "take time" and "know hardness". In a production environment, operators are sometimes in a hurry to run tests and get parts out the door. Not all measures to ensure the correct result of the hardness scale can be found. in addition,
Usually the operator mentally knows the correct size for the impression, and when he goes to measure the impression, he "sees" the value. This is human nature. Proper focus is a key factor for accurate results. As the blur increases, the perceived image size also increases. Consistency in focus will help improve consistency of results. Make sure that the surface of the sample and not the bottom of the indentation is the plane of focus. Most automated systems have some means of auto-focusing that virtually eliminates this concern.
Recording results and converting them from microns to Vickers or Knoop hardness numbers is another common source of error. A measurement of 32.3 microns could easily become 33.2 microns. We are all done. When calling the number we just get the wrong person, but when converting the hardness value you get the wrong hardness value!
Digital microHardness Testers that utilize conventional encoders for measurement can eliminate this situation. However, they couldn't find the end of the impression. To help eliminate these problems, a camera can be fitted to virtually any microHardness Tester, as well as to most "vintage" models that are still in operation on a daily basis. These cameras transmit images to a computer, which allows the operator to view the images on the computer's monitor. Here, Vickers and Knoop indentations can be measured manually by clicking the mouse on the corners of the indentation, or in more sophisticated software, the computer will perform a sort of gray scale to automatically determine the tip of the indentation, and Displays the hardness value, converted to a scale (HRC, etc.), usually the average diagonal. The enhanced magnification provided by the camera and monitor allows the operator to more accurately resolve indentation cues. Also, viewing impressions on a monitor is much more comfortable and relaxing than squinting through an eyepiece, reducing operator fatigue.
Various levels of complexity are provided, depending on the amount and type of research conducted. Most basic forms offer the ability to manually 'click' the indentation tip and the computer will display the hardness value and in many cases the converted secondary hardness value (ie HRC). These basic systems drive various levels of complexity and automation.
The NEWAGE CAMS (Computer Aided Testing System) is a modular system that can grow from a basic "click and prompt" type system, all the way to full automation. This enables users to find the level of complexity that best meets their needs, and also allows their systems to evolve as their needs change. Running in a Windows environment, CAMS also collects, archives and stores all data, eliminating errors of transposition or data mixing. Automatic measurement is one of the popular functions of CAMS system. Eliminates operator influence on the measurement of impressions and sometimes the time-consuming process associated with measurement. Once the operator clicks the "measure" icon, an image is captured and the impression is measured in the blink of an eye. Actual diagonal length, hardness value and converted scale are displayed on screen and can be saved to file.
environment
Since light loads are used in microhardness testing, vibrations may be responsible for load accuracy. Even if the part is not impacted during loading, oscillations of the indenter or specimen will cause the indenter to penetrate deeper into the part, producing soft results. MicroHardness Testers should always be placed on a separate dedicated, level, sturdy table. Often, the machine will be placed on an appropriate table, but not in the correct location, such as against a wall or on an adjoining table or counter. This situation can lead to incorrect results if a door to the lab is knocked causing sub-wall motion, or someone working on an adjacent table creates motion that translates through the table.
High power optics are used in microHardness Testers to help the operator determine the small tip of the indentation. Dirt in the optical path (eyepieces, optical encoders, tubes or objectives) can make matters worse by obscuring impressions or measurement lines. A clean environment will help reduce this from happening. Common sense goes a long way here: Do not cut, grind, or polish samples in the vicinity of a Hardness Tester. It is this fine particle that most easily enters the instrument.
Sample Preparation
In most cases, samples are sliced and mounted in Bakelite or epoxy resin holders prior to testing. After sectioning and mounting, the samples are ground, sanded and polished to provide a test surface free of scratches and surface textures that might interfere with the operator's ability to identify indentation cues.
在生产实验室中,生产的需求有时无法使操作员花费必要的时间来实现适当的表面处理。通常,这会导致表面起伏不平,难以辨认的圆角边缘,以及难以精准测量压痕尖端的表面缺陷。
蚀刻样品时,零件的表面会受到化学腐蚀,从而提供金相对比。尽管蚀刻样品有助于定义晶粒结构,焊缝中的热影响区,总表面深度和脱碳层,但它会降低测试表面与显微硬度印象尖端之间的对比度。在许多情况下,对比度降低会造成困难或完全无法测量印象。如果要对蚀刻后的样品进行显微硬度测试,则应将其蚀刻至目测所需属性所需的最低限度。
尽管大多数自动化显微硬度测试系统可以自动测量精细准备的样本上的维氏和努氏压痕,但许多样本却被表面异常和对比度变化所迷惑。通常,利用“阈值”技术确定印象大小的系统最容易受到这些问题的影响,并且会表现出显著的变化和误差。
校准
与罗克韦尔和布氏测试仪相比,大多数显微硬度测试仪具有令人着迷的寿命。由于前面讨论过的环境问题,这些仪器通常在实验室环境中启动,没有会困扰其他硬度计的灰尘和油污。因此,显微硬度测试仪的使用寿命往往很长,两次校准之间几乎不会出错。
幸运的是,大多数显微硬度测试仪施加力的能力非常一致。除称重传感器单元外,校准时很少出现此问题。显微硬度测试仪中的测量系统变化很大,范围从目镜的千分尺到附接到数字读数器的光学编码器。它们的共同点是它们依赖于特定的放大倍率或距物镜的距离(眼内镜滑入/滑出以增大/减小放大率)。为了直接验证测量系统,将平台测微计放置在砧座上,并将仪器的测量线放置在平台测微计上已知的距离处。然后将该距离与设备的测量系统进行比较。如果他们同意,一切都会很好。如果不,
所有这些的要点是,如果您不注意眼位,则会降低测量精度。显微硬度测试仪通常通过标准硬度块进行间接验证。由于最终的印象非常小,因此这些标准块似乎可以长久使用。
On the one hand, this is true, but on the other hand, blocks that are not handled properly can be scratched, making them difficult to read. In severe cases, improper handling, work or age hardening on softer materials may alter the value of the block. This highlights the need to examine multiple standard hardness blocks. Since the indentation of the microHardness Tester is in a very thin section of the test surface, it is important to remember that the test block should be calibrated according to the forces normally used. Test block values should only be considered during calibration.
This means that it is inappropriate to use Rockwell blocks and convert them to Vickers or Knoop values. So tempting, it can produce erroneous results, and is banned by ASTM E 384. Test blocks can be calibrated at multiple forces to better reduce the number of test blocks required.
in conclusion
A good source of error in microhardness testing is that of the operator. This is compounded when the surface is poorly prepared and "battle fever" sets in. The mundane nature of measuring multiple impressions can also lead to fatigue and subsequent errors. Then how do we minimize this effect? In the case of sporadic testing, make sure the operator is properly trained, has the correct tools to prepare the test surface, instruments are properly calibrated and in proper working order, and has time to do the job properly. With conscientious operators, errors will be minimized. Some degree of computer assistance can be helpful if more frequent or larger tests are required. Most microHardness Testers will work regardless of age. With today's technology, impressions can be read by computer in a more reproducible manner and take very little time. And computers don't get bored or tired, they're more sensitive to changes in contrast, and measurements can be made repeatedly.
Additionally, these systems can be fully automated to include automatic focusing, automatic table positioning, data collection and charting. Automation further eliminates sources of error.
- 1How to use the microHardness Tester?
- 2Frequently Asked Questions about Hardness Testers in 2022
- 3Test method for roll hardness
- 4How many Hardness Testers do you know?
- 56 Tips for Using a Hardness Tester
- 6ASTM D2240 Rubber Properties, Hardness Testing
- 7ASTM D2240 Rubber Properties, Hardness Tester Hardness Testing
- 8What are the test subjects for perchlorovinyl resin anti-corrosion coatings?
- 9Controlling Variables Affecting Screen Printing Ink Deposition
