Structure, principle, usage and calibration maintenance of micropipette
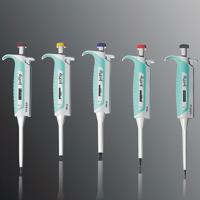
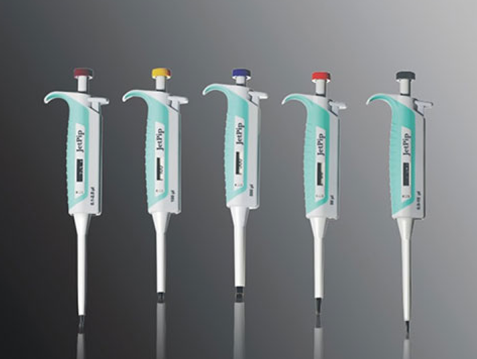
Accurate and reproducible dispensing of liquids is important for experiments in most laboratories. And, for decades, micropipettes have been a mainstay in chemistry and biology laboratories for the precise and precise delivery of smaller volumes of liquid. Micropipettes are used in various types of laboratories, including microbiology, environmental science, medicine, chemistry, chemical, diagnostic laboratories, and more. Despite the importance of accurate liquid handling in research and diagnostics, little attention has been paid to pipettes. Micropipettes come in a variety of sizes, depending on the volume that can be transferred. Commonly used micropipettes in the laboratory are P-10, P-20, P-100, P-200 and P-1000. Numbers indicate the maximum volume (in microliters) that can be transferred.
Most micropipettes have the following basic parts:
Volume Adjustment Knob – Rotate to adjust volume
volume indicator
Plunger Button – Suction and Dispense
Tip eject button – discard tips after use
volume adjustment knob
plastic shaft
Tip Eject Arm – discard tips after use
To draw liquid into the shaft of the pipette, a disposable plastic tip is attached to the shaft. Depending on the micropipette used and the volume to be dispensed, there are different types of tips in different sizes and colors.
Commonly used tips are: Large Blue – 200-1000µL, Small Yellow – 2-200µL, Small White – <2µL
usage
Micropipettes are used to deliver accurate volumes, which depend on the following conditions:
Position: During aspiration, the pipette should remain vertical. Deviating the pipette by 30 °C from vertical may result in aspirating 0.7% of additional liquid due to hydrostatic pressure. Also always keep the pipette in an upright position when storing.
Pre-wet/pre-rinse tips – always remove the old tip and place a new tip on the shaft before pipetting. Inconsistencies between samples may occur due to pre-wetting techniques.
Release Plunger – A smooth and consistent pipetting cadence is recommended for greater accuracy and precision. A sudden release of the plunger can cause liquid to collide within the pipette. This can lead to fluid accumulation inside the instrument, which can then be transferred to other samples, leading to variations in sample volume and the potential for cross-contamination.
Immersion Depth – Pipette tips should only be inserted into containers containing approximately 1-3mm of liquid. Because, if the nib is submerged beyond the nib, liquid may adhere to the nib and transfer with it, or if the nib is not submerged far enough, air may be sucked into the nib, which may lead to erroneous results.
Equilibration Time – Mitigates the effects of thermal expansion which can affect volume delivery. The tip, the pipette, the liquid being transferred, and the transfer container itself can all be equilibrated to the same temperature.
Pipette Micrometer Settings – The suggested volume range of a pipette may change radically, and may not even be effective in changing volume delivery performance.
processing method
In order for the pipette to function properly, it is important to take the following precautions very carefully:
Never adjust the volume beyond the range of the micropipette. Do not adjust the micropipette below zero microliters. Do not adjust P20 above 20μl, P200 above 200μl, and P1000 above 1ml.
Never force the fader dial.
Do not drop the pipette.
When using a pipette, always use smooth movements. There should be no "popping" sound.
Always store micropipettes upright on the bench-mounted rack when not in use.
Always choose the correct size pipette for the volume to be measured.
There are two stops on the micropipette plunger: Slowly depress the plunger to the first stop to aspirate the sample. This pushes the air out of the pipette tip in preparation for aspirating the correct amount of liquid. This is the initial resistance point. Insert the tip into the liquid and slowly release the plunger to aspirate the sample.
The second step is dispensing; carefully push the plunger down past the initial resistance until it makes contact with the body of the pipette. Applying pressure to the second stop dispenses the correct volume of fluid.
Cleaning and maintenance
Regular preventive maintenance of your pipette will help reduce breakdowns and keep it in good working order. Depending on the criticality of the pipette, the types of solutions transferred with it, and the age of the pipette, maintenance schedules may vary. Regular maintenance includes the following steps:
1. Disinfect the exterior of the pipette: Wipe the pipette with a detergent solution before and after use, and dry the pipette with a lint-free cloth. Check the general appearance of the pipette:
2. The plunger should be straight and free from corrosion or cracks, and the measurement window should be clear and properly aligned. Pipettes should be free from physical or chemical damage, cracks or breaks.
3. Disassemble and clean the pipette:
Remove the tip ejector
Separate the bottom half of the pipette from the top half
Sterilize each component removed from the pipette
Remove the seal and o-ring assembly
Visually inspect for worn and cracked parts
Clean the air passages with a long, lint-free cotton swab moistened with cleaning solution (check the nose cone)
Check the piston assembly for bent, corroded or cracked
Rinse with distilled water and air dry
4. Replace O-rings and seals.
5. The pipette manufacturer's user manual should be consulted for lubrication (if applicable).
6. Reassemble the pipette and check for functionality
7. Using a micrometer, place the pipette of the calibration volume upright on a rack overnight.
8. Calibrate/Verify Pipette Performance
calibration
To perform well, micropipettes need to be properly calibrated every three months. Calibration can be easily performed in the laboratory by gravimetric method.
Principle: The density of distilled water is constant at constant temperature and atmospheric pressure. The volume of water can be determined by weighing the dispensed water. When determining the amount of water, the measurement accuracy is affected by the ambient temperature, atmospheric pressure and relative humidity. Therefore, these factors are usually combined to arrive at the Z-factor, which is used to calculate water volume. The calculated water volume is then compared to the theoretical volume to determine the accuracy and accuracy of the pipette
Micropipette Calibration Procedure
As temperature affects the density of water and thus the theoretical weight, estimate the water temperature.
Place the empty weighing boat on the balance.
The tare weight is zero.
Add appropriate amount of water by micropipette.
Record the weight and repeat nine times for a total of 10 readings.
Calculate the mean and standard deviation of the readings.
To properly calibrate the micropipette:
The coefficient of variation (CV), calculated by dividing the standard deviation by the mean, should be less than 1%.
The accuracy of the micropipette calculated by dividing the actual mean by the theoretical mean should be between 99-101%.
If the micropipette is no longer calibrated correctly, send it to the manufacturer for calibration. Technicians usually need to adjust (tighten or loosen) some screws to compensate for volume.


- 1How should I store the correct micropipette?
- 2Pipette Tips - Technique and Pipette Maintenance
- 3Four ways to use an electronic pipette
- 4How to store micropipettes properly?
- 5How to use a micropipette for liquid handling?
- 6Pipette uses common sense - Dlab
- 7Pipette uses little common sense