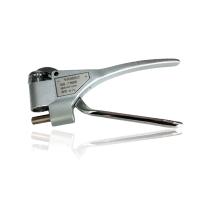
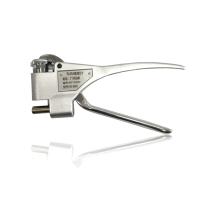
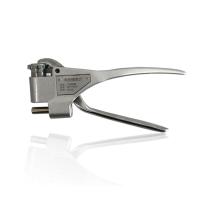
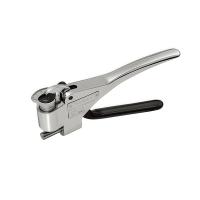
Use and Calibration Steps of Wechsler Hardness Tester
Instrument use
Place the specimen between the anvil and the indenter, and depress the handle until it is felt as far as it will go. At this time, the pointer of the meter head points to a reading, which is the measured hardness value. Although excessive pressure above this limit will not damage the durometer, it is meaningless and the reading will not change. exist
The handle should still be held firmly during the reading, any twisting or movement during the test will cause an inaccurate reading.
Instrument Calibration
Calibration of this instrument includes full scale calibration and standard sample calibration. Full-scale calibration provides a reference point for the instrument, and the reference point of the instrument is set at the position of 20 on the full scale. Standard sample calibration provides a reference point for the instrument, and this reference point is the known hardness value of the standard hardness block.
4.1 Calibration standard blocks
The standard hardness block of the Webster Hardness Tester is made of 6061 aluminum alloy. Each hardness block has been tested and attached with a test report. The number on the test report. The hardness value and The serial number is engraved on the hardness block, and the validity date of the hardness block is two years.
4.2 Full scale calibration
Put the calibration sleeve on the anvil, do not place the sample in the opening of the Hardness Tester, and directly hold the handle to the bottom. The pointer of the Hardness Tester should point to the scale 20±0.5WH. If the test reading does not meet the requirements, as shown in Figure 3, use a small screwdriver to adjust the full scale adjustment screw so that the pointer points to the scale
20. If the pointer indicates a smaller value. The adjustment screw should be adjusted clockwise; if the value indicated by the pointer is too large, the adjustment screw should be adjusted counterclockwise. If the pointer cannot point to the full scale of 20 by adjusting the adjusting screw, the pressure needle should be replaced.
4.3 Standard Sample Calibration
Test the standard hardness block with a Hardness Tester, the pointer should point to the hardness value marked on the hardness block, and the maximum allowable error is ±0.5HW. If the test readings do not meet the requirements, unscrew the supporting screws, take out the lower handle from the main frame, and then remove the meter head from the indenter, the indenter remains on the
within the frame. The slotted adjusting nut is now visible inside the ram. As shown in Figure 4, use the special wrench provided with the instrument to turn the adjusting nut. If the reading of the test hardness block is too small, the adjusting nut should be turned counterclockwise, otherwise, the adjusting nut should be turned clockwise. Each 1/4 turn of the adjusting nut will change the reading by 2-3 divisions. After adjustment, reinstall the instrument for hardness block inspection.
Repeat the above steps until the readings of the full scale and the hardness block meet the requirements.
4.4 Replacing the indenter
If the pointer cannot point to the full scale of 20 by adjusting the adjusting screw, it means that the pressure needle is worn out and should be replaced with a new one.
Unscrew the support screw, remove the lower handle from the main frame, and then remove the meter head from the indenter cylinder, and the indenter cylinder remains in the frame. The slotted adjusting nut is now visible inside the ram. As shown in Figure 4, use the special wrench equipped with the instrument to take out the adjusting nut, then take out the indenter, and replace it with a new one.
indenter. After replacing the indenter, use the adjusting nut to adjust the pressure of the load spring. After feeling the resistance of the load spring, the nut only needs to be tightened one turn. During the initial adjustment, the pressure of the load spring should not be too high, otherwise the tip of the indenter will be damaged. Follow the calibration steps to recalibrate the instrument.
4.5 Calibration Notes
Every once in a while (1-2 weeks), check the full-scale value to determine whether the indenter is worn. If the full-scale value has shifted full-scale calibration should be performed. When the full scale point cannot be adjusted to 20, it means that a fault has occurred or the punching needle is severely worn, and the
Needle should be replaced. If the full scale point still cannot be adjusted to scale 20 after replacing the indenter, it means that the instrument is faulty, and the instrument should be sent back to the production company for maintenance;
The accuracy of the hardness measurement of the instrument should be checked frequently with standard hardness blocks. If a deviation is found, adjust the adjusting nut of the load spring to calibrate. When using a standard hardness block, only its upper surface should be used. When placing the calibration hardness block, the indenter should avoid the part with indentation,
Because the edge of the indentation will affect the penetration depth of the indenter on the surface of the sample, affecting the accuracy of the measurement;
The full-scale adjustment screw has been set before leaving the factory and cannot be adjusted casually. It is only allowed to be adjusted once in the following situations:
1 Replaced with a new indenter;
2 Replaced with a new head;
3 The pointer deviates due to the wear of the indenter. Do not adjust the adjustment screw to calibrate the reading of the test standard hardness block.
Maintenance and Precautions
5.1 Maintenance of the instrument
Anti-fouling: The instrument should be wiped with a soft cloth frequently during use to remove the dust In particular, it is necessary to prevent dirt from entering the gap of the dial or around the indenter, otherwise it will affect the measurement accuracy or cause malfunction.
Anti-corrosion: During use, attention should be paid to waterproofing in addition to frequent wiping. Many parts will rust .
Anti-drop: The instrument is composed of many precision parts. If it falls, it will cause permanent damage to some parts.
Do not disassemble: the precise measurement of the instrument is due to the good matching of some precision parts. This collocation is difficult for non-professionals to master. Therefore, no further disassembly is allowed except for the parts disassembled during calibration.
5.2 Precautions during measurement
The surface of the sample should be cleaned, the dirt on the sample, especially the fine sand will affect the measurement accuracy;
When the instrument is below the scale of 4HW and above 17HW, the sensitivity is obviously reduced, and the measurement accuracy is also reduced. At this time, other Hardness Testers should be considered ;
The distance from the measuring point to the edge of the sample should be greater than 5mm during the test, and being close to the edge of the sample will affect the measurement accuracy;
When testing, it should be noted that the distance between two adjacent indentations should be greater than 6mm, otherwise the previous indentation will affect the accuracy of the next measurement;
Although the hard oxide film is very thin, it will also affect the accuracy of hardness measurement of aluminum profiles. Experience shows that an oxide film with a thickness of 10 μm will increase the hardness measurement value by 0.5 to 1HW;
Various coatings will seriously affect the measurement accuracy, so the hardness measurement should be performed after removing the coating with sandpaper or solvent;
The surface of the sample should be perpendicular to the indenter, and the bottom of the sample should be closely attached to the anvil, otherwise errors will occur;
Enough grip force should be exerted at one time during the test, and slowly increasing the force will cause the measured value to be low;
The anvil of the instrument has the same hardness as the punching pin. Except for checking the full scale value, generally do not dry punch, as frequent dry punching will wear the punching pin and reduce the life of the punching pin ;
As an integral part, the meter head cannot be forcibly disassembled.