The specific installation method of BYK swing rod Hardness Tester
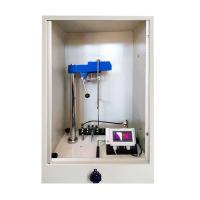
The pendulum Hardness Tester is a film measuring instrument for dry determination of the elastic hardness of coatings. The instrument consists of a sample holder, a pendulum swinging on the sample and a counter. The elastic hardness of the coating is measured by the swing value of the pendulum within a certain swing range. The value can be the swing time or the number of swings. The number of wobbles is the displayed seconds or number of wobbles on the instrument through the grating sensing well on the lower part of the instrument.
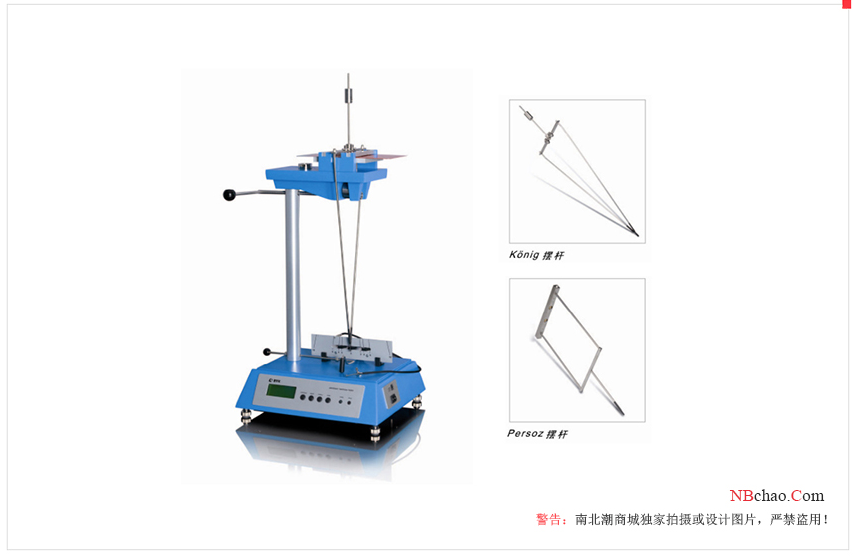
This article takes the BYK pendulum Hardness Tester as an example to introduce the specific installation method of the pendulum Hardness Tester.
Installing the pendulum Hardness Tester
The pendulum hardness test is very sensitive to the levelness, so it is necessary to put the instrument on a test bench without vibration, and adjust the level of the instrument.
After placing the instrument in a suitable place, remove the protective cover. Plug in the power and start the instrument.
Adjust the foot screw at the bottom of the instrument, adjust the gas in the level on the upper part of the instrument to the center of the ring, and then lock the foot screw (use a 10 wrench to loosen or tighten the screw)
According to the requirements of the Koenig pendulum, fix the swing rod release line at the 60 mark position, and the Persoz pendulum at the 12· position.
Clean the pins on the pendulum and clean the calibration glass with alcohol
Place the glass plate on the elevated test platform
Lift the test platform to the stop position and rotate the handle 1so · to the stop position. The handle is level and the black plastic tip of the handle points forward
If the gas level is level, the glass plate is also at the thousand level level.
Turn the handle to lower the test platform
The thimble on the platform is inserted into the small hole on the swing rod to indicate that the swing rod has been placed in the correct position . The arrow mark on the pendulum needs to point towards the front of the instrument. If the bit beans are reversed, the grating will not work and cannot count.
Slowly lift the test platform to lift the glass panel to the pressure point of the pendulum. The handle is in a dry horizontal position with the handle head facing forward. The pendulum needs to be jacked up by two header balls at the same time. If it is not moving vertically upwards slowly , the pendulum will sway freely in the raised position.
Check the position of the scale on the pendulum. The pendulum needs to stop at the zero position, if not, check the top of the pendulum. If the position of the pendulum has shifted slightly, lower the test platform to drop the pendulum into the correct stop and then raise the platform again. Repeat this operation three times to confirm that the pendulum is in the correct position.
pull out the handle
Put the protective cover over the instrument. The protective cover is secured by grooves on the bottom of the instrument. It is recommended to use an appropriate adhesive to bond the protective cover to the instrument.
Insert the handle through the small hole in the protective cover to lift the test platform. Check the bubble level again to confirm that the instrument is at a dry level.
Install the protective cover
Peel off the protective film on the plexiglass and clean the surface of the plexiglass. Insert the supplied plastic wire channel (8) into the front and rear panels (1) and (2). Insert the side panels (3) and (4) into the wire channel (8) from above. Insert the wire channel (9) into the top plate (5) and pass the top plate (5) through the wire channel (9) and the front and rear plates (1) and (2). Insert the handles on the dodge doors (6) and (7) outwards into the sides of the protective cover from above. The plexiglass components can be coated with an appropriate adhesive for bonding and fixing during assembly.
- 1Paints and varnishes Pendulum damping test method under ISO 1522
- 2GB/T1730 Interpretation of Koenig and Persaz pendulum damping test
- 3Swing bar hardness testing: a method for evaluating film hardness
- 4Pendulum damping test method for the determination of film hardness
- 5Film hardness testing method: pendulum hardness, pencil hardness, etc
- 6How much do you know about the difference between Konig pendulum and Persoz pendulum of Pendula Hardness Tester?
- 7Pendula Hardness Tester calibrating steps
- 8Determination method of paint film hardness - swing rod hardness, scratch hardness, indentation hardness
- 9How to calibrate the swing rod Hardness Tester?