Experimental operation steps of pH meter
1. Preparation before starting up
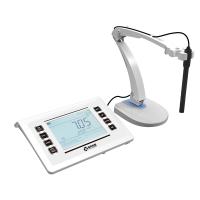
(1) Screw the electrode bracket into the electrode bracket socket, and adjust the electrode clamp to the proper position.
(2) Clamp the composite electrode and T811 temperature sensor on the electrode clip, and pull off the electrode sleeve at the front end of the electrode.
(3) Clean the electrodes with distilled water. After washing, wash again with the solution to be tested.
2. Boot
(1) Plug the power cord into the power socket. Press the power switch, after the power is turned on, preheat for 30 minutes, and then carry out calibration.
(2) Use of pH automatic temperature compensation and manual temperature compensation:
1) As long as the switch 12 on the rear panel is placed in the automatic position, the instrument can be in the state of automatic pH value temperature compensation, and manual temperature compensation does not work at this time.
2) The method of using manual temperature compensation: remove the temperature sensor, and set the switch 12 on the rear panel to the manual position. Set the "selection" switch 8 of the instrument to "C" of the "temperature regulator" to adjust, so that the digital display value is the same as the thermometer display value in the measured solution, and the instrument also sends the temperature signal to the pH-t hybrid circuit for calculation. So as to achieve the purpose of manual temperature compensation.
(3) Solution temperature measurement method: Set the "selection" switch of the instrument to "C", and the digital display value is the temperature value measured by the temperature sensor.
3. Calibration
The instrument must be calibrated before use. Generally speaking, when the instrument is in continuous use, it should be calibrated once a day.
(1) Unplug the short-circuit plug at the measuring electrode jack 15; insert the composite electrode 3 and T811 temperature .
(2) If the composite electrode is not used, insert the electrode converter plug 16A at the measuring electrode jack 15; insert the glass electrode plug into the converter socket 16B; connect the reference electrode to the reference electrode jack 14 (see Figure 3 -5).
(3) Turn the "selection" switch knob 8 to the pH gear.
(4) Measure the temperature of the solution first, and set the "selection" switch to "C". The digital display value is the temperature of the solution.
(5) Turn the slope adjustment knob 6 clockwise to the end (that is, to the 100% position).
(6) Insert the cleaned electrode into the buffer solution .
(7) Adjust the positioning knob so that the readings displayed by the instrument are consistent with the pH value of the buffer solution at the current temperature (for example , when the mixed phosphate is used to set the temperature at 10°C, pH = 6.92)
(8) Clean the electrode with distilled water, then insert it into the standard buffer solution with pH = 4.00 (or pH = 9.18), and adjust the slope knob so that the reading displayed by the instrument is consistent with the pH value at the current temperature in the buffer solution.
(9) Repeat (7)~(9) until there is no need to adjust the two knobs of positioning or slope.
(10) The instrument is calibrated. Calibration by manual temperature compensation can refer to item (2) of operation step two.
Note: After calibration, the positioning adjustment knob and slope adjustment knob should not be changed. , the calibrated buffer solution should be pH=6.86 for the first time, and should be close to the value of the measured solution for the second time. If the measured solution is acidic, the buffer solution should be pH=4.00; if the measured solution is When alkaline, the buffer solution with pH = 9.18 is selected. --Under normal circumstances, the instrument does not need to be calibrated within 24 hours.
4. Measuring pH
When measuring the pH value of the solution, the electrode should be cleaned with distilled water first, and then the electrode should be cleaned with the solution to be tested, then the electrode should be inserted into the solution to be tested, shake the beaker to make the solution uniform, and then read the pH value of the solution.
5. Measure the electrode potential value
(1) Clamp the ion selective electrode or metal electrode and calomel electrode on the electrode holder.
(2) Clean the electrode head with distilled water and clean it with the solution to be tested - once.
(3) Insert the plug 16A of the electrode converter into the measuring electrode socket at the rear of the instrument; insert the plug of the ion electrode into the socket 16B of the converter.
(4) Connect the calomel electrode to the reference electrode interface at the rear of the instrument.
(5) Insert the two electrodes into the solution to be tested, and after the solution is stirred evenly, the electrode potential value of the selective electrode of the ion can be read out on the display screen, and the positive and negative polarities can also be displayed automatically.
(6) If the measured signal exceeds the measurement range of the instrument, or the measurement terminal is open, the display screen will not light up and an overload alarm will be given.


- 1Principle and Application of Standard pH Meter
- 2Method for determining amino acid pH value
- 3Basic principle and application analysis of anti-fluorine pH meter
- 4Proper use and maintenance of pH meters
- 5Understanding and Addressing Common Challenges in the Use of pH Meters
- 6How to use pH meter
- 7Differences between three STIP-scans: pH Meter, Conductivity Meter, and Dissolved Oxygen Meter
- 8PH meter conversion of mv and ph value
- 9Common types and application differences of STIP-scan


