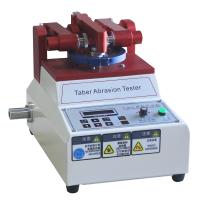
Operation Manual of Asiri Taber Wear Tester
Steps
1. Sample preparation
1.1 The sample should be placed in a state of temperature 23±1°C and relative humidity 65±2% for more than 48 hours before the test.
1.2 Sampling standard cutter and sample cutting machine cut the standard specification sample with an outer diameter of 100mm, an inner diameter of 6.35mm, and a thickness of 3mm, and stick the sample on a standard sticker of the same size. For the spraying model, make a test piece according to ASTM D823, and the substrate area is 100mm in diameter.
2. Preparation before the test
2.1 Lift up the pressure lever and the suction tube.
2.2 Loosen and remove the fixing nut of the grinding wheel, select the model of the grinding wheel according to the test standard and install it on the fixing nut at the center of the left and right grinding wheel shafts.
2.3 According to the standard of the test, select the weights to be installed on the left and right counterweight shafts, and the weights of the counterweights must be the same.
2.4 Whether the machine is connected to a power supply that meets the required specifications.
3. Test process
1 dressing grinding wheel (applicable when using rubber grinding wheel)
1) Take off the compression nut and gasket, loosen the fixing screw with a wrench, and pick up the fixing ring.
2) Place the sandpaper disc (H-17), put the gasket on, and fix the sandpaper disc with the compression nut.
3) Put the fixing ring on, flatten the sandpaper, and fix the sandpaper with the fixing nut with a wrench.
4) Set the number of rotations.
5) Connect the vacuum cleaner: Connect the vacuum cleaner's suction pipe to the connector on the left side of the machine, pull out the power cord of the connector vacuum cleaner, turn on the power, and start the vacuum cleaner.
6) Turn on the power switch of the host machine, set the required number of revolutions with the speed control knob, and select the speed (60 revolutions per minute) and (72 revolutions per minute). Press the start button, the machine will stop automatically after the set number of times is reached.
7) According to step 1), lift the key lever and vacuum tube, and remove the sandpaper disc.
Note: The grinding wheel needs to be refurbished with sandpaper every 500 revolutions.
2 tests
1) Use an electronic balance to weigh the weight of the sample before the test.
2) The operation steps are the same as 1.1-1.6
3) Take down the sample, and weigh the sample again with an electronic balance after the test.
3 result judgment
1) After the set number of times is reached, observe whether the test is damaged or how many times it is damaged.
2) Wear index=(W1-W2)÷N*1000
Description: W1: Test weight before test
W2: test weight after test
N: number of test revolutions
4. Calibration procedure
1 Correction items: speed, load
2 Calibration equipment: electronic stopwatch, tension and pressure gauge
3 cycles: 1 year 4 steps
1) Speed correction method
1.1) Turn on the power start button of the machine, press the CLR button of the counter to reset the displayed value to zero, and set the number of times the instrument runs (the number of times the speed exceeds the calibration speed).
1.2) Press the start button to start the machine, and let the standard stopwatch time at the same time.
1.3) Stop timing when the standard stopwatch reaches 1 minute, and press the stop button at the same time to stop the machine to see if the time matches the speed.
5. Load calibration
1 First install the grinding wheel on the left and right pressure rods, hang the center of the grinding wheel shaft with the tensile and compressive gauge to make the display of the tensile and compressive gauge match the load, and hang the center of the grinding wheel shaft with the tensile and compressive gauge to make the display of the tensile and compressive gauge consistent with the load.
Care and Maintenance
1. Keep the instrument clean at all times, and wipe the machine with a cotton cloth before and after each use to keep it clean.
2. Always apply anti-rust oil to the exposed parts of the instrument (wipe it clean after 2 hours of spraying).
3. Lubricating oil should be applied to the moving parts of the instrument regularly to keep the instrument running smoothly.
- 1How to install and use the domestic TABER wear-resistant testing machine?
- 2Operation Instructions for Pushen 339 Wear Resistance Testing Machine