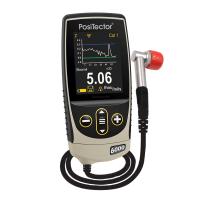
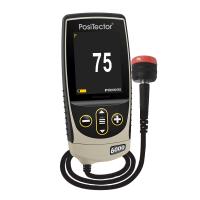
Defelsko posiTector6000 Film Thickness Gauge FAQ Summary
Is the PosiTector 6000 factory calibrated?
PosiTector 6000 instruments are shipped fully calibrated and include a long-term calibration certificate traceable to NIST or PTB. Calibration certificates document the actual readings taken by your instrument in our calibration laboratory to standards traceable to national metrology institutes. Beware of "certificates" or "certificates of conformity" offered by competitors. These usually do not include actual instrument readings and are often insufficient for common quality requirements.
Does the PosiTector 6000 need to be "calibrated" or "pre-adjusted" before use? Is a two-point adjustment required before measuring?
The PosiTector 6000 features innovative probe technology and factory calibration so measurements can be made immediately - often without the need to perform two-point calibration adjustments. Ruby or alumina probe tips on standard probe models eliminate wear and tear, meaning factory calibration will remain throughout the probe's lifetime. The PosiTector 6000 will continue to deliver accurate results right out of the box and after years of use.
For high confidence and proper measurement accuracy, follow our "golden rule" - simply check the zero (or known shim thickness) on the uncoated part, adjust if necessary, then measure the coated layer parts. This ensures proper tuning for substrate properties including mass, metallurgy, curvature, temperature and roughness.
Does your instrument require any formal training to use? Do you offer "demo" models?
no. Our instruments are designed for simple operation, with easy-to-use menus, instruction manuals and helpful videos. In lieu of a demo model, we offer unlimited technical support by phone and/or email with a limited 30-day money-back guarantee.
How often should the PosiTector 6000 be recalibrated?
PosiTector 6000 probes include a calibration certificate with no expiration or end date. They have no shelf life, so the length of time in the wild is not a good indicator of recalibration intervals. Many organizations with quality programs and recertification programs require annual recalibration, which is a good starting point for most users. DeFelsko recommends that customers determine calibration intervals based on their own experience and work environment. Based on our product knowledge, data and customer feedback, a one-year calibration interval from the date the instrument is placed into service is a good starting point.
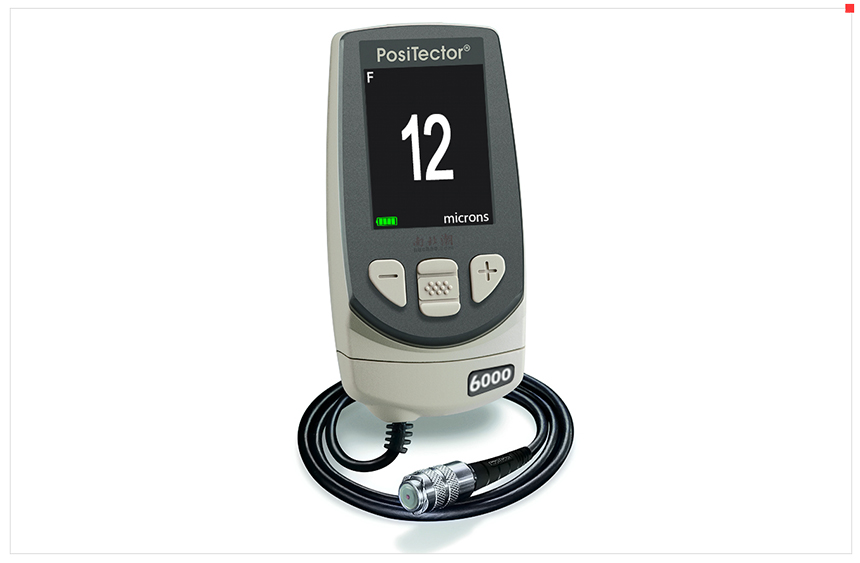
What can the PosiTector 6000 measure?
Depending on the model, PosiTector 6000 probes have different capabilities.
"Ferrous" model probes (order codes beginning with "F", such as FS1) can measure non-magnetic coatings applied to ferrous (magnetic) metals, usually carbon steel.
"Non-ferrous" model probes (order codes beginning with "N", eg NRS3) can measure non-conductive coatings applied to non-ferrous metals.
"Combination model probes" (order numbers starting with "FN", e.g. FNTS1) can measure non-magnetic coatings applied to ferrous metals (magnetic), as well as non-conductive coatings on ferrous metals
Is PosiTector 6000 affected by the surface roughness (profile) of the metal substrate beneath the coating?
As shown in the figure below, all coating Thickness Gauges are affected to some extent by the roughness of the substrate. It is generally accepted that coating thickness should be measured from the highest "peak" of the rough surface to ensure that the coating is covered by a protective coating. However, the coating Thickness Gauge will instead measure the coating thickness from the "effective magnetic plane" which is somewhere between the highest peak and the deepest valley of the profile.
ASTM D7091, ISO 19840 and SSPC-PA 2 propose several similar solutions depending on the instrument type and the specific situation. One option is to verify that the gage reads zero on the uncoated steel substrate and adjust to zero if necessary. This is a popular solution when the metal surface is smooth.
Since it is difficult to ensure that the probe tip is on the highest peak of the surface profile, an alternative is to place a plastic shim of known thickness close to the expected coating thickness between the probe and substrate and adjust to the shim The specified thickness (called 1-point adjustment). Plastic spacers sit on the peaks of the surface profile and have a larger area than the probe tip, ensuring adjustments are made on the "peaks". This better simulates coatings that cover surface profile peaks.
If access to the bare substrate is not possible, another option is to use the ISO 19840 compliant PosiTector zero offset feature. Zero offset adjustment is useful when measuring coating thickness on rough or blasted substrates without touching a representative uncoated substrate. A predefined zero offset value can be selected according to the blast profile height. Alternatively, a custom zero offset can be entered.
Can the PosiTector 6000 measure coatings on stainless steel?
"Stainless steel" is a term commonly used to classify various corrosion and heat resistant alloys. In metallurgical specific terms, "stainless steel" means any iron-based alloy having a chromium content of at least 10.5% by mass. Some stainless steel alloys have relatively low magnetic response (commonly referred to as "partial/weak magnetic"). Others don't have any magnetic response, while some have a ferromagnetic response similar to carbon steel.
The PosiTector 6000 has the unique ability to measure partially magnetic stainless steel alloys, an application that is challenging for many competing instruments. The PosiTector 6000 FN (Combined Ferrous/Non-Ferrous) probe model can often provide consistent measurements on partially magnetic substrates with a simple zero adjustment. For more challenging applications, the "N-Lock" measurement mode allows precise measurement of non-conductive coatings applied to partially magnetic substrates.
Can the PosiTector 6000 measure coatings on hot surfaces?
The PosiTector 6000 FXS and FHXS Xtreme probes are excellent for measuring coating thickness on hot and/or rough surfaces (250°C, 500°F max). All PosiTector 6000 probes can take measurements on hot surfaces. Standard probe models can operate in ambient temperatures up to 50˚C (120˚F). However, measurements can be made at higher temperatures if the probe is lifted off the surface immediately after taking the reading and allowing it to cool. Just make sure the probe is kept below 50˚C (120˚F) and cool enough to handle with unprotected hands.
What is the minimum part size required for reading?
To ensure that the part is sized for the PosiTector 6000 probe, simply check the zero position on the uncoated part and adjust if necessary. Accuracy is verified by measuring plastic shims placed on uncoated parts. If the measured value is within the total tolerance of the shim and probe, the probe is suitable for measuring coated parts.
Can the PosiTector 6000 be used underwater?
While the body and probe connector of the PosiTector gage are not suitable for immersion in water, the PosiTector 6000 conventional cable probe is hermetically sealed, making it ideal for use underwater. An extension cable (up to 75 m / 250 ft) can be used for underwater or remote measurements.
Is the PosiTector 6000 intrinsically safe?
Although the PosiTector 6000 is not designed to be intrinsically safe, our PosiTest Mechanical Gauge is an excellent choice for measuring coating thickness in hazardous operating environments.
Can the PosiTector 6000 measure nickel on steel?
Yes, but it depends on the specific type of nickel plating that has been applied to the steel.
When nickel plating is deposited by the electrolytic process (application of an electric current in a nickel bath), the resulting coating (commonly referred to as "electronic nickel") is always somewhat conductive and magnetic and cannot be measured by our gages when used Precise measurement for ferrous or non-ferrous metals.
Electroless nickel coatings are deposited by an autocatalytic process that does not require increased current. If the minimum phosphorus content in the nickel bath is about 8% during this process, the nickel coating formed is practically non-magnetic and ferrous metals with magnetic principle coating Thickness Gauges (such as the PosiTector 6000 F model) can be used Measure its thickness accurately.
What is the measuring range of PosiTector 6000?
The coating thickness measurement range of the PosiTector 6000 depends on the interchangeable probes connected. The PosiTector 6000 probe can be used for a variety of coating thickness applications. For example, the PosiTector 6000 FN probe can measure coating thicknesses up to 1500 um (60 mils), while the PosiTector 6000 FNGS probe can measure coating thicknesses up to 63.5 mm (2.5 inches). Whatever your application, DeFelsko has the potential to provide a measurement solution that meets your requirements.
- 1Calibration methods of Film Thickness Gauge
- 2Application of Film Thickness Gauge in automobile paint thickness measurement
- 3Application of Linshang LS220 Paint Film Thickness Gauge in Thickness Measurement of Automobile Paint Surface
- 4Three precautions for the use of paint film coating Thickness Gauges
- 5Curved (non-planar) film How to choose the right Coating Thickness Gauge
南北潮的小小编 - 《南北潮商城》
- 6Film Film thickness determination method
- 7Film thickness determination of films with TJIKN instrument
- 8Test of film thickness of workshop primer
- 9Application Scope and Selection Method of Film Thickness Measurement
