Resonance stiffness meter test method
Resonance Stiffness Tester obtains the stiffness value by calculating the length of the sample when the maximum amplitude of resonance is reached. It is suitable for measuring the stiffness of paper and cardboard, and the unit is expressed in mN or mN-m.
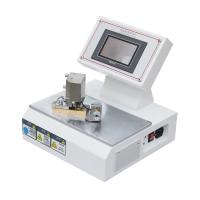
(1) Resonance Stiffness Tester
The resonance stiffness Tester developed by Lhomargy Company in France is composed of electromagnetic vibration unit, electrical parts, transformer, clamping device, magnifying glass and flashing frequency measuring lamp, etc. Its working principle is shown in Figure 2-50. When the sample vibrates at a certain frequency in one direction, the resonant length of the sample is related to its bending stiffness in the same direction and the weight of the sample. Take a sample of a certain width and place it on an instrument that vibrates at a frequency of (25±0.1) Hz and an amplitude not greater than 0.02mm. Adjust the free length of the sample to make it resonate and reach the maximum amplitude. At this time, read the free length of the sample when the maximum amplitude is reached from the scale scale, measure the quantitative value of the sample, and calculate the resonance stiffness of the sample.
There are two methods for calculating the resonance stiffness of the sample, namely A method and B method. Method A is more accurate and can calculate the coefficient of variation of bending stiffness. The results obtained by method B are 1% lower than those obtained by method A. big difference.
According to A method, the resonance stiffness of the sample is:


In the formula, S——the resonance stiffness of the sample, mN·m. Generally, the values of L/100 and G/1000 are between 0.1 and 10.
(2) Test method
Test according to the national standard GB 12909 "Determination of bending stiffness of paper and cardboard (resonance method)". The testing instrument is a resonance stiffness Tester. The specific test steps include the following points.
①Sample collection and processing ﹑Sampling according to GB450, cut at least 10 samples in each measurement direction. For paper or thin cardboard, the sample width is 10~15mm; for thick cardboard with higher weight, the sample width is 15~25mm. The corrugated cardboard sample width is taken as 25mm. The length of the sample should meet the test requirements. The resonant end of the sample should be smooth and straight, and the two long sides should be parallel and not deflected. According to the requirements of GB 10739, carry out temperature and humidity pretreatment on the samples.
② After adjusting the level of the instrument, turn on the switch and start the instrument.
③ Unscrew the lower clamp, close the slide plate at the bottom of the upper and lower clamps, hold the sample with the right thumb and forefinger, open the upper clamp with the left hand, insert the sample vertically into the two clamps, then close the upper clamp and tighten the lower clamp.
④ Gently turn the handle mounted on the control rod with the right hand to adjust the free length of the sample. When pulling down the sample (that is, shortening the free length of the sample), you can directly rotate the handle with your right hand. If the resonance length of the sample needs to be increased (that is, when the sample is lifted up), the upper clamp needs to be opened, and the handle is rotated with the right hand until a suitable free length is obtained, and then the upper clamp is closed.
⑤ When a suitable free length is obtained, a maximum amplitude vibration will be seen from the magnifying glass, as shown in Figure 2-47. In order to verify whether it is the maximum amplitude, gently lift or pull down the sample, at this time, it can be seen from the magnifying glass that the maximum amplitude becomes smaller immediately, so that it is determined to be the maximum amplitude. Note: For samples with too low weight, it may be necessary to reduce the clamping force when adjusting the extension length to reach a certain resonance point. For samples with a higher quantitative, it is necessary to lift or pull the sample from the upper fixture, and finally adjust the free length of the sample to reach the resonance point. Therefore, verifying the resonance state requires adjusting the clamping force of the specimen.
⑥ Read the free length of the sample at the maximum amplitude from the scale, which is the resonance length.
⑦ Calculate the stiffness of the sample.
In the test report, the calculation method, number of tests, test direction, sample width, sample weight and resonance length should be indicated, and the average value, standard deviation or variation coefficient of bending stiffness should be given.