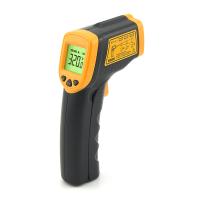
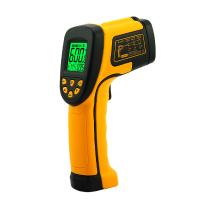
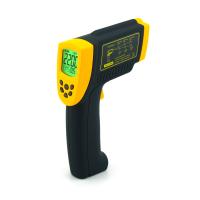
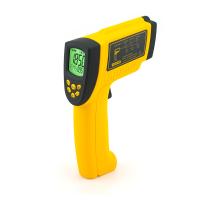
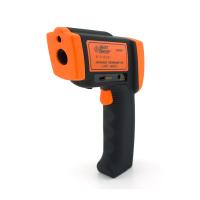
Industrial high temperature infrared thermometer DT-8889H operating function description
MxM
Each reading, the thermometer can measure the maximum (MAX), minimum (MIN) temperature.
1. Pull the trigger to measure.
2. Release the trigger to stop the measurement.
3. Press the MODE button until MnMx (Min V Max) appears.
4. Press the MnMx soft key.
MAX=Maximum, the maximum value measured.
MIN=minimum, minimum measured value.
K-type thermocouple (K-Type)
ATTENTION: To avoid electric shock or personal injury, do not connect external contact probes to live circuits.
The thermometer has a k-type thermocouple probe. The probe connects to the thermometer through the probe input located on it. After installing the Detector , the Detector symbol (TK) appears on the display. When the thermometer is taking a non-contact measurement, a probe can be used at the same time.
The probe reading is displayed below the non-contact measurement.
save
Store readings:
1. Pull the trigger to measure.
2. Release the trigger to stop the measurement.
3. Press the MODE button until Save appears.
4. Press the Save soft key to enter the Save menu.
5. Press the Yes soft key to save the reading.
average
The thermometer can measure average temperature (AVG) or differential (difference) temperature with each reading.
1. Pull the trigger to measure.
2. Release the trigger to stop the measurement.
3. Press the MODE button until Avg (Avg/Dif) appears.
4. Press the Avg soft key.
AVG = average, average measured value.
DIF=difference, difference of measurements.
unit
1. Pull the trigger to measure.
2. Release the trigger to stop the measurement.
3. Press the MODE button until Unit appears.
4. Press the °C soft key to change °C (Celsius) or the F soft key to change °F (Fahrenheit).
storage
The pyrometer can store measurement records including time, date, emissivity and measurement record number for access to stored in memory
records in:
1. Pull the trigger to measure.
2. Release the trigger to stop the measurement.
3. Press the MODE button until Mem appears.
4. Press the Mem soft key to enter the Memory menu to read the saved readings.
emissivity menu
The emissivity menu includes a list of predefined materials with their typical emissivity values. Note: The default emissivity is 0.95.
To access the emissivity menu:
1. Pull the trigger to measure.
2. Release the trigger to stop the measurement.
3. Press the MODE button until ε appears.
4. Press the E soft key.
The emissivity list can be accessed by pressing the Table softkey, or the typical emissivity of the material can be entered manually by pressing the softkey.
If the emissivity table is accessed, a list of materials and their suggested emissivity will be displayed.
Emissivity display:
1. Use the down arrow to access the list.
2Press the OK soft key to select the desired material.
To enter emissivity values manually:
1. Use the down or up arrow soft key to change the input, hold down the up or down arrow soft key to increase the rate of change.
2. Press the MODE button to return to the main menu when finished.
trigger lock
The thermometer trigger can be locked for continuous measurement, to trigger locked:
1. Pull the trigger to measure.
2. Release the trigger to stop the measurement.
3. Press the MODE button until the lock symbol appears.
4. Press the 0 softkey to lock the trigger, and the lock symbol appears on the display to indicate that the temperature measurement is locked.
5. Press this softkey to unlock.
backlight
1. The thermometer is equipped with a backlight display with eight brightness levels. The backlight soft key is used to adjust the brightness of the backlight. Each time the trigger is pulled
always turn on the backlight.
2. To switch the brightness of the backlight, press the Backlight softkey.
3. The backlight can be disabled using the Settings menu.
laser
The thermometer is equipped with two lasers, which are used only for aiming the target, and the lasers are turned off when the trigger is released.
To enable or disable the laser:
1. Pull the trigger to measure.
2. Release the trigger to stop the measurement.
3. Press the MODE button until the laser appears.
4. Press the Laser softkey to enable or disable the laser.

high alarm
The thermometer has a programmable high alarm that specifies a high alarm value based on an entered threshold. When the alarm level is reached, an alarm will sound and the display will flash orange and white.
To set a high alert:
1. Pull the trigger to measure.
2. Release the trigger to stop the measurement.
3. Press the MODE button until Hi appears.
4. Press the On soft key to turn off the alarm.
5. Press the Of soft key to turn on the alarm clock.
6. Use the up and down arrow softkeys to change the alarm settings.
low alarm
The thermometer has a programmable low alarm that specifies a low alarm value based on an entered threshold. When the alarm level is reached, an alarm will sound and the display will flash orange and white.
To set a high or low alarm:
1. Pull the trigger to measure.
2. Release the trigger to stop the measurement.
3. Press the MODE button until Hi appears.
4. Press the On soft key to turn off the alarm.
5. Press the Off soft key to turn on the alarm clock.
6. Use the up and down arrow softkeys to change the alarm settings.
set up
From the setting menu, time, date, backlight, buzzer, contrast, APO time.
time
To change the time on the thermometer:
1. Pull the trigger to measure.
2. Release the trigger to stop the measurement.
3. Press the MODE button until Set appears
4. Press the Set soft key to enter the Set menu.
5. Press the up and down arrow softkeys to select the time.
6. Press the Set soft key to set the time.
7. Use the up and down arrow softkeys to select the desired hour.
8. Press the Next soft key to select minutes.
9. Use the up and down arrow soft keys to change the selection to the desired minute.
10. Press the OK soft key when finished.
date
To change the date on the thermometer.:
1. Pull the trigger to measure.
2. Release the trigger to stop the measurement.
3. Press the MODE button until Set appears.
4. Press the Set soft key to enter the Setup menu.
5. Press the up and down arrow softkeys to select the date.
6. Press the Set soft key to set the date.
7. Use the up and down arrow soft keys to change the selected year to the desired year.
8. Press the Next soft key to select the month.
9. Use the up and down arrow softkeys to change the selection to the desired month.
10.按Next软键选择日期。
11.使用向上和向下箭头软键将所选日期更改为所需日期。
12.完成后按确定软键。
背光
在正常使用中,背光始终打开,使用此菜单更改背光设置关闭背光可节省电池电量。
1.拉动扳机进行测量。
2.释放扳机以停止测量。
3.按MODE按钮,直到出现Set。
4.按Set软键进入Set菜单。
5.按向上和向下箭头软键选择背光。
6.按Set软键进入背光设置。
7.按向.上和向下箭头软键选择背光亮度。
蜂鸣
测温仪可以启用或禁用按键声,报警声和蓝牙声。
1.拉动扳机进行测量。
2.释放扳机以停止测量。
3.按MODE按钮,直到出现Set。
4.按Set软键进入Set菜单。
5.按向上和向下箭头软键选择蜂鸣。
6.按Set软键进入蜂鸣设置。
7.按向上和向下箭头软键选择蜂鸣声、报警声或蓝牙。
8.按On或Off软键去启用或禁用按键,报警和蓝牙。
对比度
测温仪可以针对不同的环境设置不同的LCD对比度。
1.拉动扳机进行测量。
2.释放扳机以停止测量。
3.按MODE按钮,直到出现Set。
4.按Set软键进入Set菜单。
5.按向.上和向下箭头软键选择对比度。
6.按Set软键进入对比度设置
7.按向.上和向下箭头软键,将LCD对比度值设置为30到99。
8.完成后按确定软键。
APO时间
测温仪可以将自动关机时间设置为7秒至60秒:
1.拉动扳机进行测量。
2.释放扳机以停止测量。
3.按MODE按钮,直到出现Set。
4.按Set软键进入Set菜单。
5.按向上和向下箭头软键选择APO时间。
6.按Set软键进入APO时间设置。
7.按向.上和向下箭头软键设置APO时间值。
8.完成后按确定软键。
数据记录
测温仪能存储32K数据,采样率设置为1秒到3600秒。
开关
测温仪可以打开或关闭数据记录表格开关。如果开关打开,您可以将拉动扳机记录数据。
然后显示符号D,松开扳机,开关将自动切换到关闭。
1.拉动扳机进行测量。
2.释放扳机以停止测量。
3.按MODE按钮,直到出现Set。
4.按Set软键进入Set菜单。
5.按向上和向下箭头软键选择Datalog。
6.按Set软键进入Datalog设置。
7.按向.上和向下箭头软键选择开关。
8.按On或Off软键打开或关闭数据记录功能。
采样率
1.拉动扳机进行测量。
2.释放扳机以停止测量。
3.按MODE按钮,直到出现Set。
4.按Set软键进入Set菜单。
5.按向上和向下箭头软键选择Datalog。
6.按Set软键进入Datalog设置。
7.按向上和向下箭头软键设置采样率值。
8.完成后按确定软键。
删除
1.拉动扳机进行测量。
2.释放扳机以停止测量。
3.按MODE按钮,直到出现Set。
4.按Set软键进入Set菜单。
5.按向上和向下箭头软键选择Datalog。
6.按Set软键进入Datalog设置
7.按向上和向下箭头软键删除所有数据记录。
8.按Del软键。
9.按Yes软键确认删除所有数据记录,也可按ESC软键中止删除所有数据记录。
蓝牙
测温仪能从蓝牙发送线上数据和存储数据。
1.拉动扳机进行测量。
2.释放扳机以停止测量。
3.按MODE按钮,直到出现Set。
4.按Set软键进入Set菜单。
5.按向上和向下箭头软键选择蓝牙。
6.按0n或Of软键打开或关闭蓝牙功能。
Note: When the thermometer is measuring, the bluetooth is turned on and the data can be sent online.
The memory data and data records in the device can be transferred to a mobile phone or a personal computer via bluetooth, and use software.
measurement operation
① Hold the meter by the handle and point it to the surface to be measured.
②Pull and hold the trigger to turn on the meter and start the test. If the battery is OK, the display will light up. If the display does not light up, replace the batteries.
③Release the trigger, and the HOLD display icon will appear on the LCD, indicating that the reading is in progress. In the HOLD state, press the UP button to turn on or off the laser. Then press the down button to turn the backlight on or off.
④The meter will automatically shut down about 7 seconds after the trigger is released. (unless instrument is locked)
NOTE: Measurement Considerations
Hold the handle of the meter, point the infrared sensor to the object whose temperature is to be measured, and the meter will automatically compensate for the temperature deviation from the ambient temperature . Keep in mind that it takes up to 30 minutes to adjust for wide ambient temperatures, followed by high temperature measurements, and some time after low temperature measurements (and a few minutes).
- 1Technical Principle, Application and Development Trend of Infrared Thermometer
- 2Precautions for infrared thermometers
- 3How does emissivity affect infrared thermometers? Emissivity of common substances
- 4Infrared thermometer selection method
高丽 - 《山西科技》
- 5Principle of Infrared thermometer and Problems to be Noticed in Its Application
刘福杰;王浩静;范立东 - 《现代仪器》
- 6Technical Questions and Answers about Infrared Thermometers
- 7Infrared Thermometer Technical Questions and Answers
- 8AT-150C-CN Non-contact Infrared thermometer operating instructions
- 9AT-150D-CN Non-contact Infrared thermometer operating instructions