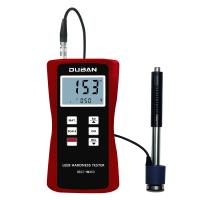
Factors Affecting the Accuracy of Leeb Hardness Tester Testing
Since the Leeb Hardness Tester measures the hardness of metal under dynamic action, there are many factors that affect the accuracy of the test results, so these factors should be limited to a certain extent, mainly including: test conditions, test objects, operating skills and data processing, etc. A key link, some specific issues will be discussed below:
1. The influence of the curvature of the test piece on the accuracy
In field work, samples with curved surfaces are often encountered, and various curved surfaces have different effects on the hardness test results. In the case of correct operation, the instantaneous position of the impact body on the surface of the test piece is the same as that of the plane test piece, so it is commonly used. A support ring is sufficient. But when the curvature is small to a certain size, due to the significant difference between the deformation of the plane state and the elastic state, the rebound speed of the punch will be low, and the Leeb hardness display value will be low.
2. Errors caused by data conversion
The error of converting Leeb hardness into other hardness includes two aspects: one is the measurement error of Leeb hardness itself, and the error of converting Leeb hardness into other hardness includes two aspects, one is the measurement error of Leeb hardness itself, which involves To the dispersion and error of multiple Leeb Hardness Testers of the same model when repeating the test with the same method. On the other hand, the error caused by comparing the hardness measured by different hardness testing methods is due to the lack of a clear physical relationship between various hardness methods, and the unreliable measurement when compared with each other.
3. Errors caused by special materials
The conversion table stored in the Hardness Tester may differ from the following steel grades:
high alloy steel
◆All austenitic steels
◆In high-speed steel, heat-resistant tool steel and ledeburite chromium steel (tool steel) and hard materials (ledeburite carbides such as M7C3 and M6C will cause an increase in elastic modulus, resulting in low HL value. This grade of steel should be in Tested in cross section.
◆ Local cooling and hardening, eg due to improper cutting or specimen preparation, can also lead to high HL values.
magnetic steel
◆ When testing the hardness of magnetic materials, the value of HL will be low due to the influence of the magnetic field. If the magnetic field is strong, this test method is not recommended.
case hardened steel
◆For case-hardened materials, especially surface-treated steel, the HL value will be lower due to the softer matrix. When the hardened layer is larger than 0.8mm (0.2mm for C-type impact device), the HL value will not be affected.
For special materials, the comparison relationship can be established by itself through the following methods.
◆The test surface must be carefully prepared
◆If coupling is not performed, the selected sample size should be as large as possible
◆The hardness of the sample is within the conversion range of the Hardness Tester
◆Check the accuracy of the static Hardness Tester and the hardness block of the corresponding measurement range.
◆Use a static Hardness Tester to measure three points on the sample, and use a Leeb Hardness Tester to measure five values around the indentation, and take the average value. The hardness values measured by the two methods are compared, and the error range is given. Using the method described above, a conversion curve can also be drawn using a set of samples of different hardness.
4. Gear detection error
In general, the Leeb Hardness Tester can further guarantee the detection accuracy of the gear tooth surface with a modulus greater than 7, but when the gear modulus is less than 7, the detection error is relatively large due to the small tooth surface. Corresponding tooling can be designed according to the situation to help reduce errors.
5. The influence of material elasticity and plasticity
In addition to hardness and strength, the Leeb value is also related to the modulus of elasticity. The hardness value is a characteristic parameter of the hardness and plasticity of the material, because the composition of both needs to be determined together. In the elastic part, it is obviously first affected by the E-modulus, in this respect, when the static hardness of the material is the same, but the E-value is different. A material with a low E value has a high HL value.
According to the modulus of elasticity of the material. Alloy type and heat treatment state can classify various materials.
6. Structural error caused by hot rolling direction
When the workpiece to be tested is formed by hot rolling process, if the test direction is consistent with the rolling direction, the test value will be low due to the large elastic modulus "E", so the test direction should be perpendicular to the hot rolling direction. scrolling direction. For example: when measuring the cross-section hardness of cylindrical parts, it should be carried out in the radial direction (generally, the hot rolling direction of cylindrical parts is axial).
7. The influence of other factors
The following points should be paid attention to when testing pipe fittings:
◆Pay attention to the stable support of pipe fittings
◆The test point should be close to the support point and parallel to the support force
◆When the tube wall is thin, place an appropriate tube core in the
During the heat treatment process, the metal material sometimes changes (for example, 20Cr steel is carburized and quenched from alloy structural steel to low alloy tool steel). In this case, care should be taken to select the appropriate metal material.
The hardness deviation of the workpiece itself will also cause the error of the test value. The hardness distribution should be analyzed based on experience, and the error of the test value should be reasonably explained. Incorrect operating methods, sample preparation, and probe configuration can also cause errors.
in conclusion
All durometers are not versatile and cannot solve all problems! The portable Leeb Hardness Tester has simple measurement value, small marks, wide hardness value measurement range, easy to carry, and is not limited by space and orientation. It is a beneficial supplement and extension of the desktop Hardness Tester! Widely used in molds, rolls, container manufacturing, forging and other industries!

-
Leeb Hardness Tester DHT-400Dplus$ 1938.00
-
-
-
Leeb Hardness Tester DHT-100Dplus$ 1312.00
-
-
-
-
-
- 1Read the Leeb Hardness Tester in one article
- 2Leeb Hardness Tester different hardness system difference
- 3What products is the Leeb Hardness Tester with D probe suitable for measuring?
- 4Leeb Hardness Tester measurement requirements
- 5Factors Affecting the Test Accuracy of Leeb Hardness Tester
- 6What are the measurement requirements for a Leeb Hardness Tester?
- 7What factors affect the test accuracy, error and repeatability of the Leeb Hardness Tester?
- 8What is hardness testing? What types are there?
- 9Requirements for Casting Hardness in American Standard ASTM and Selection of Sclerometer
-
-
PRLH150 Leeb Hardness Tester$ 259.00
-
-
-
-
