
KANGGUANG WSD-3U Fluorescent whiteness measurement range 0-199
 WSD-3U

KangGuang WSD-3U Fluorescent Whiteness MeterSPEC
KangGuang WSD-3U Fluorescent Whiteness MeterDetails
KangGuang WSD-3U Fluorescent Whiteness MeterPacking list
- SKU
- NB012509
- Measurement range
- 0~199
- Resolution
- X, y 0.0001, rest 0.01
- Precision
- (Whiteness) W ≤ 1.0
- Zero drift
- Zero drift ≤ 0.1 indication drift ≤ 0.2
- Repeatability
- (Whiteness) Delta W ≤ 0.2
- Measurement aperture
- Φ18mm
- Specimen size
- Diameter > < 18mm, thickness < 40mm
- Dimensions
- 300*330*280mm
- Net Weight
- 4.8 kg
- Light source
- D65
- test condition
- 0/d condition
- Viewing Angle
- 10 ° field of view
- Voltage and power consumption
- 220V±10% 50Hz,23W
- Operating temperature
- 0-40℃
- Surface color parameters - absolute value
- CIE XYZ、Yxy La*b* LC*H* HunterLab
- Surface color parameter - color difference value
- Yxy La*b* LC*H* HunterLab
- Color parameters - whiteness
- CIE86 whiteness Wg and Tw value R457 whiteness Wr value Hunter whiteness Wh value GB5950 whiteness Wj value Stensby whiteness Ws value Stephansen whiteness Wp value
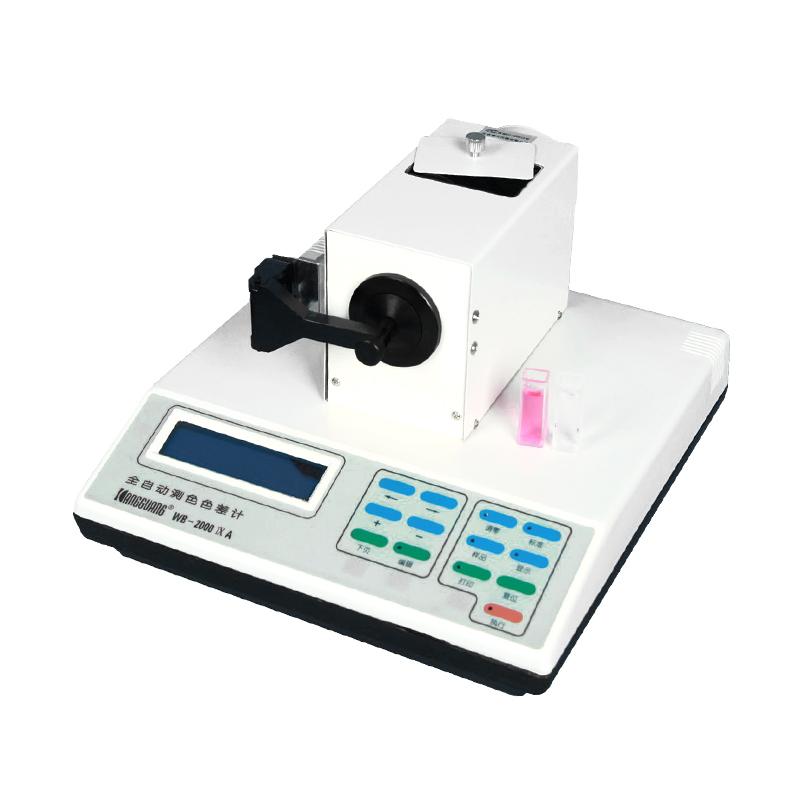
Instrument structure diagram

(1) Main machine part (2) LCD display (3) Operation keyboard (4) Optical test head (5) Reflective sample test bench

(6) Power switch (7) Power cord socket (8) Fuse (9) Printer and communication interface
Operator panel description

1. Edit key part: It is composed of six keys, and its function is to modify various parameters set by the user and input new parameters. See Figure 4.
(1) ← key: the cursor is shifted to the left, which is used to move the digit to be modified when editing data.
(2) → key: The cursor is shifted to the right, which is used to move the digit to be modified when editing data.
(3) + Add key: Add one to the modified value.
(4) - Decrease key: Reduces the modified value by one.
(5) Next page turn button: display the content of the next screen (page).
(6)Edit Edit Key: Enter the Edit or Exit Edit section.

2. Operation key part: It is composed of seven buttons, and its function is to operate the instrument to zero, white, measure, display, and print out the measurement results. See Figure 5.
(1) Zeroing and zeroing button: Press this button to enter the state of preparing for zeroing.
(2) Standard whitening key: Press this button to enter the state of preparing to proofread the standard (whitening).
(3) Sample test button: Press this button, and the instrument enters the state of preparing to measure the sample.
(4) Display display key: After the sample is measured, press this button to display the measurement result. By pressing this key continuously, all the measured results that are requested to be output are displayed.
(5) Print and print button: After the sample is measured, press this key to print the measurement results, and you can also communicate with the computer.
(6) Reset reset button: press this button, and the instrument will resume the state of preparing the sample for measurement.
(7) Execute the execution key: press this button to perform various operations when you are ready to adjust the zero, calibrate the standard (white), and measure the sample.