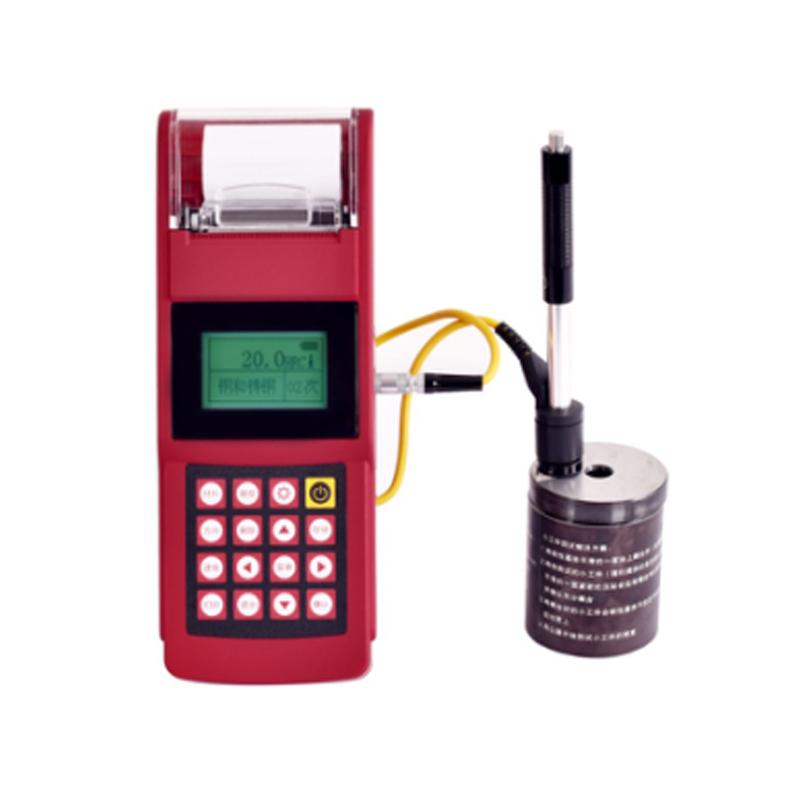
LEEB U917 Portable Leeb Hardness Tester
Leeb U917 Leeb Hardness TesterSPEC
Leeb U917 Leeb Hardness TesterDetails
Leeb U917 Leeb Hardness TesterPacking list
- SKU
- NB022734
- Measurement range
- 150~960HLD、17.1~68.5HRC、77~651HB、83~976HV、26.4~99.5HS、 59.6~99.6HRB、59.1~85.8HRA
- Error of indication
- ±6HLD(HLD=760)
- Indication Repeatability
- 6HLD(HLD=760)
- Optional Impact Device
- D、G、C、DL、DC、D+15
- Measurement direction
- 360°
- Hardness system
- HL/HB/HRC/HRB/HV/HS/HRA/HSD
- Measurement material
- 11 kinds
- PC communication
- Yes.
- Print roll diameter
- 30±0.5mm
- Paper width
- 56.5±0.5mm
- Power Supply
- Lithium battery (can work continuously for 10 hours)
- Power Supply
- 9V
- Dimensions
- 238*90*38mm
- Weight
- 440g
- Optional accessories
- Various Shaped Support Rings, Impact Devices, Standard Hardness Blocks, Printing Paper

overview
The instrument is a built-in printer, tolerance limit setting and other multi-functional hardness measuring instruments, built-in high-speed thermal printer, support on-site instant printing, to ensure the fairness of measurement results and long-term storage and traceability of data. Using full Chinese display, menu-based operation, simple and convenient operation. This machine can directly display various hardness values such as Richter, Brinell, Rockwell, Vickers, Shore, etc. The instrument is small, portable, highly reliable, suitable for harsh operating environments, resistant to vibration, shock and electromagnetic interference.

Features
According to the Leeb hardness measurement principle, the Leeb HL measurement interface is displayed when the machine is turned on, which can detect a variety of metal materials with high precision.
The "Steel" material is supported, and when the "Forged Steel" specimen is tested with a D/DC type impact device, the HB value can be read directly, eliminating the need to manually check the table.
It is convenient to switch to all hardness systems (HL, HB, HRB, HRC, HV, HS, HRA) and convert the measured values of each hardness system in parallel.
Full Chinese display, menu-based operation, simple and convenient operation.
It has a high-brightness LED backlit display, which is convenient for use in low-light environments.
One main unit can be equipped with 5 different impact devices, and the type of impact device can be automatically identified. There is no need to recalibrate when replaced.
It can store up to 600 sets of hardness measurement data (30~1 impact times). Each set of data includes information such as a single measurement, an average value, the date of measurement, the direction of impact, the number of times, the material, the hardness system, etc.
The upper and lower limits of hardness values can be set in advance, and automatic alarms will be given when the range is exceeded, which is convenient for users to test in batches.
Lithium battery design, long service life, with charging and low battery prompt, charging is simple and convenient. It has power-saving functions such as automatic shutdown.
It has the function of calibration of the indicator software.
The built-in thermal printer can directly print the current measured data, or you can choose to store a certain set of data.
Scope of application
Installed mechanical or permanently assembled components.
Mold cavities.
Heavy-duty workpieces.
Failure analysis of pressure vessels, turbine-generator sets and their equipment.
Measure workpieces with limited space.
Bearings and other parts.
Material division of metal material warehouse.
Rapid inspection of multiple measuring parts in a large area of large workpieces.
Applicable Materials
Steel & Cast Steel, Alloy Tool Steel, Stainless Steel, Grey Cast Iron, Ductile Iron, Cast Aluminium Alloy, Copper-Zinc Alloy (Brass), Copper-Tin Alloy (Bronze), Pure Copper, Forged Steel
Mainly used for:
1. The hardness testing of products in the process of mass production can meet the testing requirements with a set of standard equipment.
2. For hardness testing of annealing, tempering, quenching and other heat treatments, it is necessary to pay attention to the thickness of the hardened layer if there is a hardened layer when selecting the model, and if the hardened layer is too thin, you need to choose a C-type impact device
3. When testing the hardness of the bearing, it is necessary to pay attention to the bearing diameter, and if the diameter is too small, the special-shaped support ring needs to be selected
4. When the gear hardness is tested, if the gear is too small, the DL impact device needs to be selected
5. When the casting is inspected, if it is difficult to perform the finish, it is necessary to choose the G-type impact device.
Optional
All kinds of special-shaped support rings, impact devices, standard hardness blocks, printing paper.
 U917
U917
