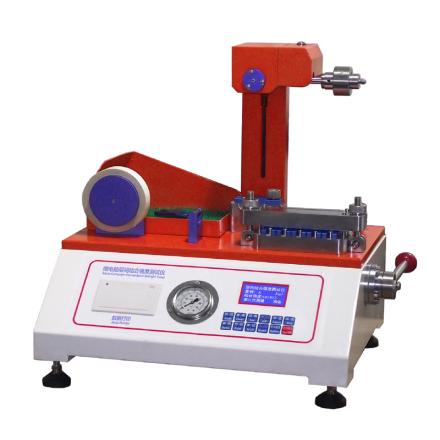
Specifications
| Specimen size | 25.4*25.4mm |
| Number of samples | 5 groups |
| Specimen parallelism | Less than 0.1mm |
| Maximum sampling Film thickness | 1.5mm |
| Common sample pressure | (690 ± 21) kpa (1034 ± 34) kpa |
| Sample holding force | 0~600N (adjustable) |
| impact angle | 90° |
| Secondary gravity structure | Secondary gravity overlaps to ensure the Accuracy of the secondary measurement structure |
| resolution | 0.001lbf / in ² |
| Release method | Fully automatic release |
| Double-sided adhesive force | >486N/m |
| Measuring range | File A |
| Self-calibrating | Can be calibrated |
| Oil circuit full scale system | Equipped with an independent refueling window, the refueling work can be completed quickly |
| Oil circuit exhaust system | Equipped with an independent exhaust window, the exhaust work can be completed quickly |
| Error of indication | File A |
| unit | J/M²、lbf/in² |
| Display | 3.2In LCD display, real-time display of test data |
| software | Optional computer connection software, office file processing documents, end point A4 printing (optional) |
| printout | Modular integrated thermal printer |
| Dimensions | 500*400*650mm |
| Weight | 45KG |
Packing list
completeness-built unit X1, operation manual X1, certificate of conformity X1, warranty card X1
After-sales instructions
Warranty days: 365 days
1. The equipment is not artificially caused by product quality problems, and the manufacturer provides warranty services during the warranty period;
2. During the warranty period, the manufacturer will respond within 12 hours after receiving the notice of equipment failure, if it cannot be solved by telephone, the corresponding maintenance plan will be arranged according to the specific situation, or returned to the factory for maintenance, or appointed technicians to the scene to solve.
3. Provide paid services outside the warranty period;
[Note] For after-sales services outside the Chinese mainland, if the instrument requires repair, the shipping and possible associated taxes shall be borne by the sender. Generation address of the manual: http://en.nbchao.com/p/29196/Specification.html , which is only used by users who purchase commodities from the NBCHAO.
