
YINUO YN-ZSY-4 offset plate inks spot color Proofer inks color display instrument, offset printing four-color offset plate printing two-color optional
SE YN-ZSY-4


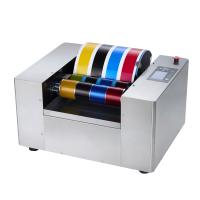
YiNuo YN-ZSY-4 Inks color display instrument - offset printing four colorsSPEC
YiNuo YN-ZSY-4 Inks color display instrument - offset printing four colorsDetails
YiNuo YN-ZSY-4 Inks color display instrument - offset printing four colorsPacking list
- SKU
- NB034021
- uniform ink method
- automatic
- Printing accessories
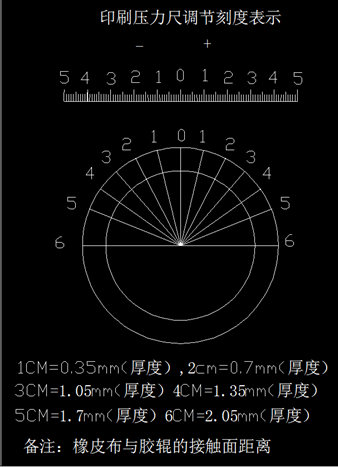
- Printing pressure can be precisely adjusted externally according to the material Film thickness
- Main accessories
- Germany/Japan
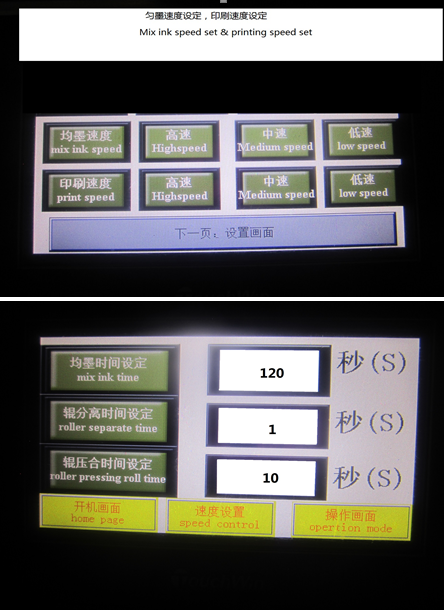
- Uniform ink printing speed
- Adjustable
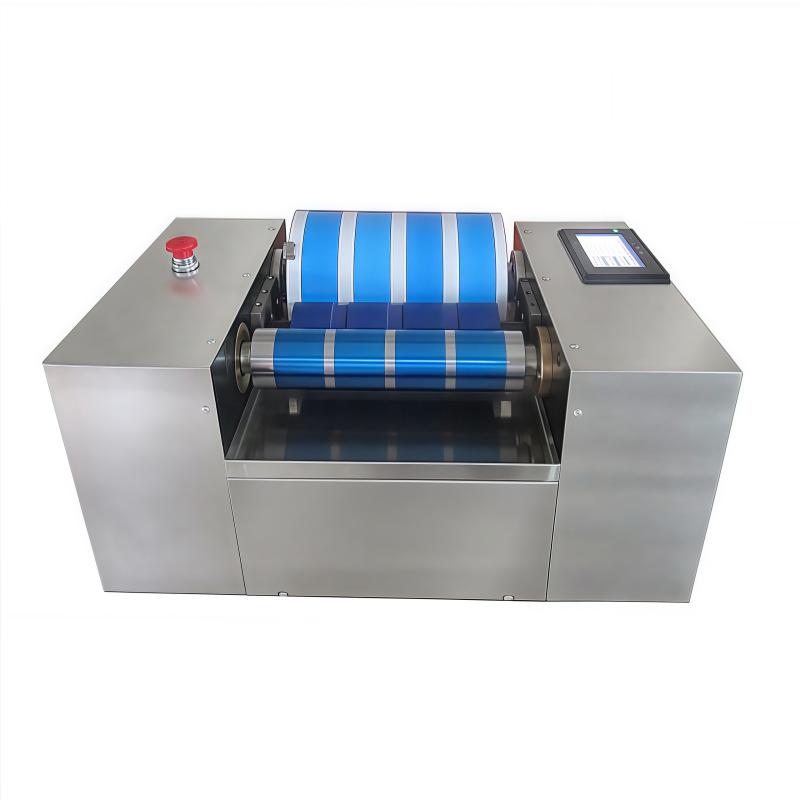
- Blanket Roller Size
- 260X220mm
- Color bar size
- 45X220mm---4 pieces (4 pieces in primary color area, 4 pieces in light color area)
- Power
- 220V,400W
- Complete-built unit Mass
- About 75KG
Instructions
1. Wiring requirements for this device: live wire, neutral wire, ground wire, and third wire are required for safe use of electricity. The machine has a built-in leakage switch.
2. Turn on the power switch, and prepare paper, ink, and cleaning cloth after color development (white is better).
3. Install the paper, adjust the viscosity of the ink, put the ink to be tested into the chest of the ink injector, and discharge the air inside until the ink overflows.
4. Align the nozzle of the ink injector with the surface of the ink distribution rubber roller, and install the amount you need to inject.
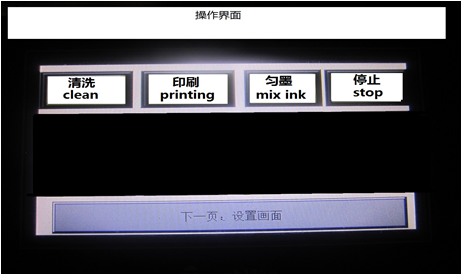
5. Open the operation screen and set the data, press "Ink Distributing", the instrument will automatically execute the computer program.
6. Press "Print" after the ink distribution stops, and the printing is very good.
7. After printing and sampling, you can start to clean the ink on the rubber roller and steel roller.
8. Clean the rubber roller and steel roller effectively.
9. Turn off the power after the work is completed.
10. In thunderstorm weather, try not to use this device. Because there are many electronic accessories in it, pay special attention to the machine not to be powered off for a long time. It is recommended to turn it on twice a month.
Ink distribution pressure and printing pressure adjustment
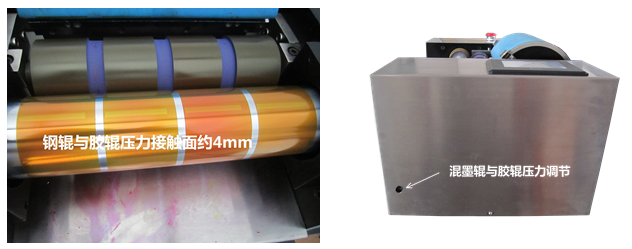
1. Press the "emergency stop" switch between the steel roller and the rubber roller during ink distribution, and then unscrew the emergency stop switch to power on after the machine stops. There will be an indentation with a width of 4-5mm between the two rollers, and observe the indentation Balance.
2. The pressure adjustment of the blanket cylinder and ink distribution rubber roller, there is a scale on the left and right sides, balance adjustment, the pressure effect is flat, clear and tidy. Excessive pressure will cause pattern deformation and ink convex edge, and small pressure will cause white spots to be false.
- 1The conveying phase of the ink conveying on the printing machine
- 2What is inkjet printing?
- 3Sustainable printing methods: flexo and screen printing, gravure printing, lithography, offset printing
- 4What faults can occur in lithographic printing? What remedies are there?
- 5Influence and Advantages of Scraper Cavity System on Flexographic Printing
- 6Test method for surface strength of paperboard printing
- 7The Importance of Correct Installation of Scraper Blades for Flexographic Printing
- 8Color scheme common problem causes and solutions
- 9How are printing plates made?
- 10Printing ink suitability and paper surface strength
- 1GB/T 17001.3-2025《Anti-counterfeiting printing ink—Part 3:Thermochromic anti-counterfeiting printing ink》
- 2GB/T 17001.4-2025《Anti-counterfeiting printing ink—Part 4:Sunlight excitation color variable anti-counterfeiting printing ink》
- 3GB/T 17001.6-2022《Anti-counterfeiting printing ink—Part 6:Infrared excitation fluorescence anti-counterfeiting printing ink》
- 4GB/T 13217.1-2020《Test method for colour and tinctorial strength of ink》
- 5QB/T 2025-2013《Offset tin-printing ink》