
CCYONGXIN ZHD-4 Paper and Cardboard Electric Thickness Gauge
SE ZHD-4
ZHD-4


ChangChunYongXin ZHD-4 Paper and Cardboard Electric Thickness GaugeSPEC
ChangChunYongXin ZHD-4 Paper and Cardboard Electric Thickness GaugeDetails
ChangChunYongXin ZHD-4 Paper and Cardboard Electric Thickness GaugePacking list
- SKU
- NB034370
- Measuring range
- 0~4mm
- resolution
- 0.001mm
- Contact Pressure
- 100 ± 10kPa
- Contact area
- 2±0.05cm²
- Dimensions
- 120*150*260mm
- Weight
- 11.2kg

Introduction
ZHD-4 Paper Thickness Tester is designed according to the relevant provisions of the professional standard QB1055-91 "Paper and Cardboard Thickness Tester".
The instrument is suitable for measuring the thickness of various paper, cardboard and other sheet materials below 4mm.
Structure and Principle
This instrument is a special instrument for measuring the thickness of paper and cardboard with the internationally accepted Schopper type, which is designed on the principle of contact measurement.
Thickness refers to the vertical distance of paper or cardboard between two measuring boards under a certain pressure, and the result is expressed in mm or um. According to the thickness and thinness of the paper, multi-layer measurement or single-layer measurement can be taken, and the result of single-layer measurement indicates the thickness of the paper.
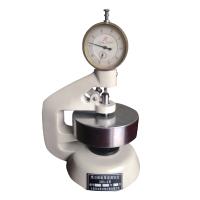
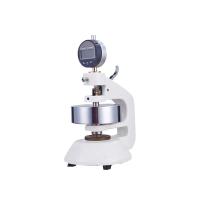
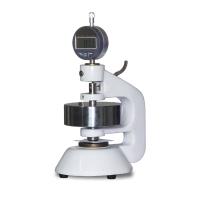
Instrument structure
The Thickness Gauge is composed of a box, a table base, a digital display (or a mechanical dial indicator), a measuring rod, an anvil, a weight, a cam, and a motor. After the instrument is powered on, the motor drives the cam to rotate. The rotation of the cam is converted into the linear reciprocating motion of the measuring head up and down, thus completing the work of measuring the thickness of the sample.
Installation and commissioning
Place the instrument on a flat and stable workbench.
1. Zero adjustment:
(1) If the lower end of the measuring rod of the digital display meter is in contact with the measuring anvil; as long as the meter head touches the upper end of the measuring rod, then the meter is fixed, and the tightness of the tightening screw should be appropriate. For how to use the digital display meter, please read the instruction manual of the digital display meter.
(2) If the lower end of the measuring rod of a mechanical dial indicator is in contact with the anvil; the dial should be turned to make the zero point of the dial upward, and then the head of the dial should touch the upper end of the measuring rod, and lightly tighten the screw to make the dial not Sliding under its own weight. Gently press the gauge with your hand to move it down until the small pointer points to 1 and the large pointer points to zero. At this time, fix the gauge and pay attention to the proper tightness of the gauge screws.
- 1Paper and Cardboard Thickness Gauge
- 2Basic Principle and Application of Cardboard Strength Testing Machine