
QIWEI PHS-3CB desktop pH meter rechargeable
 PHS-3CB


QiWei PHS-3CB pH Meter (desktop microcomputer rechargeable)SPEC
QiWei PHS-3CB pH Meter (desktop microcomputer rechargeable)Details
QiWei PHS-3CB pH Meter (desktop microcomputer rechargeable)Packing list
- SKU
- NB003953
- PH range
- 0~14pH
- Measurement Accuracy of pH
- ±0.01pH
- resolution
- pH: 0.01pH/Temperature: +/- 1 ℃
- Measurement range
- 0~100℃
- Stability (zero drift)
- ≤ 0.01pH +/- 1 word/2h
- Impedance
- >1x10¹²Ω
- Data storage
- none
- Power Supply
- 9V DC Power Supply
- Dimension
- 230*200*60mm
- Weight
- About 1.5Kg
- Standard electrode reagent
- E201-C plastic case PH composite electrode (suitable for solution temperature measurement in the range of 5-60 ℃); PH standard calibrated sample; power adapter
- Environmental temperature
- 0~40℃
- Allowable Relative Humidity
- <85%
- Solution temperature compensation range
- 5~60℃
- Measurement Accuracy
- ±1℃
- Measurement range
- 0~100℃
- Measurement range mV
- ±1000mV
- Temperature compensation method
- manual
Introduction
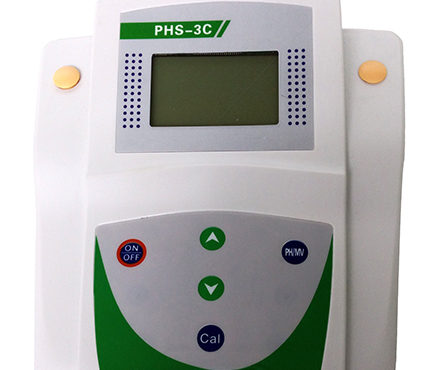
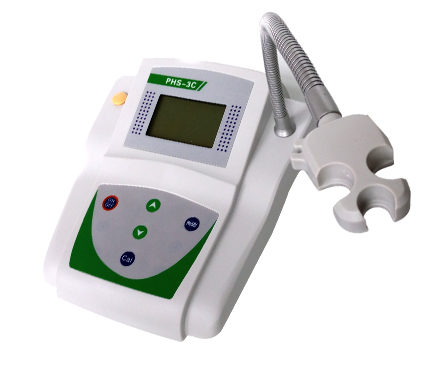
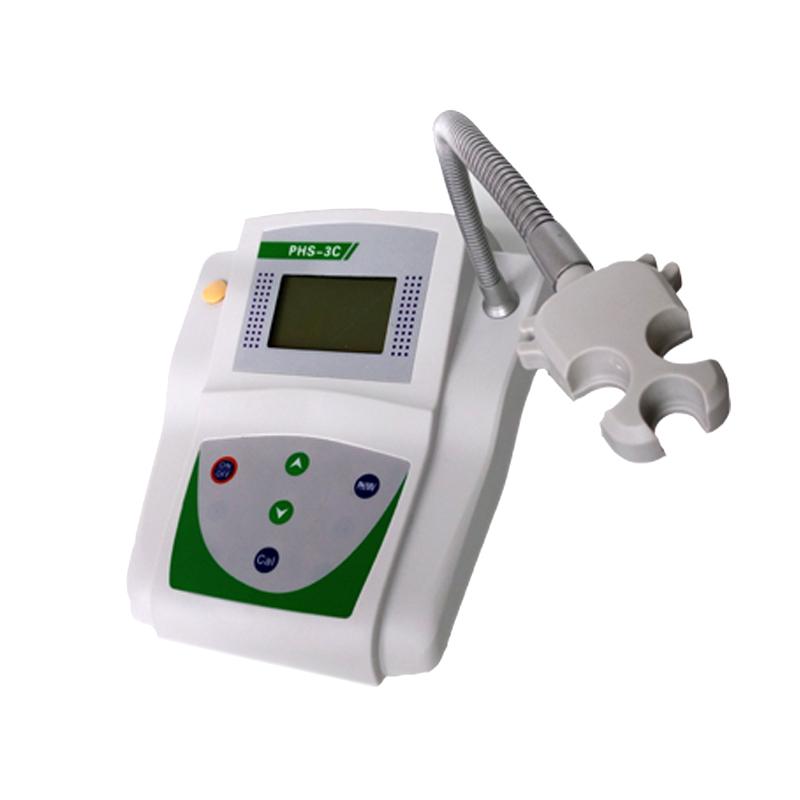
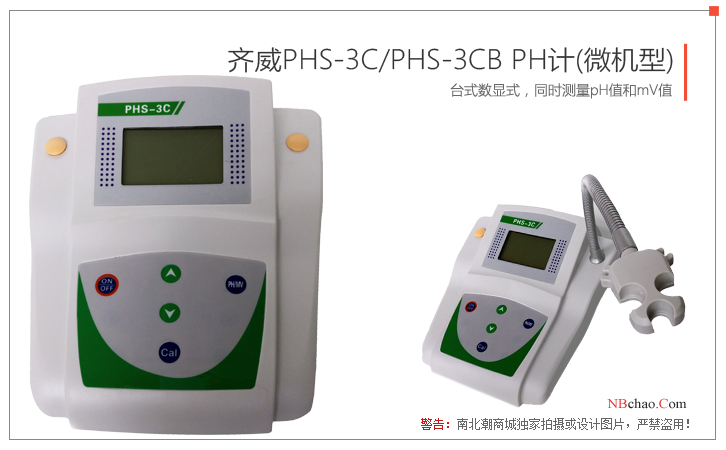
Qi WeiPHS-3CB(Desktop micromodel can be recharged) The pH meter measures pH with an accuracy of 0.01 pH and a temperature accuracy of ±1 °C. The microcomputer PH meter is a touch button that manually compensates for the temperature and automatically recognizes the calibration solution. It is suitable for precise measurement of acidity (pH) and electrode potential (mV) of solutions in the laboratory.
Actual picture of the product
How to use:
1. Prepare before use
(1) Plug the power adapter into the 220V AC power supply and plug in the DC output plugPHS-3CB PH meterPower jack on the rear panel.
(2) The electrode is installed on the electrode stand, remove the short-circuit plug on the electrode socket of the PH meter, and insert the electrode.
Note that the electrode plug should be kept clean and dry before use, and should not be contaminated.
(3) After the power is turned on, press the on/off button, preheat for about 5 minutes before calibration.
2. PH meter calibration
Before using the PH meter, it is necessary to perform professional calibration, PHS-3CB The pH meter should be calibrated with three standard buffer solutions: 4.00, 6.86 and 9.18, and the standard buffer solutions used should be accurate and reliable to ensure the accuracy of the subsequent measurement results.
1) Plug in the power supply and press the "Switch" button to power on. UnscrewPHS-3CB PH meterThe short-circuit protective cover on the pH socket is connected to the molded case pH composite electrode, and the electrode is washed and spun dry in purified water. Measure the temperature of the pH buffer solution with a thermometer and press the increase button "∧" or decrease the button "∨" to adjust the temperature value accurately.
2) Positioning calibration. Immerse the pH electrode in pH 6.86 buffer, stir it slightly, and hold the "Calibration" button until the measured value is stable. When the LCD screen displays the CAL symbol, let goCalibration key, first display a flashing 6.86, after a few seconds display the End symbol, and then display the pH calibration value (the pH value displayed at this time varies with temperature, for example, 6.86 at 25°C, 7.04 at 15°C, these are all values set in the chip, the same below). Indicates that the calibration is completed and memorized.
3) Slope calibration I/calibrationII。 where calibration I is usedpH 4.00 buffer,Calibration II is usedpH 9.18 buffer。 OPERATION METHOD: TAKE OUT THE PH ELECTRODE, WASH IT WITH PURE WATER AND SPIN IT DRY, AND THEN IMMERSE THE PH ELECTRODE IN PH 4.00 (pH9.18buffer, after a little agitation, it is placed still, and after the measured value is stable, press and hold the "Calibration" button, and release it when the LCD screen displays the CAL symbol, and first display the flashing 4.00 (9.18), the End symbol is displayed after a few seconds, and the pH calibration value is displayed to indicate that the calibration is complete and memorized. Once the calibration is complete, the percentage slope of the electrode in that linear segment is automatically displayed.
Calibration Instructions: Built-in intelligent chip, you can use one-point, two-point or three-point automatic calibration, if the measurement accuracy is ≤0.1pH, as long as you use pH buffer solution for a little calibration; If the measuring range is only in the acidic range (≤7pH), pH7 and pH4 calibration are optional; If the measuring range is only in the alkaline range (≥7pH), pH7 and pH10 calibration are optional; If the measurement range is relatively wide, or the pH electrode is used for a long time and there is aging phenomenon, a three-point calibration should be selected, which will make the measurement accuracy higher, and the first time the pH electrode is used, a three-point calibration is required to adjust the slope of the instrument to be consistent with the pH electrode.
3. Measure the pH value of the solution
Measure the temperature of the solution with a thermometer, then press the increase button ∧or decrease the button∨ adjust the temperature value of the instrument accurately, wash the pH electrode with pure water and spin it dry, immerse it in the measured solution, and place it still after a little agitation, and the reading when the measured value is stable, that is, the measured pH value.
Note: The closer the temperature of the test solution is to the temperature of the calibration solution, the more accurate its measurement will be.
4. Measure the mV value
Press the "pH/mV" button to switch to the "mV" setting. Connect the ORP electrode or ion electrode (need to be equipped) and insert it into the measured solution, stir it slightly, and place it statically, and read it after the measured value is stable, which is the measured ORP value or the potential value of the ion electrode.