


MODERNER BY-I Pendulum Hardness Tester for determination of coating hardness
 BY-I
BY-I

Moderner BY-I Pendula Hardness TesterSPEC
Moderner BY-I Pendula Hardness TesterDetails
Moderner BY-I Pendula Hardness TesterPacking list
- SKU
- NB000671
- Swing bar type
- Konig pendulum + Persoz pendulum
- Konig swing Mass
- 200g
- Konig swing period
- 1.4s
- Konig ball diameter
- 5mm
- Konig Glass Swing Time
- 250±10s
- Number of swings on Konig Glass
- 172~185
- Konig starting and ending swing angle
- 6°/3°
- Persoz swing Mass
- 500g
- Persoz swing cycle
- 1s
- Persoz ball diameter
- 8mm
- Persoz Glass Swing Time
- ≥420s
- Number of Swings on Persoz Glass
- ≥420
- Persoz start and end swing angle
- 12°/4°
- Power
- AC220V 50Hz 或 60Hz
- Dimensions
- 380*300*700mm
- Application standard
- GB/T 1730-2007
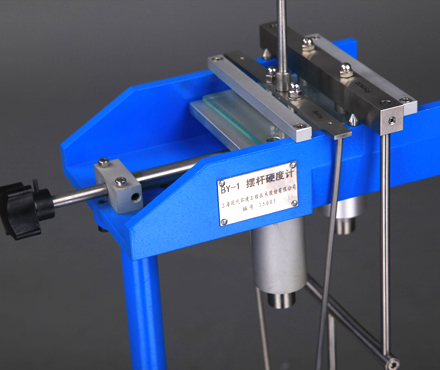
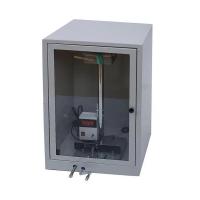
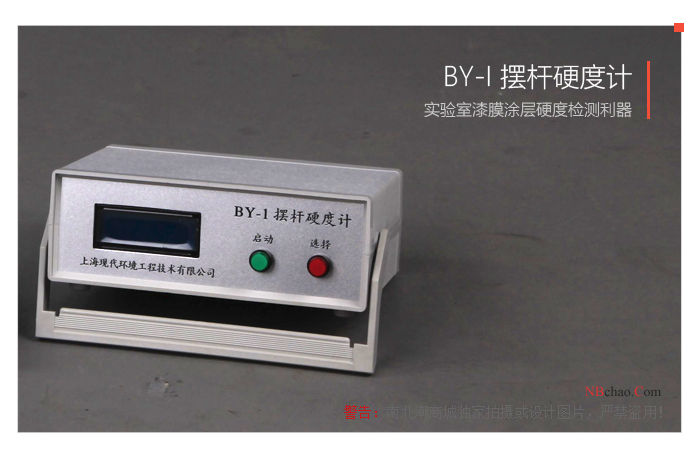
Overview of the BY-I pendulum Hardness Tester
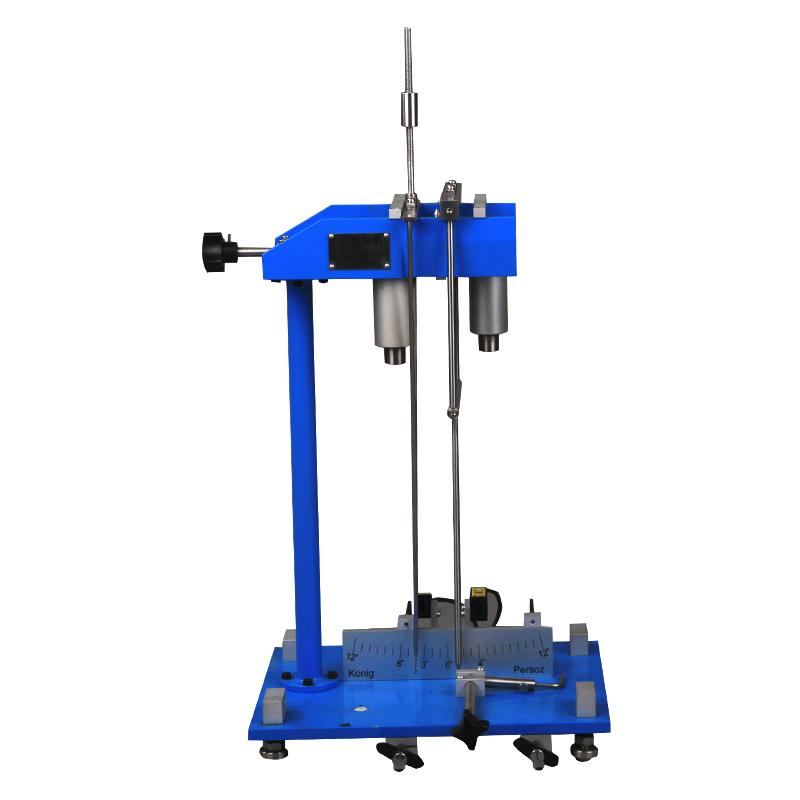
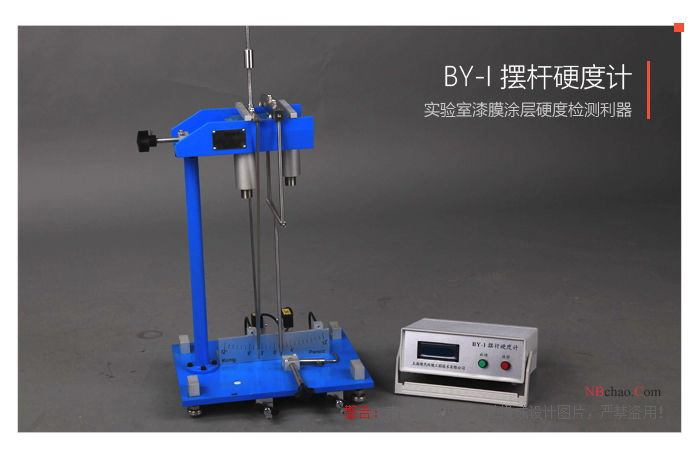
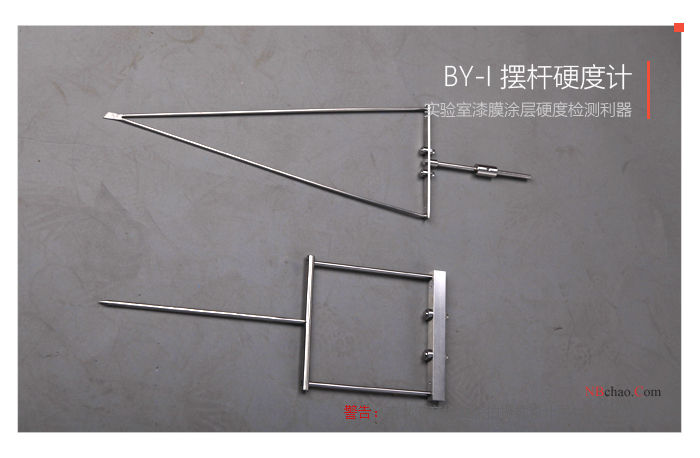
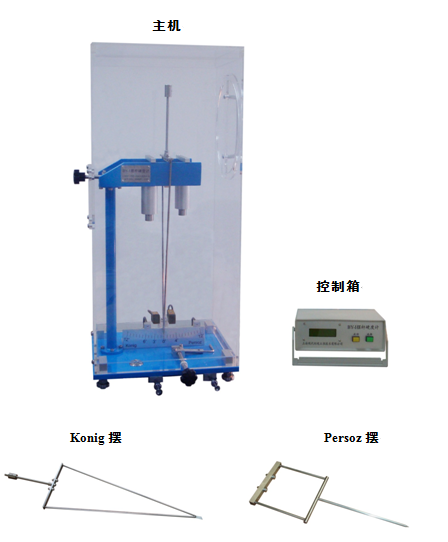
Modern Environment BY-I Pendulum Hardness Tester is a common instrument for laboratory hardness testing of paint film coatings, which is suitable for hardness testing of paints, coatings, inks, varnishes and other products.The BY-I pendulum Hardness Tester is equipped with:Konig pendulum and Persoz pendulum, suitable for different test objects, among themThe Konig pendulum has a triangular frame structure, and the Persoz pendulum has a square frame structure.The BY-I pendulum Hardness Tester is an effective hardness testing equipment in the laboratory by recording the number and time of the pendulum swing by the control box.
How the pendulum Hardness Tester works
The softer the coating surface of the pendulum that swings at a certain period, the faster the swing attenuation of the pendulum is attenuated. Conversely, the decay is slower. Due to the differences in structure, weight, size, swing period and swing amplitude of various pendulums, as well as the complex elastic and viscoelastic changes under the interaction between the pendulum and the coating, it is impossible to establish an effective conversion relationship between the measurement results of various pendulums. Therefore, when measuring the hardness of a coated pendulum in each product standard, it is specified that only one type of pendulum is used.
Technical parameters
| Model | BY-I |
| Use a power source | AC220V 50Hz or 60Hz |
| Suitable for pendulum type | Konig pendulum and Persoz pendulum |
| Dimensions | 380x300x700mm (LxWxH) |
| Weight of the main unit | kg |
Technical indicators of BY-I pendulum Hardness Tester
The Konig pendulum has a triangular frame structure, and the Persoz pendulum has a square frame structure. The main technical indicators of the two kinds of pendulum rod determination are shown in the following table:
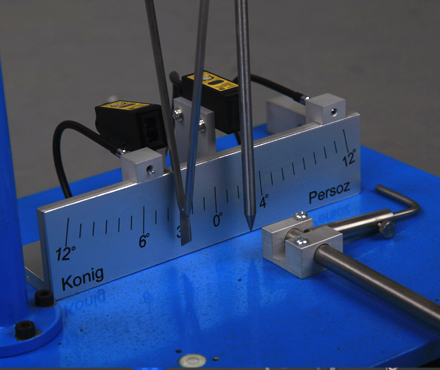
| Pendulum model | Konig pendulum | Persoz pendulum |
| Swing angle | 6°~3° | 12°~4° |
| Swing cycle | 1.4sec | 1sec |
| The quality of the pendulum | 200g | 500g |
| Diameter of the steel ball | 5mm | 8mm |
| Swing time on flat glass | 250±10sec | ≥420sec |
| The number of swings on the flat glass | 172~185 | ≥420 |
Note: The Persoz swing time on the flat glass is 430±10sec according to the ISO 1522 standard
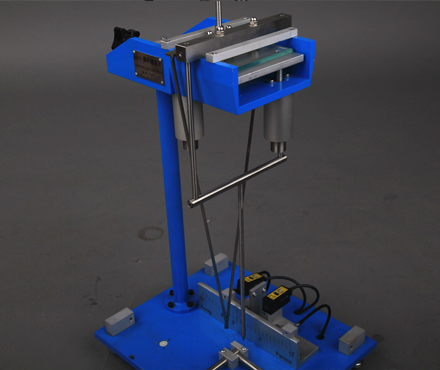
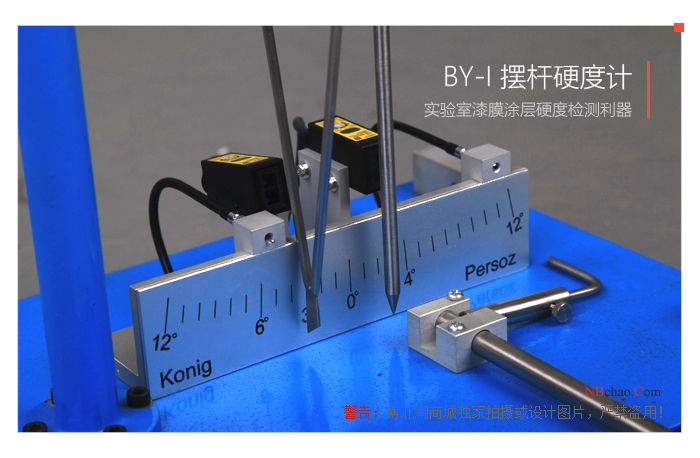
Live shot
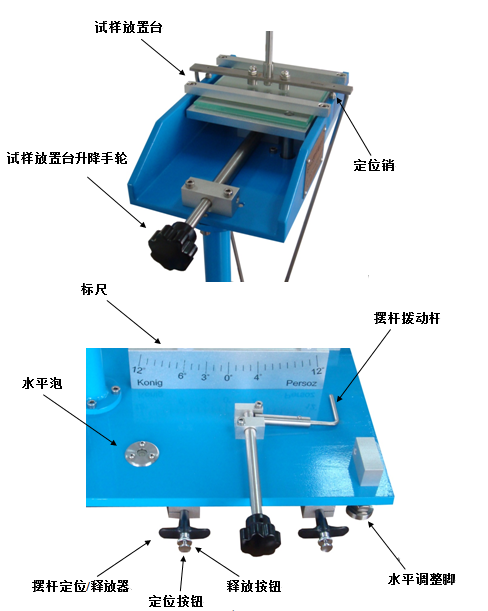
Outline and structure drawing
Comply with industry standards
The BY-I pendulum Hardness Tester is designed and manufactured based on the A method in the national standard GB/T 1730-2007, which is equivalent to the international standard ISO 1522-1998 "Pigment and varnish - pendulum damping test". The corresponding American Society for Testing and Materials standard is ASTM D4366-95. The BY-I pendulum Hardness Tester is suitable for two types of pendulums: Konig pendulum (K pendulum) and Persoz pendulum (Persaz pendulum, P pendulum). Therefore, the instrument is available in three configurations: pendulum Hardness Tester (with K pendulum), pendulum Hardness Tester (with P pendulum) and pendulum Hardness Tester (with K pendulum and P pendulum), please confirm when ordering.
In most cases, the measurement time of the Konig pendulum is close to half of the measurement time of the Persoz pendulum, from which it can be considered that the resolution of the Persoz pendulum is better than that of the Konig pendulum. However, the Persoz pendulum is prone to slippage on hard, slippery coated surfaces, which affects the actual measurement accuracy. In general, the Konig pendulum is considered to be suitable for harder coat determinations, while the Persoz pendulum is suitable for softer coat determinations.
The pendulum Hardness Tester is used in the testing process of chemical raw materials, and the user should establish appropriate safety and protective measures and determine the rules and regulations according to the relevant safety regulations before use. Safety issues related to contact with chemical raw materials shall be established by the user and shall not fall within the scope of this manual.
The initial installation and operation of the pendulum Hardness Tester
(1) Place the BY-I pendulum Hardness Tester on a stable and firm workbench. Remove the plexiglass cover and adjust the instrument level. If you are using a Konig pendulum, turn the pendulum toggle lever to the right first; If using a Persoz pendulum, turn the pendulum toggle lever to the left first.
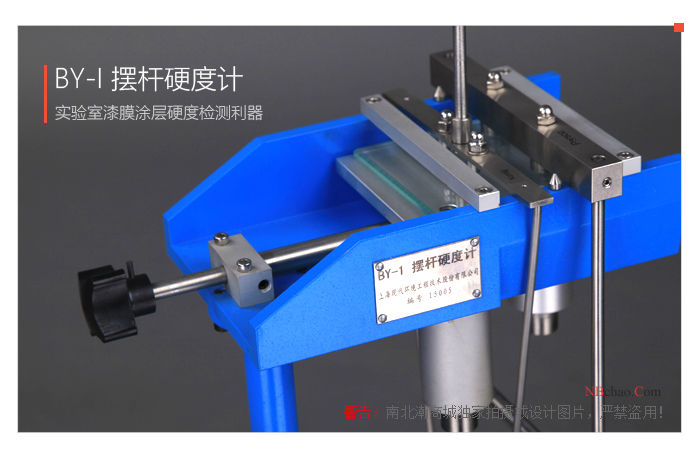
(2) Lower the specimen placement table and put in the flat glass plate (provided randomly). Remove the pendulum to be used and clean the spherical contacts of the pendulum with a clean, soft cloth. Align the small hole in the pendulum with the dowel pin on the worktop and position the pendulum (the side of the pendulum marked "Konig" or "Persoz" facing forward).
(3) Ruler zero inspection: raise the specimen placement table to clamp the flat glass piece (the pendulum rod will be raised accordingly, and the spherical contact will be in contact with the flat glass sheet), and check whether the tail of the pendulum rod is in the zero position of the scale after the swing is stationary. If it is not in the zero position, adjust the ruler to the zero position (it has been adjusted before leaving the factory).
(4) After positioning the pendulum to the starting position, check whether the tail of the pendulum is in the 6° (or 12°) position of the ruler (it has been adjusted before leaving the factory).
(5) After completing the above inspection, remove the flat glass sheet, install the plexiglass cover, connect the signal line between the BY-I pendulum Hardness Tester and the control box, and turn on the power supply of the control box. The instrument is installed and is ready to useBY-I Pendulum Hardness TesterFinish.
Pendulum Hardness Tester operating instructions
(1) The instrument control box is used for the swing counting control of the pendulum. The Select button is used to set the pendulum shape, which needs to match the selected pendulum. If you select "Konig Pendulum", the photoelectric counter on the left side of the BY-I pendulum Hardness Tester is valid (3° position of the scale); Select "Persoz Pendulum" to have a photoelectric counter on the right side of the instrument (ruler 4° position).
(2) The "Start" button is used to start the BY-I pendulum Hardness Tester to enter the counting preparation, and at the same time clear the previous display.
(3) At the end of counting, the instrument control box will beep to display the number of swings (OSC) and the number of swing seconds (sec). The instrument control box simultaneously measures the number of swings and the number of swing seconds, and gives two kinds of results at the same time.
Pre-test inspection process
(1) Remove the operation hole cover on the right side of the plexiglass cover, clean the spherical contact of the pendulum, place the pendulum on the positioning pin, put in the flat glass sheet, and then re-cover the operation hole cover.
(2) Confirm that the horizontal bubble of the BY-I pendulum Hardness Tester is in the horizontal position, and turn on the power supply of the BY-I pendulum Hardness Tester control box.
(3) Raise the specimen placement table to clamp the flat glass (the spherical contact of the pendulum is in contact with the flat glass sheet), slowly dial the pendulum to the starting swing position (ruler 6° or 12° position) with the pendulum toggle rod, and locate the pendulum rod with the pendulum positioning/releaser to confirm that the tail of the pendulum rod is in the corresponding position of the scale.
(4) Press the "start" button of the control box of the BY-I pendulum Hardness Tester, release the pendulum with the pendulum positioning/releaser, and let the pendulum swing back and forth on the flat glass. Confirm that the BY-I pendulum Hardness Tester control box stops counting at the specified end swing position and beeps (ruler 3° or 4° position); Confirm that the number of swings with the Konig pendulum is between 172~185 and the number of swings with the Persoz pendulum ≥ 420.
(6) After completing the above inspections, take out the flat glass piece, and you can do the test operation. If there are any discrepancies in the above checks, the instrument needs to be recalibrated.
Test the procedure
(1) Generally, the whole test should be carried out under the conditions of laboratory temperature and humidity (temperature 23±2°C, Relative Humidity 50±5%).
(2) Remove the operation hole cover on the right side of the plexiglass cover and clean the sample operation table.
(3) Clean the spherical contacts of the pendulum and place the pendulum on the alignment pin.
(4) Put in the test sample (if the test sample is thin, you can put the flat glass sheet underneath).
(5) Cover the operation hole cover.
(6) Raise the specimen placement table to clamp the test sample, dial the pendulum to the corresponding starting position and position.
(7) Press the "start" button of the BY-I pendulum Hardness Tester control box first, and then release the pendulum.
(8)BY-I pendulum Hardness TesterThe control box beeps to indicate that after the test is over, record the number of swings displayed and the swing time.
(9) Lower the specimen placement table, remove the operation hole cover, take out the test sample, and complete a test.
(10) After completing the test, please cover the operation hole in time to reduce dust ingress.
Precautions
(1) Do a good job of cleaning the spherical contact of the pendulum rod in time. If the spherical contacts are corroded, the balls need to be replaced with new ones and the BY-I pendulum Hardness Tester needs to be recalibrated.
(2) Place the pendulum bar on the console with the marked side facing forward.
(3) When placing the Konig pendulum, first turn the pendulum toggle rod to the right side; To place the Persoz pendulum, first turn the pendulum toggle lever to the left.
(4) If the positioning button of the pendulum positioning/release device cannot be self-locking, press the release button first and rotate it in the counterclockwise direction to make the release button pop out, and then press the positioning button to self-lock.
(5) During the test operation, press the pendulum before releasing itBY-I pendulum Hardness TesterThe "start" button of the control box.
(6) The test needs to be carried out in the state of the plexiglass cover.
(7) The small error of the zero position of the pendulum can be appropriately fine-tuned with 4 horizontal adjustment feet to calibrate (without affecting the accuracy of the horizontal bubble).
- 1NF 《Paints and varnishes - Pendulum damping test》
- 2EN ISO 1522-2006《Paints and varnishes - Pendulum damping test (ISO 1522:2006)》
- 3NF EN ISO 1522-2007《Paints and varnishes - Pendulum damping test.》
- 4JB/T 9386-2017《Pendulum damping testers》
- 5JB/T 9386-1999《Pendulum damping tester, technical conditions》
- 6GB/T 1730-1993《Paint film hardness determination method Pendulum damping test》
- 7GB/T 1730-2007《Paints and varnishes Pendulum damping test》
- 8GB/T 1730-1993《Paint film hardness determination method Pendulum damping test》