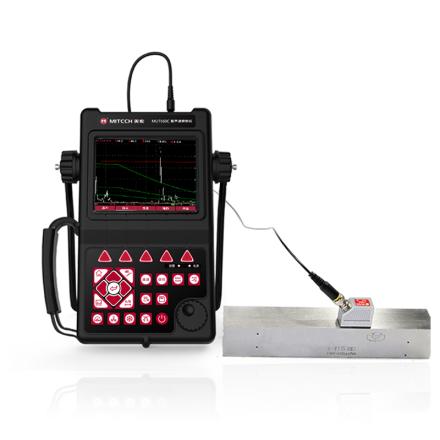
Specifications
| Scanning range | 0~9999mm |
| Frequency range | 0.2~20MHz |
| Speed of sound | 300~20000m/s |
| Dynamic range | ≥36dB |
| Vertical Linearity | ≤2% |
| Horizontal Linearity | ≤0.1% |
| Display | 640 * 480 true color LCD screen |
| resolution | >40dB(5P14) |
| Blind spot | 5MM |
| digital suppression | (0~80) %, does not affect linearity and gain |
| video duration | More than 100 hours |
| electrical noise level | ≤8% |
| Probe type | Straight probe, oblique probe, dual crystal probe, penetration probe |
| gate | Inlet gate, loss gate; single gate, double gate readings; peak trigger, edge trigger |
| Alarm function | Beep alarm, LED light alarm |
| flaw detection standard | Built-in common flaw detection standards in various industries, directly calling, convenient and fast |
| Weld diagram | The weld shape parameters can be set, and the weld pattern and the position of defects in the weld can be visually displayed during flaw detection |
| Automatic calibration | Probe zero and probe angle (K value) Automatic calibration function; Speed of sound automatic measurement function |
| Memory | Real-time retrieval of the highest defect wave and recording of the peak defect echo |
| positioning | Real-time display of defect horizontal, depth (vertical), sound path position |
| defect quantification | Real-time display of defect equivalent dB value |
| defect characterization | Through the echo envelope waveform, it is convenient for manual experience to judge |
| surface correction | For flaw detection of curved workpieces, the circumferential position of defects can be displayed in real time (optional function) |
| DAC/AVG | Linear dispersion is automatically generated, with unlimited sampling points, and can be compensated and corrected. Linear dispersion automatically floats with gain, automatically expands with sound path, and automatically moves with delay. AVG Linear dispersion can display any aperture |
| AWS D1.1 | American Welding Society standard, provides a dynamic reflection "defect rating" for various AWS weld inspection applications. Avoids manual calculations and improves inspection efficiency. (Optional feature) |
| Crazing bathymetry | Automatic measurement and calculation of crazing depth using diffracted waves at endpoints (optional function) |
| Door widening | Amplify echo details for easy echo analysis |
| continuous recording | Record waveforms in real time, store and playback waveforms |
| waveform freezing | Freeze the waveform displayed on the screen for easy defect analysis |
| echo coding | Display 1 to 6 echo display areas in different Colors for easy determination of defect location |
| B-scan | (Color-coded B-scan) Real-time scanning and cross-sectional display make detection results more intuitive |
| Environmental temperature | (-10~50)℃ |
| Relative Humidity | (20~95)%RH |
| Power Supply | Direct current (DC) 9V; lithium battery, can work continuously for more than 10 hours |
| Power saving method | Low power design |
| Working time | More than 10 hours |
| Protection level | IP64 |
| Communication interface | USB2.0 high-speed communication transmission interface |
| PC software | Yes. |
| Operating language | Chinese |
| Dimension | 280*220*70mm |
| Machine Weight | 5.5KG |
Packing list
Host x1, power adapter x1, probe x2, software x1, instrument case x1
After-sales instructions
Warranty days: 365 days
[Note] For after-sales services outside the Chinese mainland, if the instrument requires repair, the shipping and possible associated taxes shall be borne by the sender. Generation address of the manual: http://en.nbchao.com/p/7823/Specification.html , which is only used by users who purchase commodities from the NBCHAO.
