Reader's Guide
This manual is compiled based on manufacturer's data. Due to equipment batch changes, the content may not fully match every physical unit. Please refer to the actual operation and on-device labels.
Copyright belongs to the manufacturer. For internal reference of purchasers only. If safety parameters in the manual differ from the physical unit, please suspend operation and consult our engineer for confirmation.
Disclaimer: This manual is for reference only. In case of any discrepancy, the physical unit shall prevail. Our company assumes no liability for any consequences arising from operations based on this manual.
JINGKELIAN QBJ coating Cupping tester (digital display) instruction manual
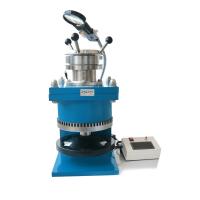
QBJ Coated Cup Protrusion Testing Machine
1. Scope of Application
The QBJ coating cup-bumping tester, designed and manufactured according to international standards ISO1520 and national standard GB9753—88, is suitable for evaluating color paints, clear coats, and related product coatings (single-layer or matching system coatings) by conducting indentation tests under the test methods specified by the standard. After gradual deformation, the coating's resistance to cracking or separation from the metal substrate is evaluated, and the coating passes or fails. Alternatively, the depth of indentation can be gradually increased to measure the minimum depth at which the coating first cracks or begins to detach from the substrate.
2. Technical Indicators
Depression diameter: 20mm
Maximum indentation depth: 10mm
Pitting accuracy: 0.05mm
Digital display scale index: 0.01mm
Maximum Collapse Force: 1000N
Test piece specifications: 70mm*70mm*0.03mm~1.25mm
3. Test Procedures and Operating Methods
1. Preparation of the sample
(1) The specimen is square, with dimensions of 70mm*70mm*0.03mm~1.25mm
(2) The material of the test pieces should be polished steel plates and comply with GB9271 requirements; the specimens should be flat and free of deformation.
(3) Prepare the coating according to standard requirements, dry it, and measure its thickness. At an environment of 23±2°C and 50±5% relative humidity, state adjustment must be performed for at least 16 hours before testing can be initiated.
2. Operating Methods
(1) Single-sided coated board test: — Automatic zeroing
Screw the test machine handwheel all the way down (clockwise) to loosen the upper test piece pressing device, insert the metal side of the single-sided coated test plate face downward and the coated side upward into the gap at the upper part of the testing machine, and align the plunger with the test piece's central axis to tighten the pressing device. Press the red reset button on the dashboard, and the display shows zero. Turn the handwheel upward (counterclockwise) at a speed of 0.2±0.1mm/s (i.e., one rotation every 2~3 seconds). When the reading reaches about 0.40mm, the plunger touches the metal surface of the test plate, and the monitor automatically shows the zero point. At this point, the red light of the instrument turns on. Then continue turning the handwheel; the display reading will be the height of the rise, which is the depth of the depression. During operation, the turn cannot be reversed, otherwise the reading will be inaccurate.
(2) Manual zeroing ,—— for double-sided coated boards
Screw the handwheel of the testing machine all the way down (clockwise) to the bottom, loosen the upper test piece clamping device, and insert a random zeroing steel plate into the gap at the top of the machine to tighten the pressing device. Press the red button on the instrument panel to make the display show zero. Turn the handwheel in the upward direction (counterclockwise), and when the reading approaches 1.80mm, slow down. When the red light of the instrument is on, that is, when the display reaches zero, stop turning the handwheel. Release the clamping device, then manually reset it (press the red button on the instrument panel), then turn the handwheel upward at a speed of 0.2±0.1mm/s. The display reads ascent height, i.e., the depression depth.
(3) Use corrected vision or a 10x magnifying glass to check whether the coating on the specimen is cracked or separated from the substrate.
(4) The above procedure should be performed on two separate test pieces. If the results differ, additional tests should be conducted until the results on both test pieces are consistent. If cracks appear in the substrate, the test result is invalid.
3. Measure the minimum degree of damage caused
(1) When the coating on the test piece cracks for the first time, or when the coating separates from the substrate, the plunger stops moving (the number on the display indicates the depth of advancement). The above tests must be repeated on the same substrate to verify the results until they are consistent.
4. Machine accessories
1. One magnifying glass with 10x light source
2. One zero-position steel plate
- 1JINGKELIAN QHD Pendulum damping tester instruction manual
- 2JINGKELIAN QFH cross-cut adhesion tester instruction manual
- 3JINGKELIAN QWX Stain resistance tester instruction manual
- 4JINGKELIAN STM-IV Stormer Viscometer Instruction Manual
- 5JINGKELIAN STM-III Stormer Viscometer Instruction Manual
- 6JINGKELIAN ZND-1 Viscometer Instruction Manual
- 7JINGKELIAN QHY Buchholz Clearance Tester Instruction Manual
- 8JINGKELIAN QHQ-A Portable pencil hardness gauge instruction manual
- 9JINGKELIAN NDJ-79 rotational viscometer instruction manual
- 10JINGKELIAN NDJ8S Digital Viscometer Instruction Manual