
SMTMF HRS-150/45X Cantilever Double Rockwell Hardness Tester convex nose
SMTMF HRS-150/45X Cantilever Double Rockwell Hardness Tester (convex nose)SPEC
SMTMF HRS-150/45X Cantilever Double Rockwell Hardness Tester (convex nose)Details
SMTMF HRS-150/45X Cantilever Double Rockwell Hardness Tester (convex nose)Packing list
- SKU
- NB015569
- Rockwell initial test force
- 3kgf(29.4N)、10kgf(98N)
- Rockwell total test force
- 15kgf147.1N)、30kgf(294.2N)、45kgf(441.3N)、60kgf(588.4)N、100kgf(980.7N)、150kgf(1471N)
- Rockwell scale
- HRA、HRB、HRC、HRD、HRE、HRF、HRG、HRH、HRK、HRL、HRM、HRP、HRR、HRS、HRV、HR15N、HR30N、HR45N、HR15T、HR30T、HR45T、HR15W、HR30W、HR45W、HR15X、HR30X、HR45X、HR15Y、HR30Y、HR45Y
- test range
- HRA:20-88、HRB:20-100 、HRC:20-70 、HRD:40-77 、HRE:70-100 、HRF:60-100 、HRG:30-94、HRH:80-100、HRK:40-100
- test range
- HRL:50-115 HRM:50-115、 HRR:50-115、HR15N:70-94、HR30N:42-86、HR45N:20-77、HR15T:67-93、HR30T:29-82、HR45T:10-72
- Indenter Specifications
- Diamond cone Rockwell indenter, φ 1.5875mm steel ball indenter
- execution standard
- EN-ISO-6508、GB/T230.1、GB/T230.2、JJG112、ASTM E18
- Conversion Ruler
- HR、HB、HV、HLD、HK
- Hardness reading
- LCD digital display
- Interface
- Built-in printer RS-232 interface
- Maximum height of specimen
- 260mm
- Distance from the center of the indenter to the fuselage
- 150mm
- Hardness Tester Dimensions
- 700×260×700mm
- Instrument Weight approx
- 85kg
Introduction
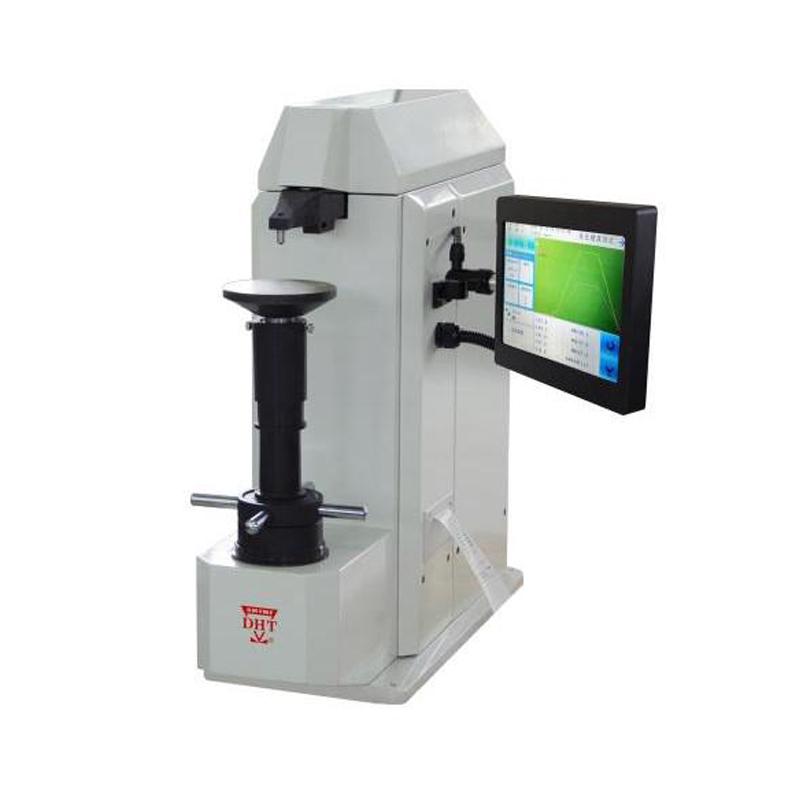
"Aolongxin" cantilever full Rockwell Hardness Tester HRS-150/45X is a desktop Rockwell Hardness Tester, which adopts the Rockwell measurement principle and is used for hardness testing of carbon steel, alloy steel, cast iron, non-ferrous metals and engineering plastics and other materials. The loading system adopts a high-precision force value sensor and a central controller to form a closed-loop loop to realize the whole process of microsecond tracking and control of afterburner. It is widely used in testing, scientific research and production in metrology, machinery manufacturing, metallurgy, chemical industry, building materials and other industries.
Features
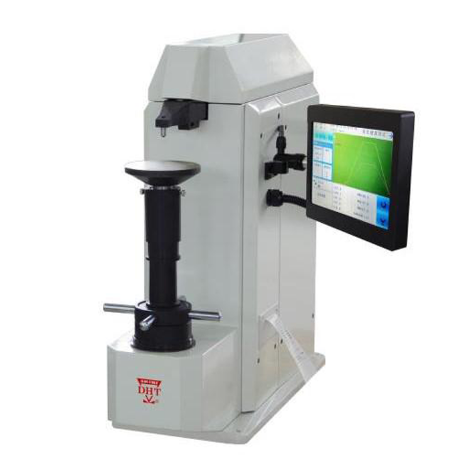
●High test accuracy and wide measurement range;
●Upper and lower limit setting, out-of-tolerance alarm;
●Surface correction, automatic correction of cylindrical and spherical measurement results;
●The specially designed indenter extends horizontally, which can measure parts that cannot be measured by ordinary Hardness Testers, such as rings and tubular shapes, with a minimum test inner diameter of 40mm;
●Easy to operate, any language version;
●Ready-to-use, no need to install weights, no need to install and debug;
●Electric loading, closed-loop control;
●The test force is automatically corrected, and the accuracy of the force value is increased by an order of magnitude
●All Rockwell scales, high, medium and low hardness values are automatically corrected
● Set password protection setting parameters; Keep more sample and test information available
●Modular design, easy maintenance
Product Enhancement
Fully automatic high-speed response closed-loop sensor loading system, large platform overall movement, to achieve high-precision and rapid testing, improve the control accuracy of actuators
The original system is a millisecond-level control system. Unable to implement step control.
The new system is a microsecond control system. High-speed step control is possible.
The pace control accuracy can reach the nanometer level!
Improve the comprehensive performance of the equipment, improve the detection accuracy and speed of the equipment
1. Improve the ability to process analog signals from force sensors. Change the "eyes"
2. Improve the ability to process the overall digital signal. Change the "core"
3. Improve the accuracy of displacement measurement. Change the "ear"
4. Improve the accuracy of motor control. Changing "hands"
5. Improve the human-machine interface. Change the "face"
A dedicated management device QEI is installed for the displacement sensor
The original motherboard did not have a dedicated management device, and the CPU had to constantly process the displacement sensor signals itself throughout the loading process.
After setting up a dedicated management device, the CPU only needs to read the data at the start and end of the two time points, and the loading process CPU can concentrate resources on managing the force sensor and loading the motor, making the control faster and more accurate.
Introduced Japanese high-precision magnetic grating displacement sensor
The original displacement sensor is a domestic (CN) grating displacement sensor. There is a problem of poor consistency and the need to match and select equipment.
Japan's high-precision displacement sensors have high consistency and are less affected by the environment. The service life can reach more than 150 million times.
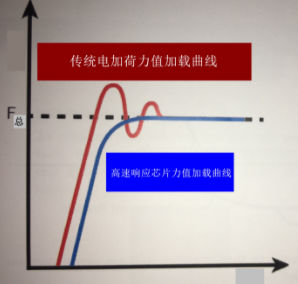
If the loading speed is to be controlled within 8 seconds required by the national standard GBT230/T-91, the red curve in the figure will continue to overshoot and remove to approach the total F when the test force F is total. As a result, the Hardness Tester needs to slow down the speed of the test, resulting in too long a detection time; Second, the overshoot phenomenon affects the test accuracy to a certain extent.
This equipment adopts a more professional and applicable central processing chip, which responds to the entire hardness test process at high speed, and the central processing chip will process 18,000-30,000 sets of data at ultra-high speed from the start to the end of each hardness test. The loading action that can be done by the traditional electric charge Hardness Tester can be shortened to 1.75 seconds (ISO6508-1:99 unifies the test force application time within 1~8s). As shown in the blue curve in the figure, the speed of the loading process reaches the top speed, and the force value is smooth and free of overshoot in the process of loading to the total test force, which improves the loading speed and accuracy of the electric charge Hardness Tester.
Detailed explanation of the "Oron core" curve
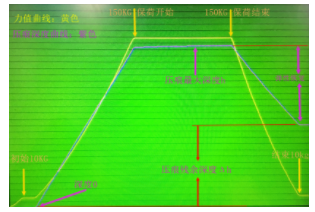
1. Force value and depth curve.
During the working process of the Hardness Tester, the main chip reads the data of the pressure sensor and displacement sensor in real time, and converts the data into curves, which are the force values and pressure depth curves of the 28.3HRC hardness block.
2. Pressure-depth curve
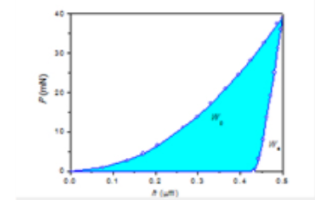
During the detection process, the synchronous data of pressure and pressure depth are exported, the pressure-depth curve is automatically generated, and the area of the shaded part is obtained for the study of elastic modulus.
In the figure, the ordinate is the pressure, and the abscissa is the depth
Precise hardness correction
For example, the standard hardness curve is a straight line, as shown in the black line segment in the figure.
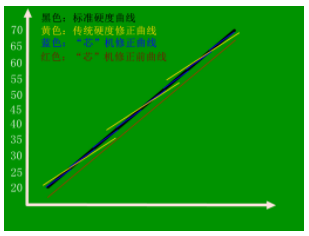
For example, the standard hardness curve is a straight line, as shown in the black line segment in the figure.
The hardness of the traditional electric digital Hardness Tester is automatically corrected as shown in the yellow line segment in the figure, and the correction is generally divided into three sections, and only near the calibration point is basically consistent with the standard hardness, and the farther away from the calibration point, the greater the difference in hardness value.
After the further transformation and improvement of the "Orolongxin" control method, the original hardness curve of the machine is shown in the red line in the figure. The hardness correction of the whole range is given a common coefficient, and the hardness curve will be improved to the state of the standard hardness curve, and the experimental conclusion is that after giving a common coefficient, without any interval correction, the hardness of 24HRC, 48HRC and 63HRC standard hardness blocks is tested, and the hardness of 24HRC and standard blocks is 0.9HRC, 48HRC error is 0.2HRC, and 63HRC error is 0.8HRC.
Now the whole hardness range is divided into more than 8 hardness correction ranges, as shown in the blue line in the figure, this correction method refines the entire hardness range, and simplifies and accurately corrects the hardness of the electric digital Hardness Tester.
Experimental data: The hardness accuracy of the test is up to ≤0.15HRC.
- 1ASTM -2023《Standard Test Method for Rockwell and Brinell Hardness of Metallic Materials by Portable Hardness Testers》
- 2JJG 2067-2016《Measuring Instruments for Metallic Rockwell Hardness》
- 3JJG 2092-1995《Measuring Instruments for Plastic Rockwell Hardness》
- 4GB/T 713.7-2023《Steel plate,sheet and strip for pressure equipments—Part 7:Stainless steel and heat resisting steel》
- 5GB/T 713.1-2023《Steel plate,sheet and strip for pressure equipments—Part 1:General requirements》
- 6GB/T 42670-2023《Test method for Rockwell hardness of carbon materials》
 HRS-150/45X
