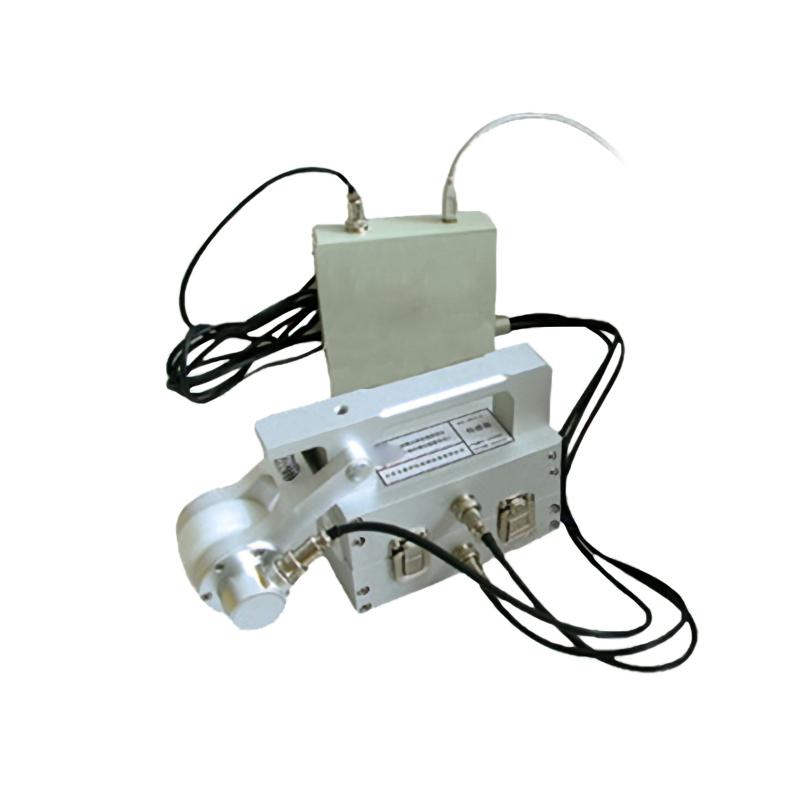
PORUIKE VTS-3A Wire Rope Flaw Detector Aluminum core Economic basic type
PoRuiKe VTS-3A Wire rope Flaw DetectorSPEC
PoRuiKe VTS-3A Wire rope Flaw DetectorDetails
PoRuiKe VTS-3A Wire rope Flaw DetectorPacking list
- SKU
- NB029995
- Sensors relative speed to wire rope
- 0.0~12.0m/s; Best: 0.1m/s
- Applicable rope diameter
- Ф6-Ф14mm
- Sensors guide sleeve and wire rope clearance
- Optimum clearance: 2~ 6mm, allowable clearance: 0~15mm
- Continuous detection of rope length
- ≥9999m
- Qualitative
- The Accuracy rate of qualitative detection of single centralized broken wire is 99.9%.
- Detection sensitivity Repeatability tolerance error
- ±0.055%
- quantitative
- The number of broken wires in a single place allows one or one equivalent root to be misjudged
- Detection Accuracy indication allowable error
- ±0.2%
- Detection length indication percentage error
- ±0.2%
- Battery Sensitivity
- U/H≥1.0V/mT
- Battery induction Signal-to-noise ratio
- S/N>85dB
- Sampling Frequency
- 5000Hz
- Power Supply
- Computer battery powered by 5V
- Sensors Weight
- Common specification < 10kg
- Environmental temperature
- -20℃~+50℃
- atmospheric pressure
- 86~206Kpa
- Relative Humidity
- ≤85%

Overview
◆ It can detect various defects such as broken wire, wear, rust, deformation, loose strands, skipping wire, material change and other defects of wire rope online.
◆The test result report can meet the standards of different industries, and at the same time, it is displayed in the form of the ratio of the number of broken wires and the broken wire area to the total broken wire area.
◆ The computer USB interface is used for direct sampling, processing and analysis, with the functions of online sound and light alarm and real-time display of results.
◆ The circular structure of the sensor, circumferential surrounding, and axial magnetization make the wire rope instantaneously magnetized to a saturated state.
◆The sensor adopts alloy aluminum shell, which has the functions of waterproof, dustproof, shockproof and moisture-proof.
◆ Stable work, reliable performance, high detection accuracy, strong anti-interference performance, accurate data.
◆ The software adapts to various computer operating systems of Windows98/2000/XP/Vista/Windows7
◆According to the provisions of the National Metrology Law and the National Safety Production Law, each instrument is inspected by the national metrology agency as a third party according to the United States ASTM1571 American standards, and a test report is issued to obtain legal qualifications.
◆ Widely used in mines, ropeways, lifting equipment, elevators, port machinery, cable bridges and other fields.
Technical core and legal qualifications
1. Virtual Instrument: Wire rope is infinitely uncertain. Only by applying virtual instrument technology, replacing traditional instruments with software, and directly sampling and processing by the computer, can we ensure that there is no missed detection and no misjudgment, just like watching a movie, the wire rope is scanned throughout the process, and the results are accurate and repeatable.
2. Sanding Instrument: According to the national standards for the scrapping of wire ropes in different industries, this product applies electromagnetic qualitative, quantitative and positioning, and online non-destructive detection of internal and external wire rope breakage, corrosion, wear, metal cross-sectional area change, loose strands, wire jumping, deformation, material abnormalities and other defects.
3. Legal instruments: According to the provisions of the National Metrology Law and the National Safety Production Law, each instrument is inspected by the national metrology agency according to the American ASTM1571-2006 American standard and GB/T21387-2008 as a third party, and a test report is issued to obtain legal qualifications.
System configuration
1. a sensing unit
High-speed reversible exciter
High conductivity signal aggregator
Hall magnetosensitive group is exhibited
Floating centering wear-resistant guide bushing
High-precision distance encoders
2. a conversion unit
AD analog-to-digital conversion module
Automatic noise rejection module
Defect sound and light alarm module
Inspection Quality Assurance Module
DAQ plug-and-play module
3. a processing unit
OTC V3.0 Signal Processing Real-Time Alarm Results Display Proprietary Software Package
Lenovo laptop (or industrial computer) (optional)
- 1The working principle and application of eddy current Flaw Detector
- 2Basic Principle Characteristics and Application Analysis of Flaw Detector for Casting
 VTS-3A
